Your First CSP Illustration - Part Four
Contact Graphixly @
Hello! My name is Liz Staley and I’m a long-time user of Clip Studio Paint (I started using the program back when it was known as Manga Studio 4!). I was a beta-tester on the Manga Studio 5 program and for Clip Studio Paint, and I have written three books and several video courses about the program. Many of you probably know my name from those books, in fact. I write weekly posts on Graphixly.com and on CSP Tips, so be sure to come back every week to learn more Clip Studio Tips and Tricks from me!
In previous articles in this series, we have gone over using various Clip Studio Paint tools to complete the process of creating your first illustration in the program. This week, we are starting to add color to our inked illustration, and we will cover the Clip Studio Paint fill tools to do so!
In this article we will cover the following topics:
Laying Down Flat Colors
Let’s start coloring!
Laying Down Flat Colors
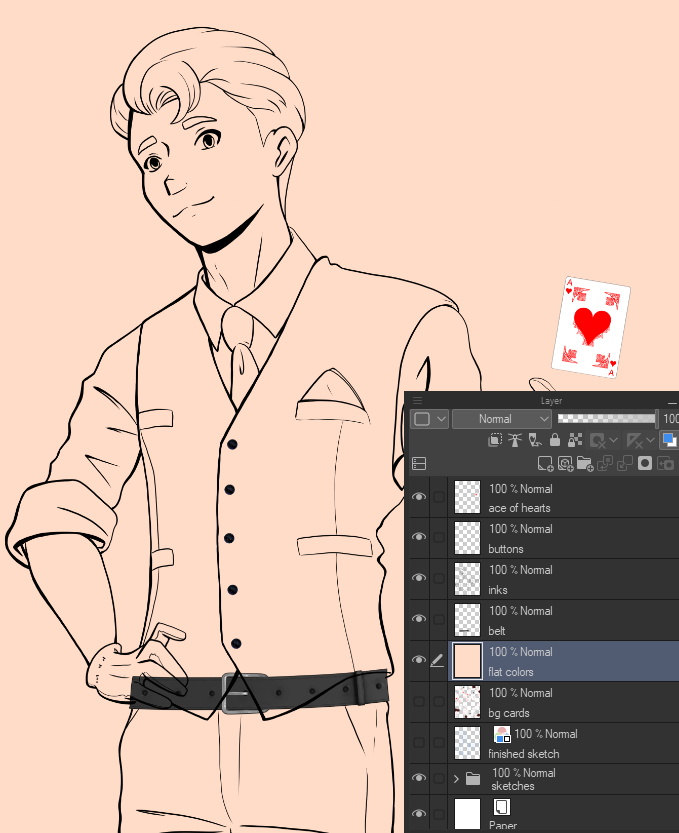
Now that we have our inked lines complete, it’s time to start adding color. The first step of this process, for most artists, is to start by laying down flat colors (sometimes called base colors as well). Start by creating a new raster layer beneath the line art layer - mine is called “flat colors” in the layer palette below.

Now let’s select the Fill tool - shown with a paint bucket icon in the tool bar - change the active color to a skin tone, and click on the character’s face to fill it with color.

What went wrong? Since we are on a blank layer, the Fill tool filled the entire layer because it couldn’t find any “boundaries” to contain the color. So we need to tell the Fill tool what to refer to when putting the color down. In other programs, you wouldn’t be able to do this with the fill tool on a separate layer and would have to paint in the flat colors with a drawing tool or put them in using the lasso selection tool. Clip Studio Paint has several ways to make this very easy, however!
Click on the Inks layer and then click on the “Set as Reference Layer” icon in the Layer Palette, shown as a little lighthouse symbol.

Now, in the Fill Subtool palette, select the “Refer other layers” subtool and check that the Reference layer icon is set in the Tool Property window.
(Note: I also like to adjust the “Close Gap” option because sometimes my lines have small gaps in them, and also like to use the Area Scaling option. This makes the filled color “bleed” under your line art a little bit, ensuring a smooth transition between lines and colors and preventing any white “halo” around the filled area.)

Now, let’s go back to the flat colors layer and then click in the face area of the character. This time it doesn’t fill the entire layer because the tool is taking the pixels from the reference layer into account as well! However, because there are large gaps in my lines, part of the hair has also been colored.

Since I sometimes have rather large gaps in my line art, I tend to use a slightly different setting for the Fill tool to do my flat colors. Instead of using Reference Layer, I use the “All Layers” setting, shown below.

Then I use a Pen tool with my fill color to close off the gap in my lines while I’m on the flat color layer.

Now the Fill tool will take the inked lines and the color line into account as the fill area and not go into the hair.

You’ve probably noticed that I’ve also put a bright color layer underneath my flat colors and my inked lines! I do this so that I can easily see any tiny areas where the color hasn’t filled, such as in the red circles in the screenshot below.

To fill these areas, we could use a pen tool. However, I like to use the Paint Unfilled Areas tool instead. With this tool you can paint over the unfilled areas without worrying about being too precise, as seen in the screenshot below with the green area.

Now the small unfilled areas are filled with color, and using the correct fill tool made it a much faster and easier process than going over each spot with a pen tool.

Continue going through each area and filling with colors according to your character design. I like to fill ‘white’ areas, such as this character’s shirt, with a light gray instead of pure white. This gives me a medium tone for the base color so I can use lighter gray and white as the highlight later.

And now the flat colors are done!
Conclusion
Next time we will go over using the shading assist as well as doing final shading and highlighting to finish up our image. Come back next week to follow along and see the final product!
For more information on CLIP Studio Paint, please visit https://www.clipstudio.net/en or https://graphixly.com