Using Superhero Brushes
Contact Graphixly @
Hello! My name is Liz Staley and I’m a long-time user of Clip Studio Paint (I started using the program back when it was known as Manga Studio 4!). I was a beta-tester on the Manga Studio 5 program and for Clip Studio Paint, and I have written three books and several video courses about the program. Many of you probably know my name from those books, in fact. I write weekly posts on Graphixly.com and on CSP Tips, so be sure to come back every week to learn more Clip Studio Tips and Tricks from me!
If you are reading this article at the time when it’s first posted, then you’re in luck! Graphixly, the official North America, South America, and European partner for Clip Studio Paint is currently have a sale on some of the greatest brushes for Clip Studio Paint and Photoshop that have ever been produced! In this article I want to showcase the “Superhero Brush Pack” specifically and show you how to install and organize the brushes and also show off some of the incredible effects they’re capable of.
In this article we will cover the following topics:
Installing and Organizing Your Brushes
Creating with the Superhero Brushes
Let’s get started!
Installing and Organizing Your Brushes
After you complete checkout of your brush pack on Graphixly.com, you will see a screen with your available downloads. This will also tell you the number of downloads of this item that you have remaining. You can download each item a few times, which is useful if you have a hard-drive failure, get a new computer, or have some other circumstance where you need to replace your brushes.
Click on “Download” to start the download process. In the window that comes up, choose where to save the ZIP file of brushes.

When the download completes (it may take a few minutes depending on your hardware and internet speed) you will need to go to the location on your computer where you saved the file and “unzip” or extract the files so they can be used.
This extraction process will differ depending on the operating system that you use. You may need to download a program to unzip the file with. I currently use Windows 10 Home edition, so I just right-click on the file and select “Extract all…” from the pop-up menu. Windows then displays the following box, where I can choose the folder location to save the extracted files to and then click on “Extract” to complete the action.

With the files extracted, open the unzipped folder to see the contents. You will see in the screenshot below that this pack includes brushes for Clip Studio Paint and Photoshop, as well as sample images that show uses for different brushes. These sample images even include layered PSD and Clip Studio files that show you how each image was created, which is very useful!

Now we are ready to install our brushes. The fastest way to do this for lots of brushes is to use the drag-and-drop method. To do this, we need to have the folder where our brushes are saved and extracted open and Clip Studio Paint open as well. Then we need to arrange the two windows so that we can see them both. Because I’m going to be installing and organizing all these brushes at once, the Subtool destination for the first brush isn’t so important, but if you only want to install a few brushes in certain subtool folders, it might be easiest to make sure that subtool folder is open before beginning.
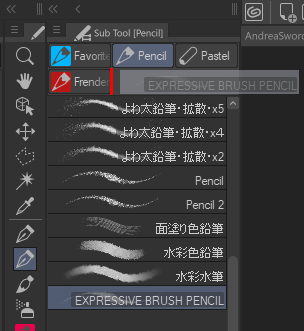
In the image below you can see my brush folder open on top of my Clip Studio window, with the “Pencil” subtool folder open in CSP for me to install my first brush.

I’m going to start by installing one of the Pencil tools from the Superhero pack, then I’ll use that tool to create a new folder of tools to install the rest of the Superhero Pencils in. So let’s begin. With my brush tools folder open on top of CSP, I select the top Pencil tool and then click-and-drag the file over to the Subtool window in CSP. You will probably see something like the semi-transparent file icon below as you drag over, and then the mouse cursor will turn into a “+” once you get over the Sub Tool window. Release the mouse button to complete the installation of the brush.

Now the “EXPRESSIVE BRUSH PENCIL” has been added to my Pencil sub tools.

With the Expressive Brush Pencil tool selected, I’m going to click and drag the tool up to the top of the Sub Tool menu to create a new category. The red vertical line shows where the new category location will be located.
Now I have a new Sub Tool category for all my Superhero Pencil tools.

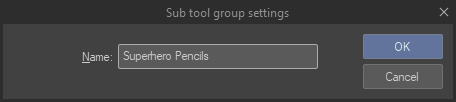
To rename this Sub tool group, right-click on the Category icon at the top of the Sub Tool window and click the “Sub tool group settings” option.

Now you can type in any name you wish in the Name field, then click OK to change the name.
Now that we have a category for all the Superhero Pencils, let’s install the rest of the Pencil tools! This is an easy process with the drag-and-drop method. Go back to the folder where the tools are unzipped on your hard drive. Then either use Shift+Click to select all the files (other than the included example image and the tool you already installed) or Ctrl+click to only select the brushes you wish to install if you won’t be installing all of them. With the files you wish to install selected, drag-and-drop them into your new category. Now our icon indicates that we are dragging multiple files, with the image below showing that I’m installing 14 files at once.

Drop the brush files into the Sub Tool folder to start the installation. You may have to wait a moment for the process to finish.
In the screenshot below you can see that I now have all the Superhero Brush tools installed in one Sub Tool group.

Repeat this process for any other tools you wish to install. I chose to drag my Superhero Pencils group to the side Toolbar in Clip Studio Paint to make a new Sub Tool group, then put all the brushes from the Superhero set into that group to keep everything organized. As you can see below, I now have sub tool categories for each of the folders in the Superhero Brush pack, but they are all in one section of my tools. This way I never have to search for something across multiple tool categories so long as I know that it came from this pack of tools!

With the tools installed, we’re ready to create!
Creating with the Superhero Brushes
Once I had the tools installed and organized, I wanted to create something to start testing these brushes out. So I began a sketch of one of my original characters, a martial artist. I started this drawing using the pencil brushes that I’d normally use, then switched to the Superhero Pencil tools for the final cleanup. This is my first time using these tools and WOW, I was impressed right off the bat.
If you’re not sure what tools you want to use, each set of tools has an example image in its corresponding folder in your download that shows what each tool looks like when used. You can open these to see what effect each tools gives before you use it, or just start picking tools and using them to see what they do, whichever works for you!

I created the sketch above using a combination of the Expressive Quick Sketch Pencil, the Real Sharp Details tool, Soft Shader, and Real HB pencils. The Soft Shader and Real HB were fantastic for me to do some quick shading to figure out where I wanted the lighting to fall, while the other two pencil brushes allowed me to get a nice “sharp mechanical pencil” feel. I have to say that these pencils are going to be replacing the pencil tools that I’ve been using for years.
With a sketch done, it was time to try out the Inking tools. I mainly used the Felt Pen Bleed on my inking lines (though I did turn up the antialiasing in the Sub Tool Details on this tool, mainly because the canvas I was working on was a bit small so the lines looked very pixelated on the lower DPI image), with a little bit of the Outliner tool added around some of the thicker areas to add more visual weight. The radial lines were then added with the Scratchy Ink Rough Edges tool to give a scratchy, grungy look to them.

The Felt Pen Bleed tool gives a bit of randomness, reminiscent of inking on sketchbook paper where the ink will randomly feather and bleed in spots. But despite a bit of randomness, I found this inking tool really easy to use. It’s capable of doing extremely fine lines, such as the muscle details on the character’s arm above, while then also going to a thicker line a moment later with just a little more pressure. The Outliner pen has very low pressure response, making it feel more like a thick Pigment Liner pen than anything, though it does have a little bit of pressure sensitivity. I love the look of the Scratchy Ink lines, they add some dynamic punch and look like they were created with a quill pen on bumpy paper.
Next up I decided to add some quick color to try some of the painting tools, and with as impressed as I already was with the pencil tools, the painting tools really blew me away. These tools provide a pretty realistic “traditional media” look. I started the background using the “Glaze” tool in the Painterly tool category. This tool allows you to build up color and blend color really nicely. Then I used the Noisy Scatter Brush to add a little texture around the outer edges as well.

Next I wanted to try out the Watercolor tools fol the characters and a few other tools for some finishing effects. I used all the Watercolor brushes, but especially loved the Texture Edges and Edges and Highlights tools. Edges and Highlights is great for adding the fine finishing details to your digital watercolor painting. Colors are easy to blend with these tools and they give you a great watercolor look without the mess or waiting for real watercolors.
To finish up, I used a few tools from the Splatter selection of tools to add a little more grime and some dramatic spatter to the illustration. The Distress Scratches tool really adds a neat effect and some great grungy texture, and a lot of the blood splatter tools look very realistic!

For being an experiment to use as many of these tools as possible to create something and see what this pack of brushes does, I’m pretty happy with how this fun piece turned out!
Even with as many tools as I did manage to test out in this article, I barely managed to scratch the surface of what this incredible group of tools can do. There are cloud, foliage, and even crowd brushes that I didn’t get a chance to write about due to time constraints. However, the screenshot below is a piece I started on for this article that I didn’t get to finish, but you can see the Cloud brushes from the Superhero Brush Pack look really great!

Conclusion
If you’re looking for great “real media” looks for your illustrations or you want some tools to give your comics and manga a bit of punch while also making your drawing process easier, I think this set of tools would be a great thing to pick up. As I stated earlier, I have some “favorite tools” that I’ve been using for years that will now be replaced with tools from this pack of brushes. Pick up these tools and many other great add-ons from Graphixly by going to Graphixly.com and clicking on the “Add Ons” tab in the navigation menu!
For more information on CLIP Studio Paint, please visit https://www.clipstudio.net/en or https://graphixly.com