Tips for Designing Humanoid Robots
Contact Graphixly @
Hello! My name is Liz Staley and I’m a long-time user of Clip Studio Paint (I started using the program back when it was known as Manga Studio 4!). I was a beta-tester on the Manga Studio 5 program and for Clip Studio Paint, and I have written three books and several video courses about the program. Many of you probably know my name from those books, in fact. I write weekly posts on Graphixly.com and on CSP Tips, so be sure to come back every week to learn more Clip Studio Tips and Tricks from me!
Many, many years ago I was drawing a lot of giant robots for a project. During this time I was asked over and over again for tips on how to draw robots because a lot of artists find them intimidating to draw - and with good reason! Robots can be mystifying if you don’t know where to start. So in this article I wanted to compile a few ways of thinking that I used when designing my humanoid robots.
In this article we will cover the following topics:
Finding References
Using the CSP Sub View Palette
Sketching and Designing
CSP Assets for Robot Drawing
Let’s get drawing!
Finding References
We’re going to concentrate on humanoid robots in this article. With humanoid robots, my first design tip is this: Humanoid Robots are just humans wearing armor.
That sounds silly but I think it takes some of the intimidation out of drawing robots for a lot of artists. You’re not drawing a robot, you’re drawing a person in armor! If you’re already familiar with drawing the human body, this can make the task much more approachable. So if you find that you are afraid of drawing robots, think of them as something different.
The first thing we’re going to do is find some reference for our “person in armor”. I want to design a fighting robot with a samurai influence. There are tons of different types of armor to choose from, of course, so you can choose one that fits the purpose of the thing you are designing. If you are creating a robot that is heavy and can take a lot of damage while hitting hard, you may want to look at heavier European armors. For a lightweight and fast robot, perhaps look at armor used in fencing!
Once we’ve decided on the influences for our design, we can go to Google and type in our search terms. I typed in “Samurai Armor” and selected images, then selected the “traditional” category from the top of the page to filter out some of the more fantastical designs for now.

Scroll down through the images and find references with shapes and elements that you find pleasing. We’re not looking for something to copy completely, but for references to draw our own design from. I found several images of traditional samurai armor that I liked the shapes of, then I also looked at fantasy inspired samurai armor as well. I saved all the images that I liked to a folder titled “Reference” so I could find them quickly later.
Save as many reference images as you want, then let’s go to Clip Studio Paint to start drawing.
Using the CSP Subview Palette
My favorite way to display references while sketching in CSP is the Sub View palette. This window allows us to load images and switch between them, zoom in and out on the images, and even choose colors from them - all without having to have the images open in tabs in the program!
Locate the Sub View palette, which is usually nested with the “Navigator” palette in the default layout. If you can’t find it, you can open it by clicking on Window - Sub View in the top menu bar.
In the Sub View palette, click on the folder icon to get started loading images.

Select the image(s) you want to load into the Sub View, then click on Open to finish. You can always load more images later or delete images out of the Sub View when you’re done with them!

Now your images will show in the Sub View palette. Use the Left and Right arrow icons below the image to change the picture being displayed. You can also use the + and - icons or the slider to zoom in and out of the image as well.

Sketching and Designing
We’re going to be working on sketching the design now. This doesn’t have to be a finished and fully rendered illustration, we’re just looking to get some shapes down to figure out what we like and how we want our character to look.
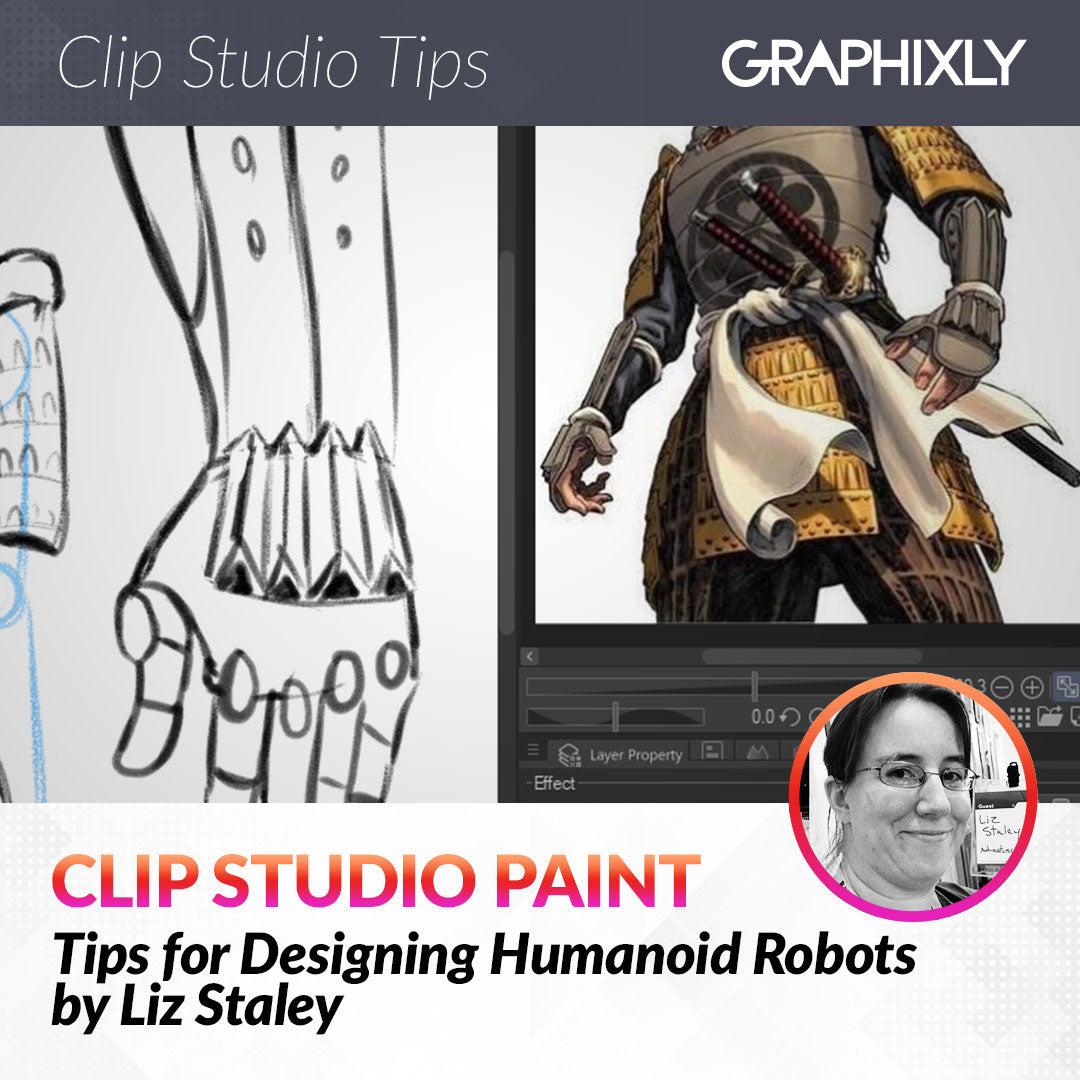
To start off the design I draw a rough and generic body shape. Remember that robots are made of hard parts and joints that need to move, so you need to leave room for the joints. I usually think of it like a ball-jointed doll or one of those wooden drawing mannequins and will draw circles at the joints so that I have a visual reminder that those areas need to bend and move on my finished design.
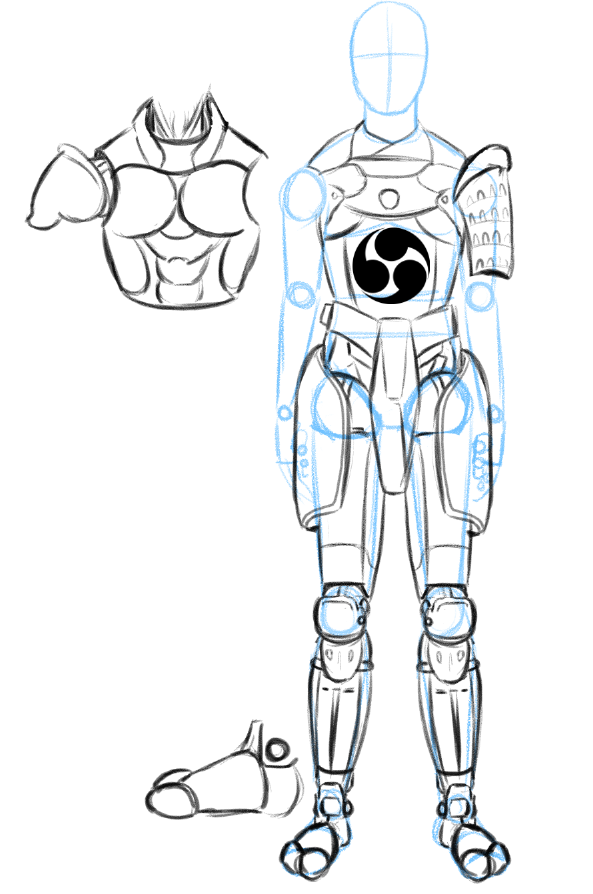
When doing initial rough design sketches, I like to draw each part on its own layer. So in this case I will draw the chest, hips, legs, arms, and head designs on separate layers. I like doing this because, as you will see a little later, it is easy to change my mind and completely redo a section with another idea without having to erase a huge chunk of the drawing.
With that in mind I’m going to start on the largest area of the design first - the chest. This is the central part of the design and, aside from the head and face, is likely to draw the most attention when someone looks at the character.
I like to look through the references I’ve gathered and then start roughly drawing out shapes that I find pleasing in the references. Remember that unlike a human in armor, the bits underneath the outer plates are most likely wire and metal, so you will need to think about how the plates of metal move. If you are making a very fast and nimble robot, be sure to leave joints that will allow for better dexterity. A heavier armored “tank” robot doesn’t need as many joints and can have heavier plating, but will be slower and won’t have the same range of motion.

You can use the Layer Color icon in the Layer Property palette to change the color of the layer when you’re finished with that section and then move on to the next. I decided to go to the hips and waist area and do the same process again. Remember to think about the joint in the hip. I choose to think of them as a ball in a socket, with the leg “bone” attached to the ball.
Remember to keep looking at your references to keep your design believable. On many of the references I’m using there are pieces of armor hanging from the belt area to protect the hips and thighs, and since this would be a good area for an enemy robot to target in a fight, it seems a good idea to armor them!

When designing the legs and feet, make sure that you think about all the different joints. Knees, ankle, and there is usually at least one joint in the foot (unless your robot stomps around with flat feet all the time!)

After drawing the leg above I decided that I didn’t like the shape of the bottom of the leg and the foot. It just didn’t look very “samurai” to me. So I found some leg armor from one of my references and tried again. This time I simplified the shin and changed the shape of the foot to emulate a Japanese sandal.

Rather than drawing the leg twice, I’m going to just mirror the one that I already drew! Use the Lasso selection tool to draw around the leg and then click on the Scale/Rotate icon.

In the Tool Property window, click on the “Keep original image” checkbox, then click on the “Flip Horizontal” icon to mirror a copy of the leg. Then drag the mirrored copy into place and click OK.

Here’s why I love drawing each area on a new layer! I decided after working on the hips and legs that I didn’t like this chest design. So I simply chose the chest layer and moved the old design aside, then made a new layer and sketched another draft!
For the lower arm I decided to draw the sketch off to the side so I could draw larger and focus on the details. Check out the next section of this article for a link to the robot fingers brush that I used for the hand in the sketch below!

I wasn’t sure what type of head I wanted for this robot so I sketched three options to the side of the canvas. This shows that you can be as detailed or as simple with your creation’s head as you want. The top option is very simple and a little alien, with the bottom option being the most detailed and the most human because of the eyes. How expressive do you need your robot to be? If you need to get a lot of ‘acting’ out of your robot character you may want to make their face a bit more human than the top option.

CSP Assets for Robot Drawing
When I was drawing lots of robots, I didn’t have the CSP Assets library to download from! Listed below are some of my favorite CSP assets, both paid and free, for robot drawing that I wish I had years ago!
Robot Fingers https://assets.clip-studio.com/en-us/detail?id=1873445
Wires and Cables Brushes https://assets.clip-studio.com/en-us/detail?id=1708847
3D Movable Robot Hand https://assets.clip-studio.com/en-us/detail?id=1903733
Rivet Brushes (great for decoration and close-ups!) https://assets.clip-studio.com/en-us/detail?id=1978601
Battle Damage Brush https://assets.clip-studio.com/en-us/detail?id=1980179
Chipped Paint Brush https://assets.clip-studio.com/en-us/detail?id=1830037
Conclusion
This is far from a comprehensive way to design robots, but I hope that some of my tips and observations have given at least one artist who is scared to draw them give it a shot! Once you get some practice they really aren’t that intimidating at all, so give it a try!
For more information on CLIP Studio Paint, please visit https://www.clipstudio.net/en or https://graphixly.com
1 comments
That was very useful!!! Thank you!