Testing the Limits of the Pose Scanner
Contact Graphixly @
When I first saw a short video of the new Pose Scanner technology, I was absolutely blown away and thought to myself “Wow! What an amazing feature!” And then I thought, “I wonder what the limitations are.” And that is the question we are going to attempt to find the answer to in this article. First we’ll learn how to use the Pose Scanner feature, and then I’m going to put it to the test and show you what I found.
In this article we will cover the following topics:
Using the Pose Scanner Feature
Photos of People in Costumes
Body-Chan and Laying Down Poses
Other Poses
Let’s get right to it and see what this new technology can do!
Using the Pose Scanner Feature
It’s important to remember when we’re testing out this new feature that this is a Technology Preview, meaning that it hasn’t been fully released yet. So when it is released in its ‘finished’ form, the issues that I discovered may have been ironed out. I did find some limitations with the AI for this feature, but overall I think it’s still a fantastic new feature.
Okay, so what is Pose Scanner?
Pose Scanner is a new feature in the Import options. This feature will take a photo that you give it, analyze it using AI, and then take a CSP 3D model and pose it according to the source photo.
A few things to know before trying this feature out for yourself:
Update to the newest version of Clip Studio Paint if you don’t see the feature in your Import menu.
You MUST be connected to the internet for this feature to work.
The image you choose will be sent to a server through your internet connection, where it will be analyzed and then the data will be used to make a rough approximation of the detected pose in your CSP program. The photo will then be deleted from the server. No identifying data is sent along with the photo and the photo is not stored.
The AI will not detect and pose hands at the time of writing this. We’ll go over a quick way to pose hands on 3D models later in this section!
If your source image has multiple figures in it, CSP will choose the largest figure’s pose to approximate.
Okay, let’s give the Pose Scanner feature a try now. First we will need to have a canvas open and ready. Here are the settings I’m using for my canvas in this article.
Now we go to File - Import - Pose Scanner (Image)(Technology Preview).
If it’s your first time using this feature you will see this notice.
If you don’t want to see this message each time you use Pose Scanner, click the “Do not show this dialog again” checkbox, then click on OK to proceed.
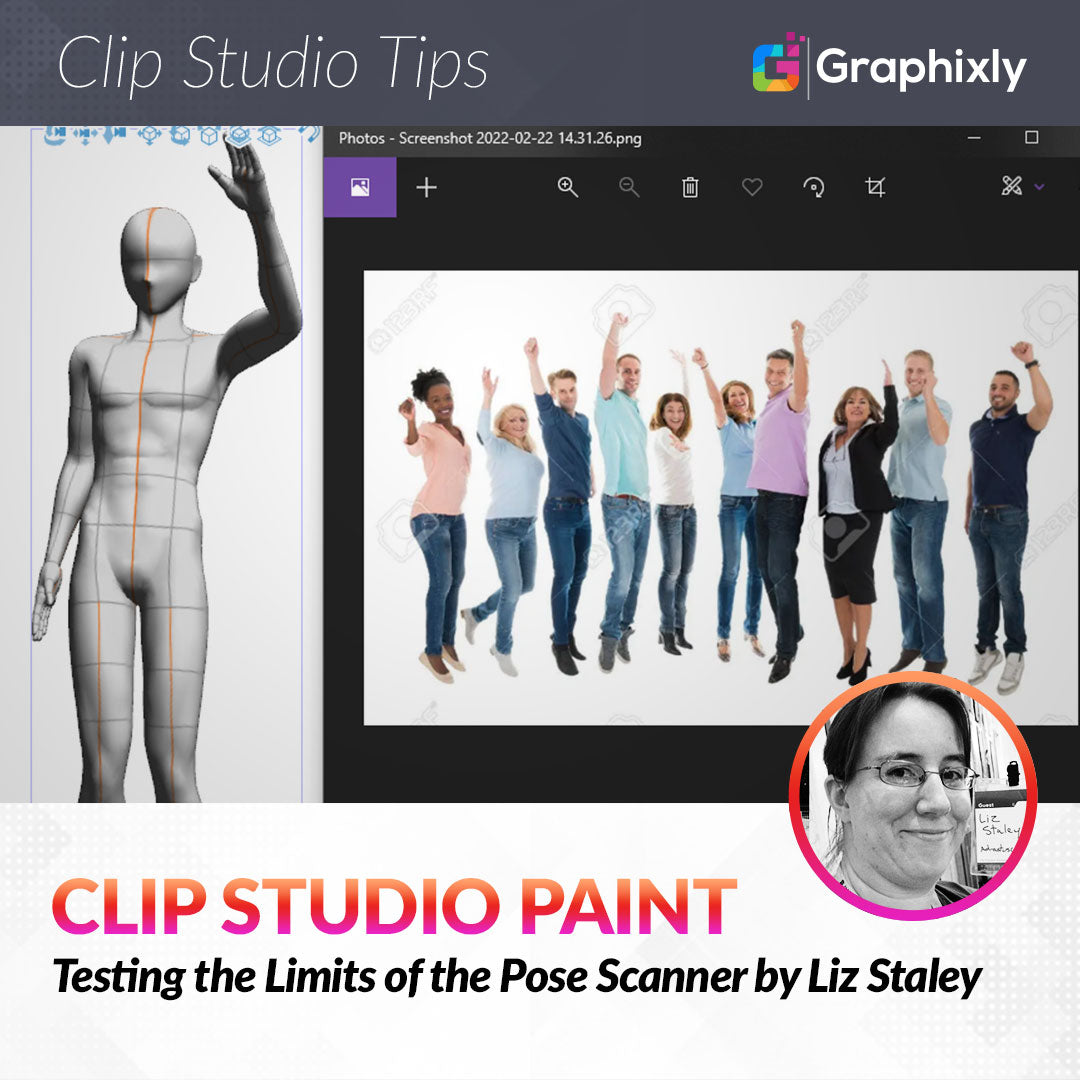
Now it’s time to choose an image from our device for the Pose Scanner to use. I actually have lots of old photos from back when I had a comic I was working on, usually of me doing silly poses that I needed for reference. I found some of these in my Pictures folder on my Desktop and thought they’d be perfect. The particular one I chose I thought would be challenging for the technology but hopefully not too challenging, and would definitely be a pain to pose a 3D model in from scratch!
Select the image you want to pose scan, then click Open.
Next we need to tell CSP which 3D model we want to use for the output pose. I chose the 3D drawing figure - Ver.2 (Female) for mine. Click on the 3D figure you want to use and then click on OK.
CSP will send the photo to the server and process it, automatically scanning for a human figure. If the AI detects no human figure, it will display a message and stop the process. If it does detect a figure it will do its best approximation of the pose with the chosen 3D figure. The results of my first test are below.
Okay, it didn’t do too bad on the legs and the left arm, but I think the AI definitely got confused about where the right arm and the head were in this photo! But it’s nothing that a little bit of fine-tuning can’t fix.
I’ve actually done an entire TIPS post already on how to pose models so you can find that info here if you don’t know how to do this! https://tips.clip-studio.com/en-us/articles/3627
One of the big downsides with Pose Scanner is that it doesn’t pose the hands, even when they’re clearly visible. That’s okay though, because using the Tool Property window makes it easy to pose our model’s hands. To access the hand quick controls, make sure the 3D model is selected. Then locate the Tool Property window in the CSP interface and click on the icon in the lower right corner that looks like a small wrench. This opens the Sub Tool Detail options.
Click on “Pose” on the left side of the Sub Tool Detail box to access the pose options. In this menu, we can find the “Pose Hand” options. Click on one of the 3D model’s hands and you can use the Pose Hand controls to quickly move the fingers. In the screenshot below, I have clicked on one of the icons below the triangle in the Pose Hand controls to quickly put each of my model’s hands into a loose fist.
After a little refinement of the head and arm positions and changing the hands, I think this 3D model is a pretty good approximation of the pose from the original photo!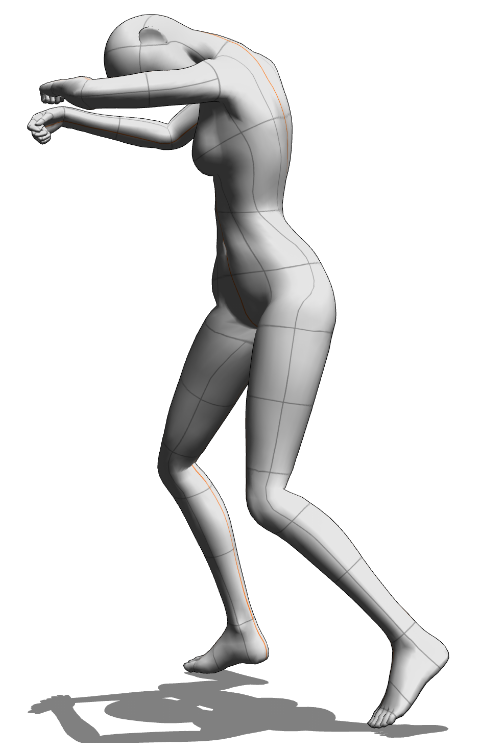
Now it’s time to do some other tests to see what this technology’s limitations are!
Photos of People In Costumes
Being an avid convention-goer for many years, I have lots of photos of people in costumes doing cool poses, so I decided to see how the Pose Scanner would react to a photo of someone in a costume. I did take all of these convention photos myself but will be obscuring faces to protect the privacy of those in the photos.
Let’s start out easy with a photo of a fantastic Wonder Woman cosplayer making a basic ready-to-fight pose. This one was a fairly simple pose, though the position of the arms isn’t quite exact, they would just take a little bit of refining to get closer to the source image. The model’s head also isn’t looking toward the camera like the source is, but again that’s an easy fix. I am impressed that the AI moved the 3D model’s feet to look like they’re in high-heeled boots, though!

Our next source photo is a Winter Soldier cosplayer. This pose is very basic but I wanted to see what the AI would do with an arm that looks like it’s a metal arm instead of a flesh one. This is where I ran into a problem with the AI not seeming to recognize the costume part as an arm, because it didn’t move the left arm of the model at all.

Let’s up the ante and try a group of Stormtroopers! I wanted to try this one because they’re full-body costumes that have a helmet, and because the source photo is a group of people so I wanted to see which figure the program would choose.

However, this is the message that I got.

So it seems like figures with armor or helmets may not be recognized as humans.
The pose below is the one that I got the most accurate results with from the AI is the one below, that only needed minimal refinement.

So clear photos where the limbs of the person are visible and without too much overlapping with the torso seem to give the best results so far. Also, full-body costumes, even when they seem “human-shaped” confuse the AI and it won’t recognize them as people.
Below is the refined version of the pose above, with an added broom so the character has something to hold in that right hand!

Body-chan and Laying Down Poses
The next thing I wanted to try was with a photo of a drawing mannequin doll that I have. I tried the SH Figurarts Body-chan but got the “A human was not detected in this photo” message, unfortunately. Which is pretty disappointing, because sometimes I find it much easier to pose a physical drawing doll than it is to pose a digital one, but it would be awesome to be able to scan the pose from a photo of a physical doll and be able to save it to use from other angles later!

Continuing along the route I was going with Body-chan, I decided to try some laying down poses that I got from a free stock photo site. This seems to be the type of poses that CSP has the most trouble with, as you can see with my first test below.

I can see where the AI was maybe going with this, but it also made me laugh out loud when the model came up on my screen! So I tried a different image, this time with a much clearer view of the entire body.

Well, that’s not much better! So then I wondered if it was something about the source figure being on their stomach. I thought maybe CSP couldn’t handle rotating the figure in such a manner or if the AI wasn’t recognizing that the model was turned like that. So I tried a different pose and, after rotating the actual 3D model that came out so that it wasn’t making this pose while standing, I think it actually is fairly close though far from perfect.

So, human-shaped action figures don’t seem to work (though I wonder if they would if they were flesh-colored and not the gray ones that I have!), and poses with a lot of rotation or reclining also seem to really confuse the AI. I also ran one of the poses through the AI twice and both times got different results, so if your results are really off you may want to try it again and see if it interprets it any differently!
Other Poses
The last two images I wanted to try were a group image and an image where something was partially obscuring the figure.
The group image was basic but I was still curious to see which of the figures CSP would choose, because in a photo with more than one figure it will choose the “largest” figure. I found that seemed to be accurate with the following free stock image.

Though when I looked at it I would have said the man to the left of center in the blue shirt looked to be the largest figure, CSP chose the man to the right of center in the lilac shirt, it seems. The AI wasn’t sure what to do about that obscured right arm but that wouldn’t be too difficult to change to look more natural, or just rotate the model or change the camera angle to hide it.
Finally, I chose a photo that I took at a horse show of a presenter to test what would happen if something was cutting in front of the figure. This presenter was in a pen with a horse in this photo, so I was curious to see if CSP would ignore the bars of the livestock panel and get the pose, and I was pretty surprised at the results!
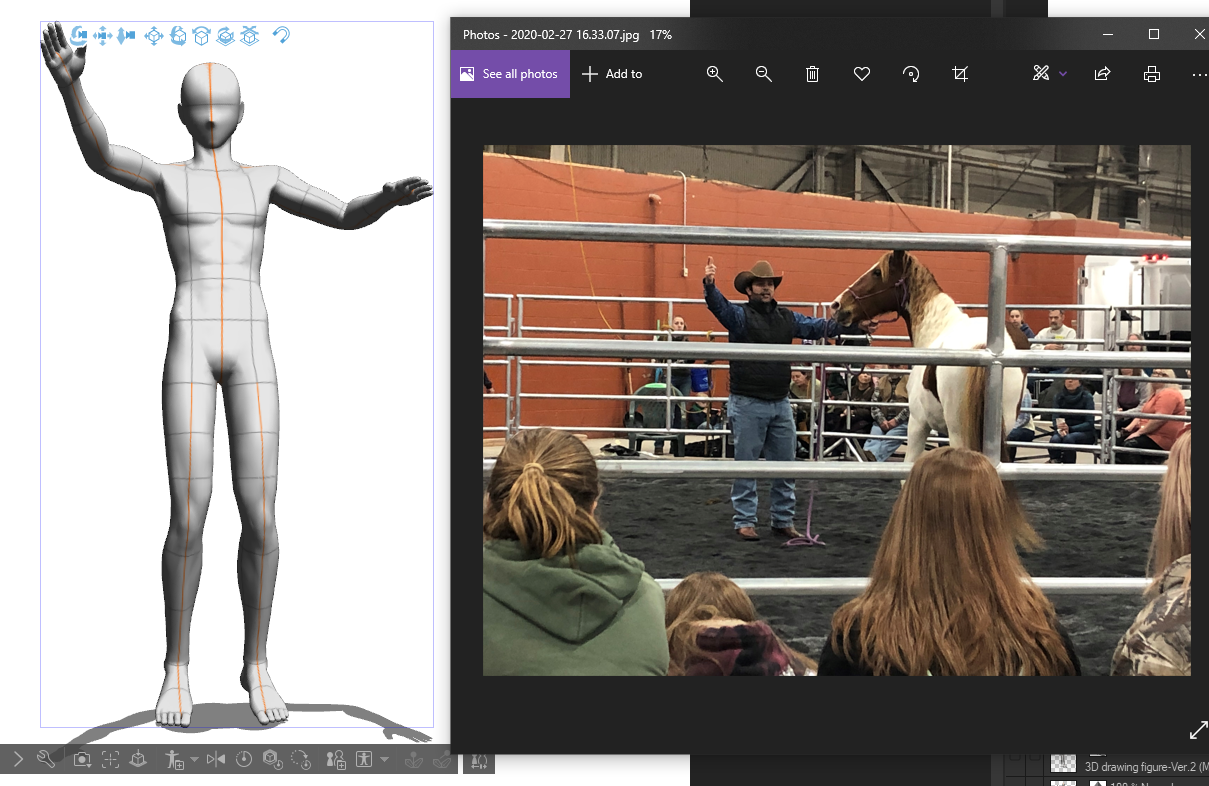
That’s one of the closest results I got in my test, despite the big horizontal metal bars going across the entire foreground!
Conclusion
This new AI technology is really exciting, and I think it’s going to be extremely useful for some artists, especially those creating comics or maybe concept art and storyboards as well. However, it does seem to work best with poses with clear silhouettes, not a lot of overlapping parts, and without the figure being in a reclining state. You will probably have to do some manual adjustment, but this new technology preview seems like it can cut down on some posing time, especially if you use lots of 3D models as reference!
For more information on CLIP Studio Paint, please visit https://www.clipstudio.net/en or https://graphixly.com