SVG Functions
Contact Graphixly @
Hello! My name is Liz Staley and I’m a long-time user of Clip Studio Paint (I started using the program back when it was known as Manga Studio 4!). I was a beta-tester on the Manga Studio 5 program and for Clip Studio Paint, and I have written three books and several video courses about the program. Many of you probably know my name from those books, in fact!
The ability to work with both raster and vector in one file is one of the great things about Clip Studio Paint. Vectors are useful for all sorts of applications, and now they can be saved from other vector programs and imported into Clip Studio for use, and vectors from CSP can be exported to other applications as well!
In this article we will cover the following topics:
Importing SVG files to CSP
Uses for imported vectors
Exporting SVG files from CSP
Let’s get started!
Importing SVG Files to Clip Studio
In order to import an SVG file to Clip Studio Paint, you will need a vector that is in SVG format, of course! Sometimes you can find these files as free or cheap downloads from other sites. If the vector file is not an SVG format, you will need to open it in a vector program, such as Adobe Illustrator, and save it as an SVG before it can be used in Clip. I will be using a vector shape created in Illustrator for the examples in the first part of this article.
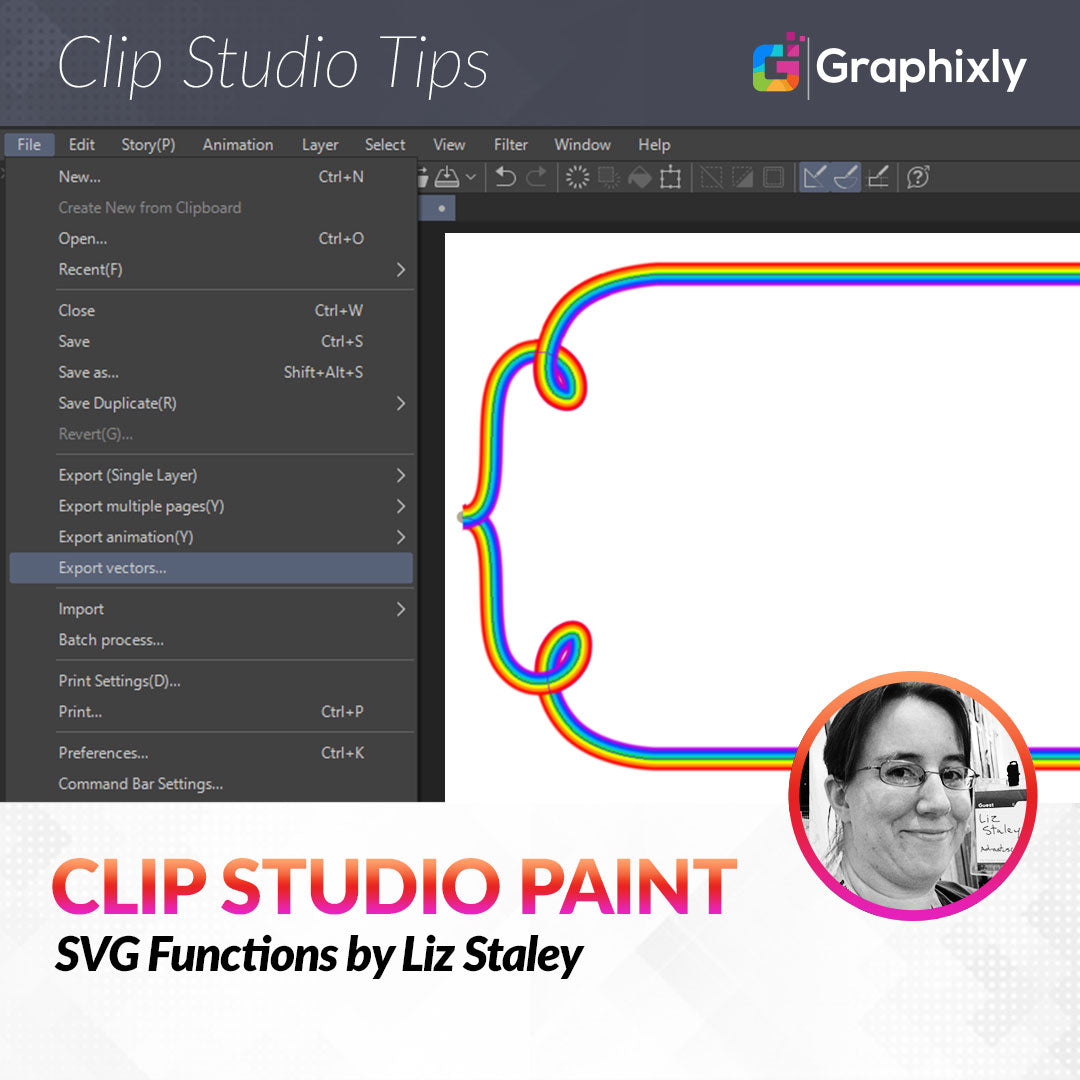
Once you have your SVG file, click on File, then go down to Export and over to Vector, as shown in the screenshot below.

In the screen that comes up, navigate to the location where your SVG file is saved. Click on the file name and then click “Open” to start the import.
Vector lines will be imported as vectors, while vector fills will be loaded just as a vector outline. We’ll cover adding vector fills in Clip Studio a little later!
In the screenshot below, you can see that my SVG vector file has been added to the Clip Studio page. Using the Object subtool, the vector can be selected and we can see all the control points and control handles that will allow us to edit the shape of this line, if desired.

To edit the shape of the vector object, the Object subtool can be used. Or use the Move Control Point option of the Control Point subtool (under the Correct Line category of tools, shown below). You have the same amount of control over the imported vector as you would with one that is created in CSP with the built-in vector tools.

Uses for Imported Vectors
Imported SVGs can also be turned into rulers very easily. To turn a vector into a ruler, right-click on the vector object’s layer in the Layer palette. From the menu, go up to Ruler/Frame and then select “Ruler from vector” from the menu.

This will turn the vector path into a ruler that you can use any of the CSP drawing tools on, including the Decoration and pattern brushes! If you want to draw on the ruler while on a new layer that isn’t taken up by the vector already, you may need to change the ruler options. Find the “Set showing area of ruler” options in the Layer palette, below the opacity slider. Click on it to show the dropdown menu with the ruler options. You can set the ruler to be shown in all layers, to be shown only when in the same folder as the layer that the ruler is on, or to show only when editing the layer the ruler is on. For this article I’m going to set the option to “Show in all layers” so that any layer I create will show the ruler on it and make it useable, even if we are twenty layers above the ruler layer at the time! The following image shows the location of the “Set showing area of ruler” dropdown.

Once the vector is turned into a layer, use your preferred drawing tool on the ruler. In the image below I’ve used the “Blurred rainbow” Decoration tool to trace the ruler I made.

You can also add a fill color to vectors just by using the Fill subtool. You will need to create a new Raster layer and place it beneath the vector layer in the Layer palette list. Then select the Fill tool. In the Sub Tool options, select the “Refer other layers” subtool. This will allow us to reference a layer we’re not on, so we have our fill separate from the lines. Under the Tool property window, find the “Refer multiple” option and select “All Layers” from the options. This icon is indicated in the screenshot below.

We can also tell CSP to fill up to the center of the vector line when it fills. To do this, click on the icon that looks like a little wrench in the lower right corner of the Tool property window to bring up the Sub tool detail options. In this screen, click the checkbox next to “Fill up to vector path” as shown below.

Now return to your canvas and click inside the vector path with your chosen color to fill the inside of the path and up to the vector path under any current lines. You can see my fill colors and my layer setup in the screenshot below.

In the next image, I’ve hidden the vector import layer so you can see that the fill color goes up under the stroke line on the vector path, making the transition between the line and the fill look clean and neat!

Exporting SVG Files
Exporting SVG data to use in another vector application is easy! You will need at least one vector layer with some vector shapes or lines on it (of course) before beginning. Make sure that your vector layer to be exported is the actively selected layer currently. To export multiple layers at once, hold down Shift or Ctrl and select the layers.
With the desired vector layer(s) selected, click on File - Export Vectors. Save the file where you can find it easily.

Now you can go to your other vector application and open your SVG file. In the image below, I’ve opened my CSP creation in Illustrator.

Note that when exporting layers from CSP to other applications like Adobe Illustrator, tool and stroke information will only be a single line weight and color. For example, if you used a dotted or dashed tool to trace a vector ruler and then exported it into AI, the dots or dashes would not export. The relative thickness of the tool and the color would transfer over, however.
Conclusion
Vectors are a versatile and fun way to create logos and other designs, especially ones that need to be used over and over again and are resized often. Using the SVG import and export tools, you can open up your vector work options and use CSP in new ways!
For more information on CLIP Studio Paint, please visit https://www.clipstudio.net/en or https://graphixly.com