
Scanning Images with Your Phone
Contact Graphixly @
Hello! My name is Liz Staley and I’m a long-time user of Clip Studio Paint (I started using the program back when it was known as Manga Studio 4!). I was a beta-tester on the Manga Studio 5 program and for Clip Studio Paint, and I have written three books and several video courses about the program. Many of you probably know my name from those books, in fact. I write weekly posts on Graphixly.com and on CSP Tips, so be sure to come back every week to learn more Clip Studio Tips and Tricks from me!
When I first got into digital art, scanners were a VERY expensive piece of equipment, and digital cameras were not nearly as prevalent as they are now. The world of technology is very different now than it was when I first started my art journey back in the days of the dinosaurs! And while I think that ‘scanning’ an image drawn on paper is less than ideal without proper lighting and a tripod, it is definitely possible to do just that and get a quality finished image. So that’s what we’re going to do today.
In this article we will cover the following topics:
Taking a photo of your artwork
Cleaning up and finishing the artwork
Let’s get started!
Taking a Photo of Your Artwork
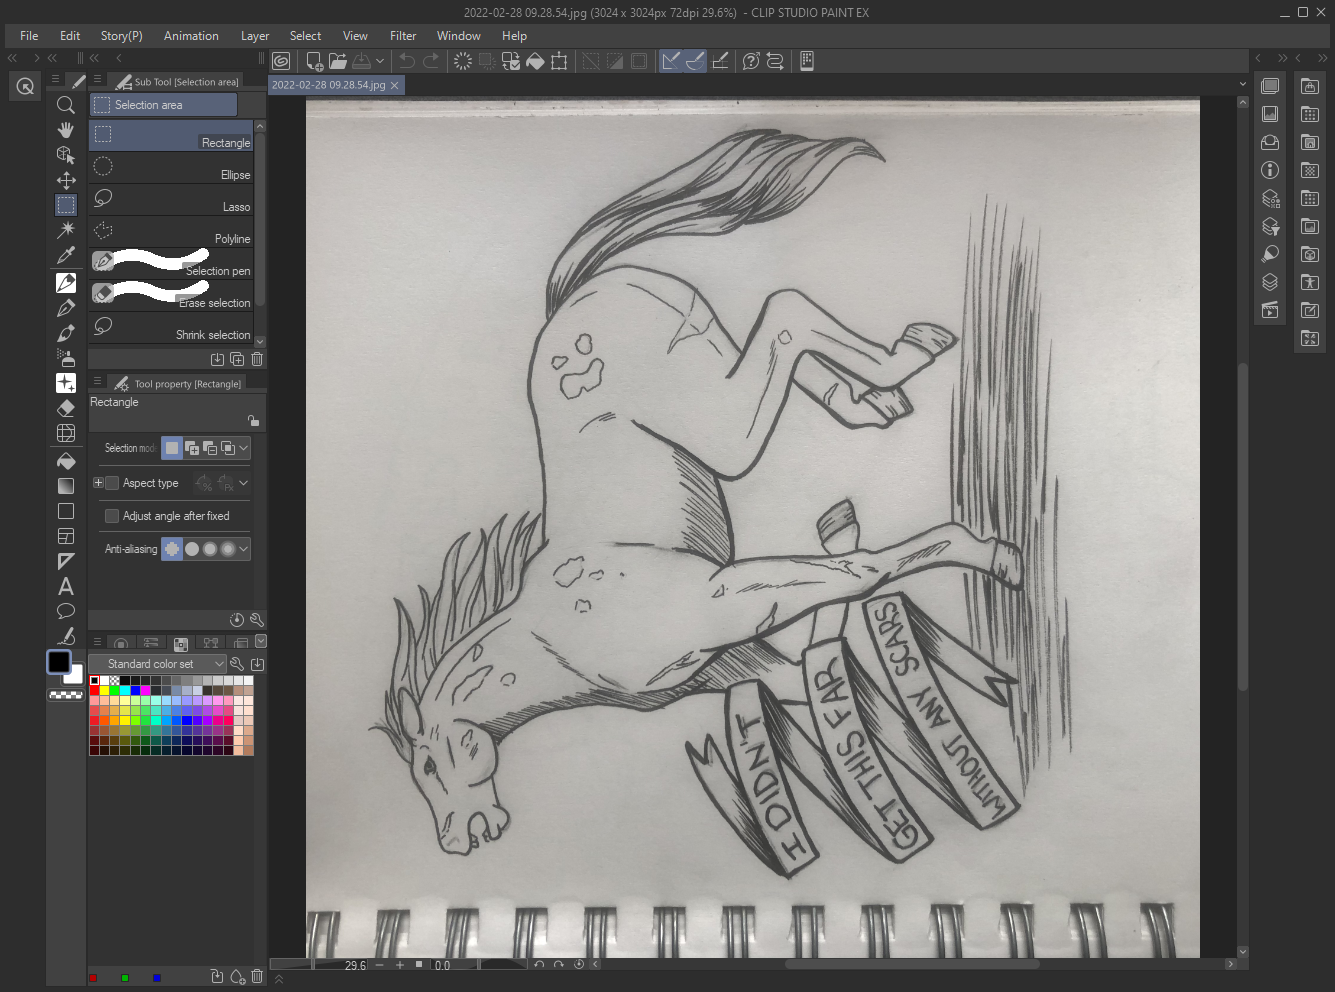
The first thing we need is some art to photograph. This is a sketch from my small sketchbook that I decided to ink using my Tombow Fudenosuke brush pens. (The song lyrics are from the song “Brittle” by my favorite band, Icon For Hire, by the way!)

There are a few things that we need to consider when photographing art: good lighting and getting the photo as straight-on as possible to avoid deformation of the artwork.
To get a good angle I like to shoot the artwork from above. We also need good lighting, but try to avoid shooting in direct sunlight because you’ll get harsh shadows. We had a sunny day here in Pennsylvania on the day I took these photos, so I decided to put the sketchbook on my desk chair next to my studio window. I kept the curtains closed to diffuse the sunlight. If you have a ring light or something similar, you could also try that for lighting your artwork! Because ring lights have light coming from multiple directions, it shouldn’t create harsh shadows on your work.

When taking your photograph, try to make sure that you are shooting as straight as possible. If you have too much of an angle then your artwork will not look as you intend it to. If you have a tripod that can hold your phone at a perfect right angle to your image then that would be the best way to take your photo.
I’m shooting with my iPhone 8 in the square format since my drawing is quite square. While taking the screenshot of my phone screen below the drawing is definitely not straight on and properly in the frame, so don’t take photos that look like my screenshot!

I took about six photos of my art so I could look them over and choose the best one. Now it’s time to get the photographs from my phone to my desktop computer. You could email them to yourself, but I like using Dropbox to automatically back up the images from my phone. I have my Dropbox set up to automatically back up any new images from my phone to my desktop computer whenever I open the Dropbox app. So, I simply opened the app on my phone, shown below, and waited for the images to sync.

Now I can go over to my desktop and look in the Dropbox folder on my hard drive, and my photos are already there!

Now, choose the photo you like best and open it using Clip Studio Paint. In the next section we’ll clean up our image and get it ready for coloring!
Cleaning Up and Finishing the Art
Now that we have our image digitized using our phone’s camera, it’s time to do some clean up and make it suitable for digital coloring. I chose the photo that I thought was the best and opened it in Clip Studio Paint to start the process.
I honestly don’t know why the photo is sideways in CSP but correct when I look at it anywhere else, but that’s okay. This is an easy fix if it happens to you. Simply click on Edit - Rotate/Flip Canvas - and then figure out which way you need to rotate the image to correct it. In the case of my image, I clicked on the “Rotate 90 degrees clockwise” option.

My photo also has a bit of extra space around the outside that shows the edges of the sketchbook and the rings holding the sketchbook together, so I want to crop those off. This is really easy. Simply use the Rectangle marquee tool to select the portions of the photo you want to keep, then select Edit - Crop. Any area outside of the selection will be trimmed off.

Now that the image has been turned to the correct orientation and cropped, this is what I have so far.

Depending on the lighting conditions you took your photo in, you may have a slightly washed out image that needs some adjustments to make the lines more crisp. (In the case of my photo I actually had a LOT of uneven gray areas and shadows that didn’t look like they were going to be a problem until I really got into the clean up stage. This is partially because of a shadow on right side of the paper and also because the eraser I used to get rid of my pencil lines wasn’t great and smeared a lot of graphite around instead of getting rid of it. I recommend making sure you do a good job erasing any lines you don’t want! Thankfully I did want this image to look a little ‘gritty’ so it all worked out in the end.)
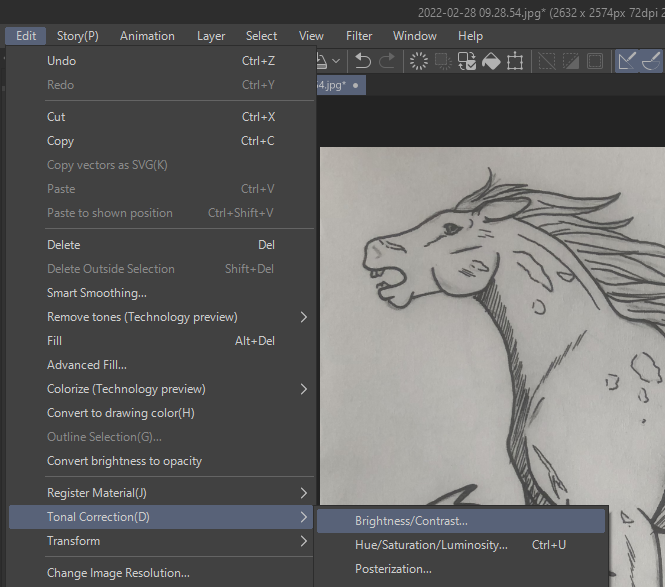
Let’s adjust the Brightness and Contrast first. Go to Edit - Tonal Correction - Brightness/Contrast to bring up the options.
Turning the brightness and contrast up will make the light areas lighter and the dark areas darker. I recommend clicking the Preview checkbox so you can see your adjustments in real time as you adjust the sliders. Also the Auto Adjust button will do the adjustment automatically for you and sometimes produces great results, depending on your image.

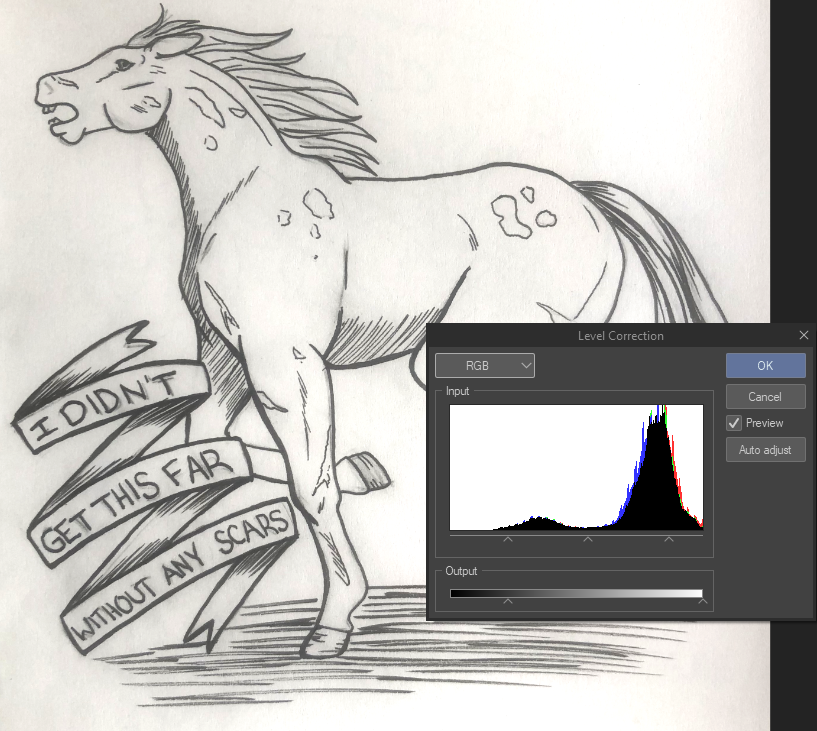
We can also use the Levels adjustment to really darken the dark areas and lighten the light areas. This setting is in the same menu and the Brightness/Contrast adjustment.
I did the Brightness/Contrast adjustment one more time to try and get as much of the gray to go away as I could before moving on to the next step. Again, I did want a little bit of roughness in this image after coloring so I wasn’t too worried about getting rid of all the gray bits of pencil, but I did want to get rid of most of it.
Next, let’s get rid of all the white areas of our line art photo so we can easily color on layers underneath the original drawing. This is so incredibly easy to do in Clip Studio Paint! Click on Edit - Convert Brightness to Opacity.

This function takes the brightest areas of the layer and makes them transparent, while keeping the darkest areas opaque (and having partial transparency for shades in between the bright and dark!), so it is effectively a one-click way of erasing all the white areas and leaving only our black and gray areas behind!

If your lines still aren’t as dark as you want them to be (or if you want to change all your lines to a different color entirely, such as a dark brown), it’s easy to make a selection from our layer now. With the lineart layer active, go to Layer - Selection from layer - Create selection.

This will make a selection from the contents of your current layer. In the screenshot below you can see that my inked lines have all been turned into a selection. Once the selection is made, you can use the fill tool to fill the lines in with any color you want.

I filled my line selection in with black to make my inked lines nice and dark.
At this point, because my eraser left pencil smudges on my original drawing I still had a lot of cleanup left to do manually. First I used the Remove Dust tool, but this only did a little bit of the work. So finally I went in with the Kneaded Eraser tool and cleaned up some of the gray areas. I did leave some of the “grit” though to go with the look that I wanted for my final image, but the kneaded eraser tool was perfect for this because I could use it to lighten areas or completely erase depending on the amount of pressure I used and how many times I went over the same area with it.
Note that you may want to put a new raster layer beneath your line layer and fill it with a solid color to make any areas that need to be cleaned up easier to see. I did this with a layer filled in with white so I could see the pencil smudges easily and make sure I wasn’t erasing more of the gray areas than I wanted to.

Finally, our lineart is all cleaned up and ready for color! You can see in the Layers window in the image below that I have my lines on one layer while the white areas are on another layer below the inked lines.

With my inked lines all cleaned up and ready for color, I then began making more layers beneath the line layer so I could add my colors without changing the line layer at all. The screenshot below shows my completed drawing as well as all the layers used to complete it.

Conclusion
While I still don’t think that scanning art with a phone camera is the best way to digitize your paper drawings, there are some times when it just can’t be avoided. In these cases, it’s great to have tools such as the Convert Brightness to Opacity feature to make creating lineart layers easy and painless!
For more information on CLIP Studio Paint, please visit https://www.clipstudio.net/en or https://graphixly.com