Rulers Part 7 - Two and Three Point Perspective
Contact Graphixly @
Hello! My name is Liz Staley and I’m a long-time user of Clip Studio Paint (I started using the program back when it was known as Manga Studio 4!). I was a beta-tester on the Manga Studio 5 program and for Clip Studio Paint, and I have written three books and several video courses about the program. Many of you probably know my name from those books, in fact. I write weekly posts on Graphixly.com and on CSP Tips, so be sure to come back every week to learn more Clip Studio Tips and Tricks from me!
When I first learned about this software, it was the Perspective Ruler tool that made me realize how awesome it was and influenced my decision to start using it. And I still think that the built-in ruler tools are one of the coolest features in CSP. Finally we’ve made it to the last of this ruler series, which is a continuation from the previous article about one-point perspective. If you haven’t read that post yet, please do so because that’s where we covered the Perspective Ruler settings and the basics of setting up a one-point perspective drawing!
In this article we will cover the following topics:
A Few Notes About Perspective Drawing
Creating Two-Point Perspective
Creating Three-Point Perspective
Let’s dive right in and get started!
A Few Notes About Perspective Drawing
Before we get started, I want to say a few things about drawing in perspective. Being able to draw convincing perspectives is, in my opinion, a critical skill for just about any artist (but especially comic artists, concept artists, etc). It’s not a very difficult skill to acquire, but it does require some practice and a lot of learning. Thankfully, there are a lot of resources online that will teach you how to draw in one, two, and three-point perspective.
That being said, this article will NOT be covering how to draw in perspective, or the more advanced concepts of perspective drawing. This is simply about how to use the Clip Studio Paint Perspective Ruler.
If you’re a comic artist who wants to ramp-up your background drawing skills, I recommend “Vanishing Point: Perspective for Comics From the Ground Up” by Jason Cheeseman-Meyer as a fantastic book to have for reference. Even after drawing perspective for years, I still learned a lot from this book when I was creating comics!

That being said, let’s move on to creating two-point and three-point perspective rulers!
Creating Two-Point Perspective
I’m going to say, again, that if you haven’t looked at the one-point perspective ruler entry from last week, you should probably go look at it! The creation process for two-point rulers builds off creating one-point (and creating three-point rulers builds off making two-point, so we’re building foundations here). I’ll still go over the process again though, in case you read last week’s article but need a refresher.
Since two-point perspective is a little more complicated than one-point, I did start with a loose sketch this time before I began making the ruler. I’m not too worried about the accuracy of this sketch, I just want to have a basic idea of what I’m going to use the ruler for, especially a large focal object that I can use to position my vanishing point guides off of. The large central cube in the sketch below is the object that I’ll be using to line up my ruler.

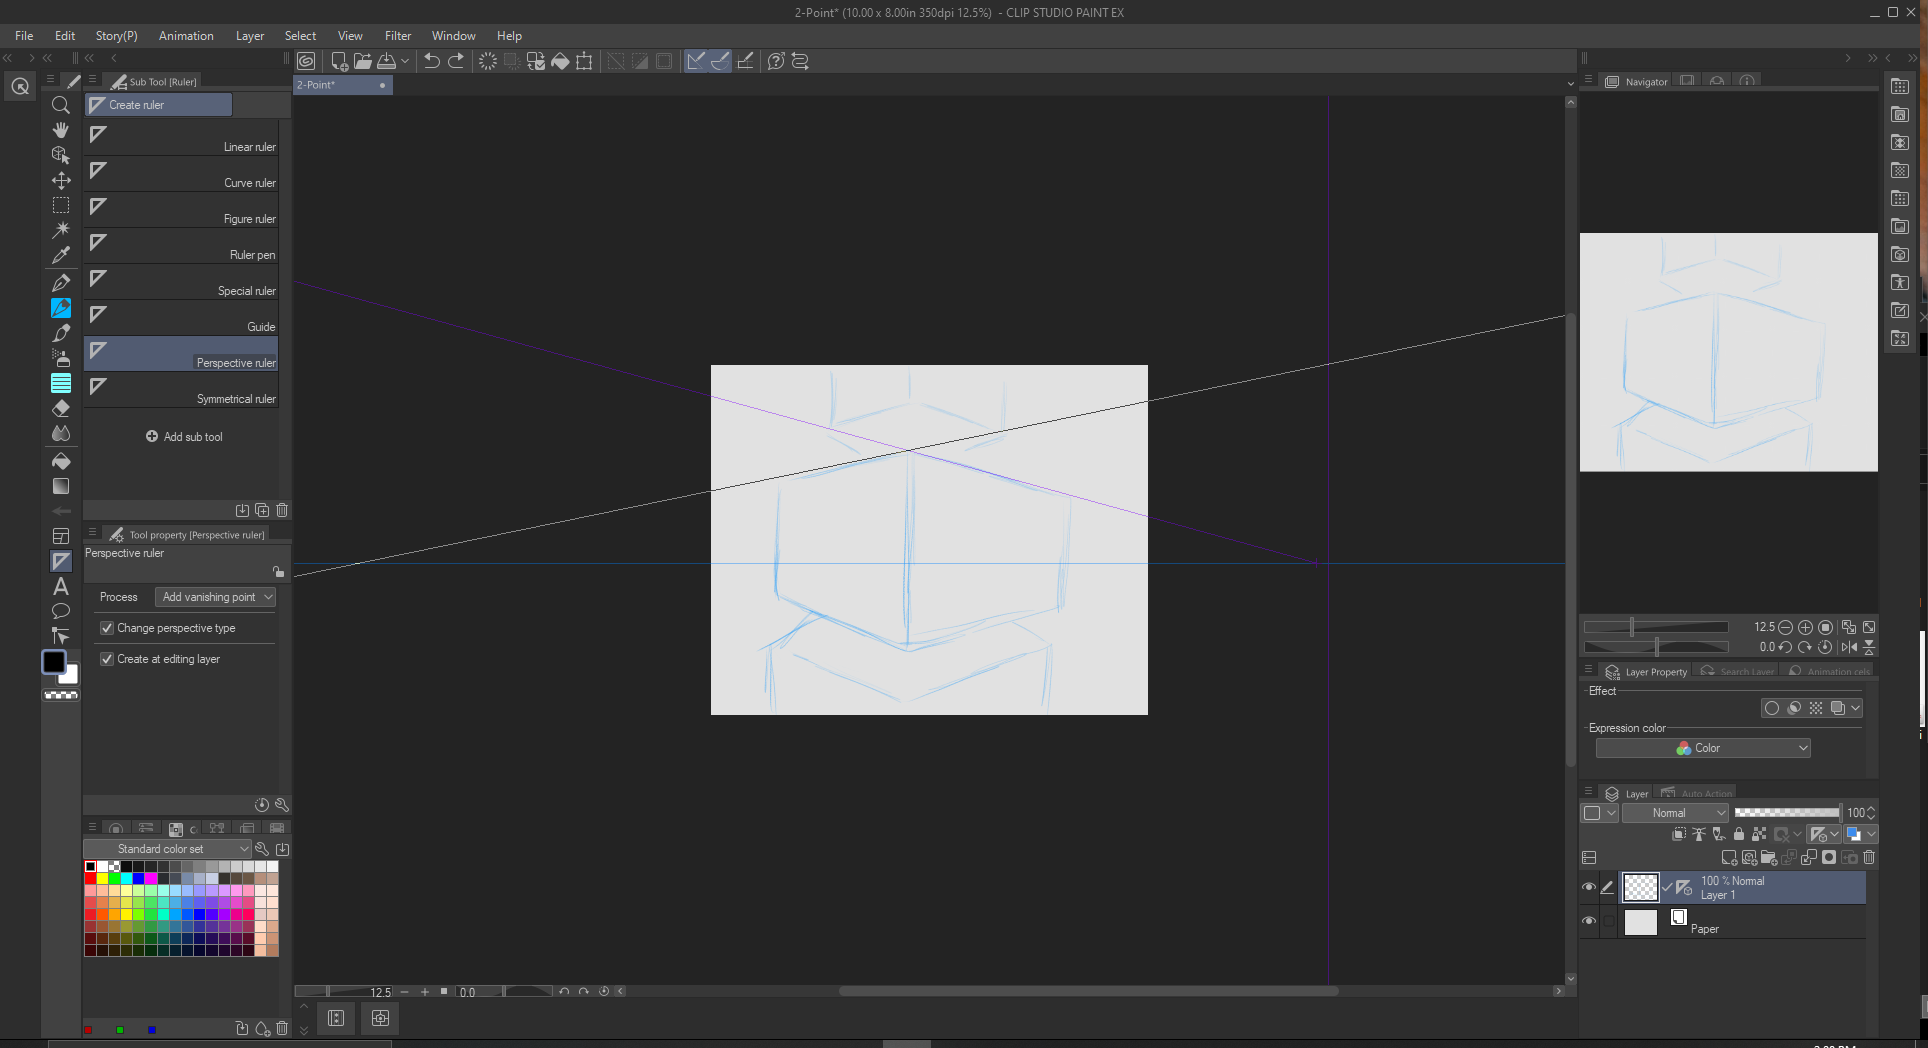
Next up, we’ll take our Perspective Ruler subtool and make sure the Process drop-down in the Tool Property window is set to Add Vanishing Point. For more information on this, check the previous article in this series.
Before we start making our ruler, we need to figure out where the horizon line (also called the “eye level”) should be. This will depend on the image you are creating. The eye level for my sketch is right in the middle of the central box. With the Perspective Ruler tool, click and drag out the line for the horizon line. In the image below I’m holding down the SHIFT key on my keyboard to keep it straight across.

Click to set the horizon line. Next we need to create our first vanishing point. Click on the horizon line where you want the first vanishing point to be. I’m doing the one on the right side of my drawing first. Click and drag to set out a guide for the vanishing point. This doesn’t have to be perfect right now, we can edit the position of everything later.

Once that vanishing point is in place, it’s time to set our second one. Click on the horizon line again and drag to create the guide for the second vanishing point. This will look like a horizon line at first, but don’t worry about it!

Click again to set the vanishing point. In the image below you can see the horizon line is blue, and the guides for the vanishing point are both purple.

Just like with creating a one-point perspective ruler, two guides are actually created for each vanishing point, but the second guideline is hiding along the horizon line. There’s some editing to be done on this ruler anyway to get things closer to my sketch, so let’s get those guides lined up and adjust the vanishing points.
Using the Operation - Object subtool, click on one of the lines of the ruler to reveal the controls for the ruler. To adjust the position of a vanishing point, simply click on the white-and-blue circle that will be showing at the vanishing point when the ruler is selected and drag to move it.
Moving the vanishing point will probably reveal the second guide that was created along with the first one. If it doesn’t and you want to find the second guide, look along the horizon line for a white circle slightly larger than the other two circles and that has a small diamond slightly off to the side of it (off the ruler guideline). This is the handle for the guidelines. Look closely at the image below and you’ll see the guideline handle selected in red near the middle of the image.

By clicking and dragging on this point, the second guideline for the right vanishing point is revealed!
Now I’m using the guidelines to check the position of my vanishing points. In the image below, I’ve moved the left vanishing point much closer to the edge of the canvas to better match the angle of the sketch line.

Again, I’m not too concerned about matching the angle precisely for this sketch. Since I freehanded it pretty quickly, my rough sketch isn’t going to be in perfect perspective!
Continue adjusting your horizon line and vanishing points using the Object tool until you’re satisfied with the position. Then use a drawing tool to start making the real perspective lines. The image below shows one side of the central box roughed in using a pencil tool. You can see that I’ve tried to follow my sketch lines fairly closely.

You can use tools other than pencils and pens on these rulers. For instance, you can quickly create the sides of boxes (or buildings and such) using the Rectangle figure tool. The left side of the box in the image below was drawn with just two clicks using this tool.

While using the Figure tools is a way to speed up this process, sometimes the results can be a bit… undesirable. As much as I love the perspective ruler tools, sometimes they can be a bit “finicky”, even with just pencil tools. So adding in the figure tools and sometimes it’s hard to get the shapes to go into the perspective that you want. For instance, in the image below I got the right side of the upper cube perfect using the Rectangle tool, but the left side didn’t want to go the way I wanted it to go.

In the end, I decided to simply take a pencil tool and continue going along over the sketch lines instead of using the Figure tools, especially for the parts of the upper and lower boxes that intersected with the middle box.

With all of my floating boxes drawn in using the two-point perspective ruler, it’s time to add some finishing touches. I added a little bit of simple shading in the image below to complete the “floating” look to these cubes.

Just like in the previous installment of this series, I’ve filmed a short video of this creation process so you can see how it works in motion.
Now that we know how to create a two-point ruler, let’s really go wild and create three-point in the next section!
Creating Three-Point Perspective
Let’s jump right in to creating our three-point perspective ruler. It’s just like creating a two-point, but of course we’ll be adding a third vanishing point. As before, I started with a rough sketch to help me out with the placement.

Follow the same procedure from the previous section for setting up a two-point perspective ruler, using the sketch as a guide. Note that sometimes you might have to put your vanishing points WAY outside of your canvas. In the following image you can see just how far out I had to zoom in order to place my vanishing points so that they matched up with the sketch.

Once you have your two points set up, it’s time to add a third! Since my sketch is looking up at a tall building, my third vanishing point will be directly above the canvas. The placement of your vanishing points will depend on your desired outcome, of course!
Using the Perspective Ruler tool with the “Add vanishing point” option selected in the Process dropdown, click where you want to add the third vanishing point and drag to put out a guideline. This is the white vertical line in the screenshot below for my ruler.

Once you have this initial line for the third vanishing point put down, click again on that same line and drag out a guideline. This looks strange at first and like you’re just putting down more horizon lines, but don’t panic!

After you release the mouse button from this second click-and-drag, the two new lines will turn into a vanishing point. In the image below you can see all three of the vanishing points - one to the left, one to the right, and one above the canvas, all with purple guidelines radiating out from them.

Use the Operation - Object subtool to fine-tune the ruler as needed. In the image below, I’ve adjusted the vanishing points and guidelines to match the lines on the sketch as close as possible.

Just like with the other perspective rulers, you can use many different tools to create your art now. Simply make sure the “Snap to Special Ruler” icon is clicked on in the Command Bar!

I’ve recorded a video for this ruler creation process as well. You can find it below!
Conclusion
This marks the end of our series about the many ruler tools available in Clip Studio Paint. I hope this series has been helpful to you! I really believe the digital rulers in CSP are one of the best features in the program and I get so excited to talk about them! I hope you now have some ideas of how to use these awesome tools in your art.
For more information on CLIP Studio Paint, please visit https://www.clipstudio.net/en or https://graphixly.com