Posing 3D Models for Use in Fight Scenes
Contact Graphixly @
Hello! My name is Liz Staley and I’m a long-time user of Clip Studio Paint (I started using the program back when it was known as Manga Studio 4!). I was a beta-tester on the Manga Studio 5 program and for Clip Studio Paint, and I have written three books and several video courses about the program. Many of you probably know my name from those books, in fact!
Drawing fight scenes can be a challenge for any illustrator or comic artist. Making dynamic poses and camera angles takes practice and patience! In this article, I’m going to show you how to use the 3D assets in Clip Studio Paint to help you draw your fight scenes more easily. Using 3D character models can help a lot with dynamic scenes. I like using 3D models when a pose or camera angle is especially difficult to find (or take!) a reference photo for.
Note that this is adapted from an article that I wrote in September of 2020 and has been updated to reflect the new 3D model controls in CSP Ver2.3.1
In this article we will cover the following topics:
Adding a 3D Model to the Canvas
Using Pre-set poses
Custom Posing a Model
Working with Multiple Models
Finishing Touches
Let’s explore the world of 3D models in Clip Studio Paint!
Adding a 3D Model to the Canvas
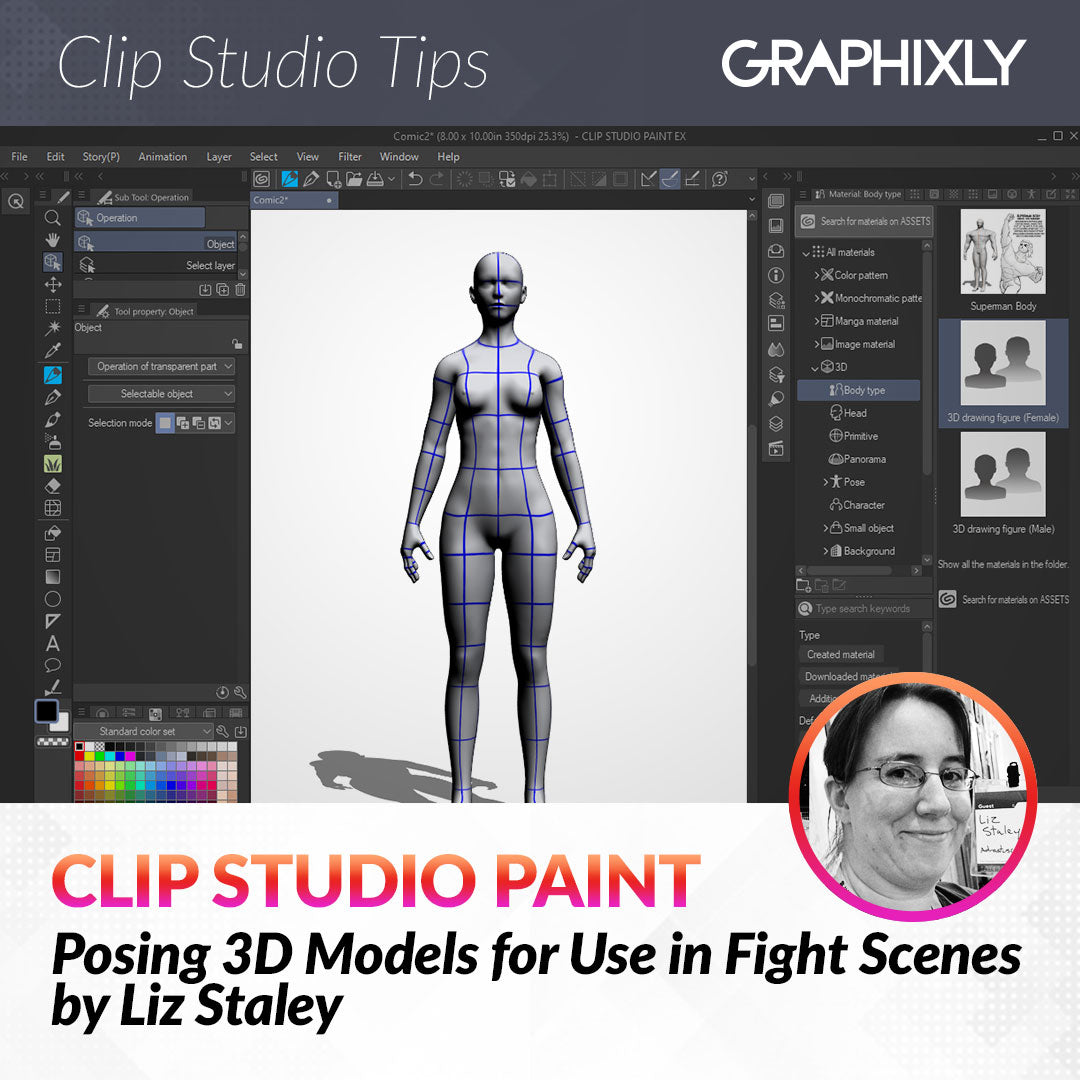
Our first step in working with a 3D model is to locate the 3D assets in the Material Library. In the default user interface, the Material Library can be found docked to the right-hand side of the program. It is indicated in the screenshot below.

If you cannot locate the Material Library in your program, click on Window - Material - All Materials or press Ctrl+Shift+M on Windows to bring up the “All Materials” category. To see only the 3D assets, use the drop-down arrows to expand the 3D folder.
In this article, I will be using the models in the “Body Type” folder. These are different from the “Character” models because they look like a generic doll, much like the wooden artist mannequins you can get in an art store, only digital! I prefer these to the “Character” models because I find it easier to reference from the generic body type model and customize it to look like my own character.
In the Body Type category, you will find a male and a female drawing figure.
To add the first 3D model to the canvas, click on the model you wish to add in the Materials Library window to select it. Then, at the bottom of the Material window, locate the “Paste selected material to canvas” icon (it looks like a little clipboard!) and click on it. This will copy the currently selected material onto the active canvas, as shown in the following screenshot.

In the next section, I will show how to use the pre-set poses that come in the Material library and also how to create your own custom poses. Let’s get to work laying out our fight scene!
Using Pre-set Poses
To make our 3D work a bit easier, Clip Studio Paint’s material library comes with a wide variety of pre-made poses that we can use as they are or even as a basis for custom posing. There are a wide range of poses in the library, ranging from the mundane to the martial. There are even specific hand poses as well that can be used for reference of hands!
For this tutorial though, we are interested in the Body poses. These poses can be found in the 3D category of the Material Library, under the “Pose” section. Click on “Pose” in the category list to show all poses, or click on the “Entire Body” sub-category to see only full-body poses.
You will see as you scroll down that there are a multitude of poses, including everything from laying down, mopping a floor, sitting, walking up or down stairs, playing soccer, and even a few fighting poses like slapping, uppercuts, and punches.
Using a pre-set pose is a fast and easy way to pose your model. You don’t have to do all the moving of individual body parts yourself!
To use a pre-set pose, first find the pose you want to use in the Material library list. If you have already placed a 3D model onto the canvas as we did in the previous section, click on the pose you want to put on the 3D model and hold down the mouse button. In the screenshot below, you can see the “Uppercut” thumbnail over the 3D model on the canvas as it is dragged onto the model.

Release the mouse button (or stylus pressure) once over the model to apply the pose. In the following screenshot you can see that our generic 3D female model is now in the middle of a powerful uppercut!

Note that you can simply drag-and-drop the pose that you want on to a canvas without having an existing model there. If you do this then the body shape of the model will default to the body shape that is seen in the pose’s thumbnail in the Material Library.

If you wish to use the pre-set pose but need a different default body shape, you can change the shape using the icons in the “Sex” options under the Tool Property for the 3D model.

Custom Posing a Model
In addition to using the pre-made poses, you can pose the models yourself using the Object tool and moving each part of the 3D figure into the position you want. This takes more time and some getting used to if you’re not familiar with working with 3D models already. However, in the years since I wrote my first book about Manga Studio 5, this process has been greatly improved and made much easier thanks to the new controls.
To make your own pose, follow the instructions from before to add a drawing figure to your canvas. Then click on the Operation icon in the toolbar and select the Object subtool if it is not already active. Then click on your 3D model to make the controls appear, shown below.

The blue circles shown at various points over the model are quick controls that allow you to click and drag to move that limb. For instance, if I click and drag on the circle on the left arm, I can quickly turn my punch into an elbow jab.

If I want to make this into a more defensive stance, however, I need to click on the model’s shoulder to move that joint because it does not have a corresponding fast change handle. When clicking on the shoulder, the joint turns a pink color and three interlocked circles appear. These circles control how the shoulder joint moves. These three circles are colored red, green, and blue. Let’s see what happens when we move each one of them, starting with red.

If you make a change to a pose that you don’t like, you can press UNDO to go back a step.
Now let’s move the shoulder with the green circle.

Still not the direction we want to go to turn the elbow strike into a guard! Let’s try the blue circle instead.

That’s better! Because of the new limits on joints put on 3D models in Ver2.3.1, however, we can’t get the arm to go all the way down to the side of the character just from this joint. Let’s rotate the upper arm and the lower arm and see if we can get the positioning just right.

Much better!
To pose hands, you don’t have to painstakingly move every finger! To access the hand quick controls, make sure the 3D model is selected. Then locate the Tool Property window in the CSP interface and click on the icon in the lower right corner that looks like a small wrench. This opens the Sub Tool Detail options.
Click on “Hand pose” on the left side of the Sub Tool Detail box to access the pose options. There are a few preset fist poses marked as icons at the bottom of the hand pose controls. You can also drag the + symbol in the triangle to open and close the fingers and spread them further apart or make them close together. To lock a finger, click on the icon above that finger to turn it into a chain link.

You can also click the Hand and Camera icon at the top of the Hand pose controls to allow CSP to access your device’s camera and pose the hand in real-time using your own hand, but we won’t be discussing that in detail in this article.
If you want to pose both hands at once, simply use the controls. If you want to pose only one hand, click on that hand to select it before changing the controls.

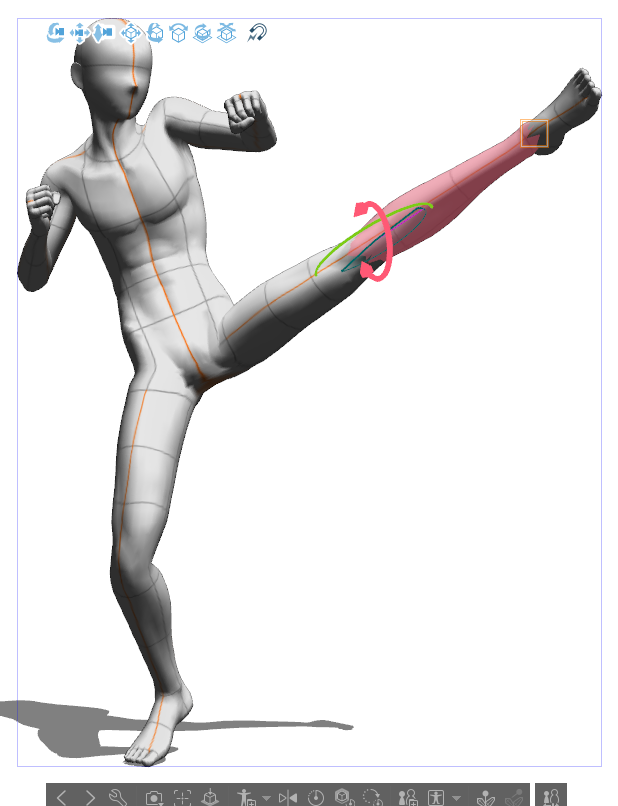
With the new posing updates in Ver2.3.1, it is much faster to get a more realistic pose you can use for reference for your drawings. Now that there are joint limits too it is much harder to do something like turn the leg around backwards while trying to position it for a kick!

Working with Multiple 3D Models
A fight scene doesn’t have just one character in it (unless we’re making the comic adaptation of Fight Club or your second character is invisible!) so now we need to know how to put multiple 3D models into the same space!
I’m going to construct a simple fight scene using the Uppercut model from earlier and a second 3D model that I’m going to adjust using the “Slip on a banana peel” pose from the Material Library as a base. I like using the pre-made poses as bases to save time while making poses, and this pose is close to the final look I want for my second figure.
To add a second model into the same space as our first model, we are going to select the model that we want to add (in this case, I am selecting the “Slip on a banana peel” pose as the second model) and then drag and drop the pose from the Material library onto the canvas. Make sure that the layer with your first 3D model is ACTIVE before doing this, or the model you’re adding will be separate from the first and you won’t be able to move the camera around both models at the same time.
In the screenshot below, I’ve added the second model. But, as you can see, it isn’t in the right place to be the opponent for our uppercutting character!

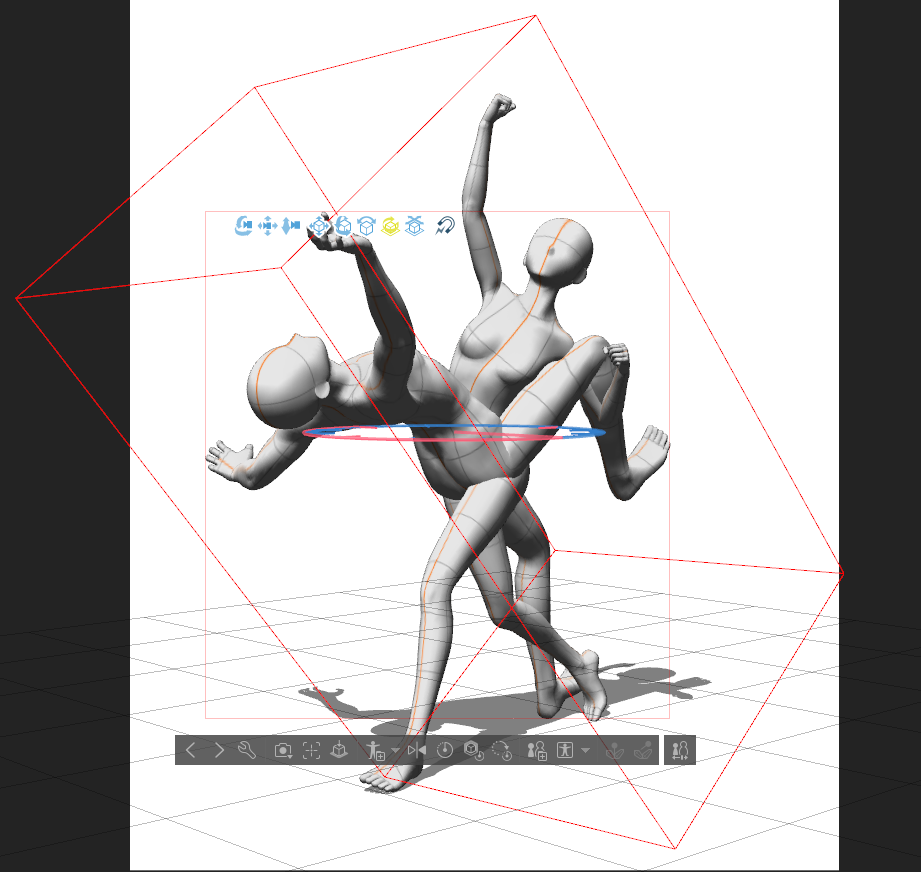
In order to move our 3D character and our 3D camera around, we need to take a look at the icons above the selected model. The first three control the 3D camera, while the five on the right control the position and rotation of the 3D model. A more in-depth description of each icon, from left to right, is below.
Rotate 3D Camera - Rotate the camera around the 3D models
Pan 3D Camera - Move the 3D camera up, down, left, and right.
Zoom 3D Camera - Move the 3D camera closer to or further away from the 3D models.
Move 3D Model - Move the 3D model up, down, left, right.
Rotate 3D Model - Freely Rotate the 3D model
Rotate Model Left/Right - Rotate model only on specified axis
Rotate Model sideways - Rotate model only around the up/down axis.
Move Model in space - Move model closer to or further from the 3D camera.
The first thing I did was rotate the second model so that it was facing the opposite direction of my first model. The icon I used to accomplish this is highlighted in the screenshot below. Simply click on the icon and drag to perform the model or camera movement.

Now that the model is facing the direction I want it to be, I need to move it in front of the first character so it looks like he’s being thrown off his feet by the power of a punch! To do this, I first moved the 3D camera using the camera controls, then moved the 3D model through the space to get him in front of the punching model.
To help keep your models aligned, you can check to make sure that the boundary boxes show up while you’re moving one around. These help you to align 3D objects in real time, and really speed up the process!

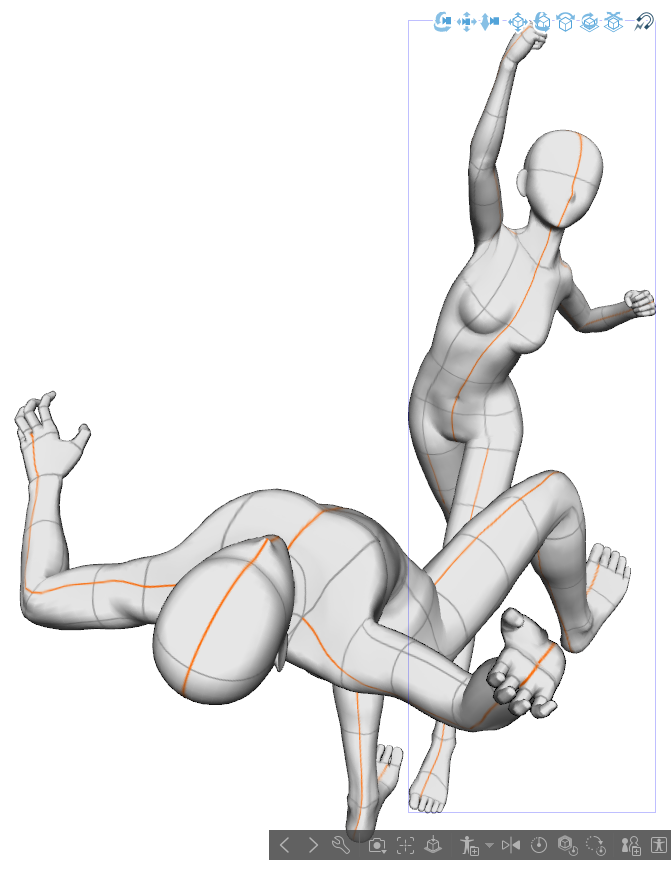
Now that the models are set up, we can use the camera rotate, pan, and zoom tools to move around to the perfect angle for our final piece. I decided to rotate the camera to a high angle so both of the character’s faces would be seen in the final drawing and then zoomed in so we feel like we’re part of the action! I also made sure to tweak each pose as needed, especially to move any overlapping model parts that would cause confusing silhouettes in the final drawing.

Finishing Touches
Now that we’ve set up our fight scene, we can use it to make our drawing. I like to drop the opacity of the 3D model layer to 50-75% and draw on a layer above the models with my preferred drawing tools. I tweak proportions slightly to better fit my characters, add expressions, hair, clothes, and motion lines so that the scene looks dynamic! A new feature in CSP is also that a perspective ruler/grid is visible when working on a layer separate from 3D models, making it much easier to sketch or ink in background elements, such as buildings.

Conclusion
3D models are a great way to get reference for some of the most challenging illustration scenarios. Having them natively available in Clip Studio Paint means that you don’t have to switch to another 3D program to set up a scene, screenshot it, and then import it into CSP to use it as a reference, which means that you save time by not switching between applications. Once you get the feel for 3D models, you can use them in all sorts of scenarios to improve your workflow!
For more information on CLIP Studio Paint, please visit https://www.clipstudio.net/en or https://graphixly.com