Painting Easy Beautiful Eyes
Contact Graphixly @
Hello! My name is Liz Staley and I’m a long-time user of Clip Studio Paint (I started using the program back when it was known as Manga Studio 4!). I was a beta-tester on the Manga Studio 5 program and for Clip Studio Paint, and I have written three books and several video courses about the program. Many of you probably know my name from those books, in fact. I write weekly posts on Graphixly.com and on CSP Tips, so be sure to come back every week to learn more Clip Studio Tips and Tricks from me!
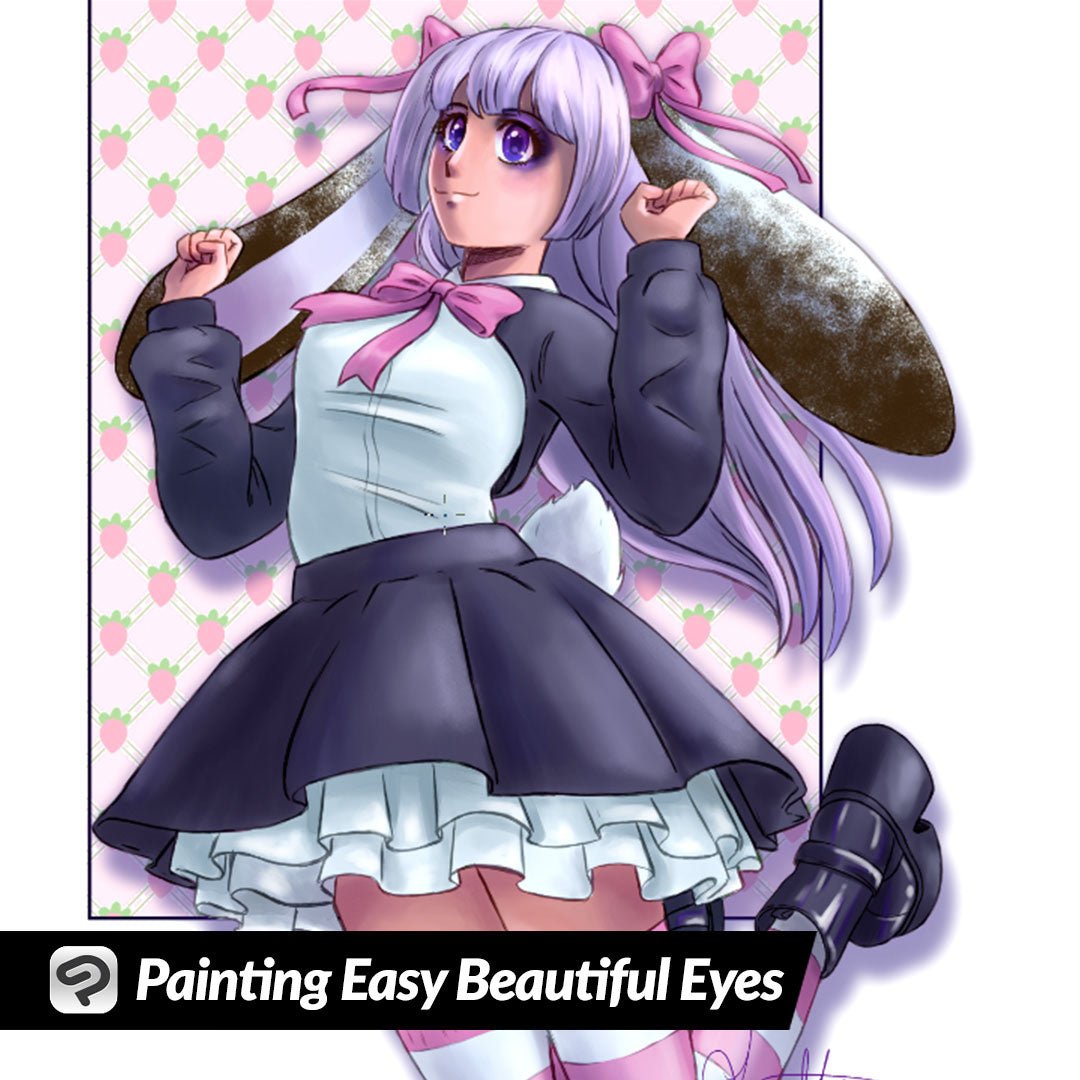
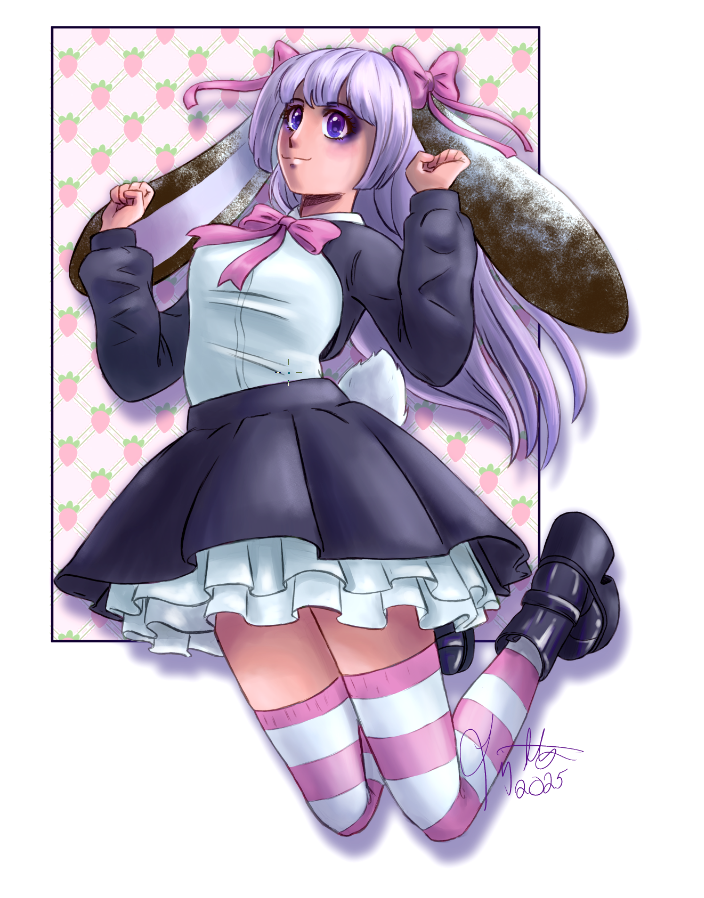
This week we are going to finish up the illustration I’ve been working on for the past few articles! I left the eyes until last because I wanted to do more detailed eyes than I normally do and thought it would be fun to write about the process. Plus I want to add some makeup to the character’s eyes, and since I couldn’t find too many tutorials about this I thought it would be useful to write that process as well!
In this article we will cover the following topics:
Painting Easy (But Pretty!) Eyes
Creating Eye Makeup
Let’s finish this illustration!
Painting Easy (But Pretty!) Eyes
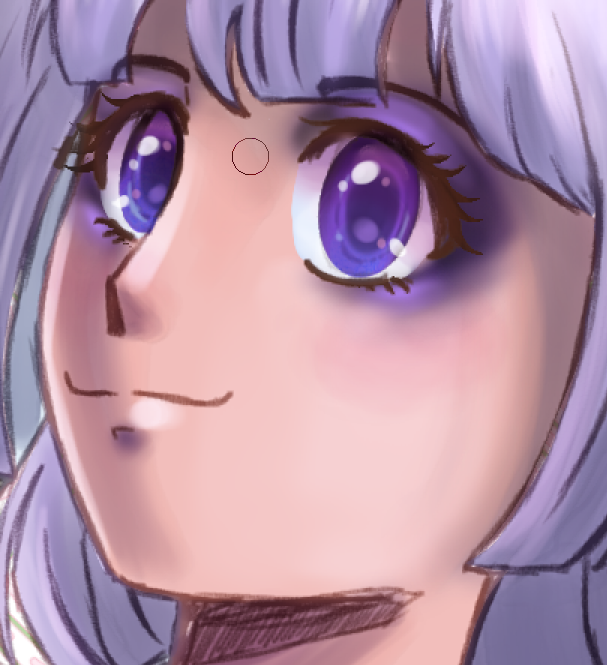
For the painting on these eyes I will be using the Round Watercolor default brush from newer versions of Clip Studio Paint (If you are using an older version you can use the Opaque watercolor brush for basically the same effect!)
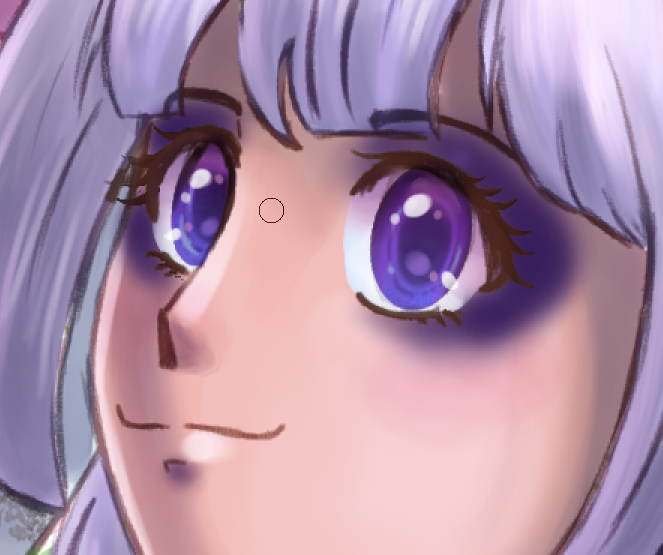
To start, I made a selection from the layer where I drew the whites of the character’s eyes back during the flatting process. Then I created a new layer to paint in the whites of the eyes. Using a pinkish-purple color I applied it dark to the top of the eye and then blended down toward the lower eyelid.
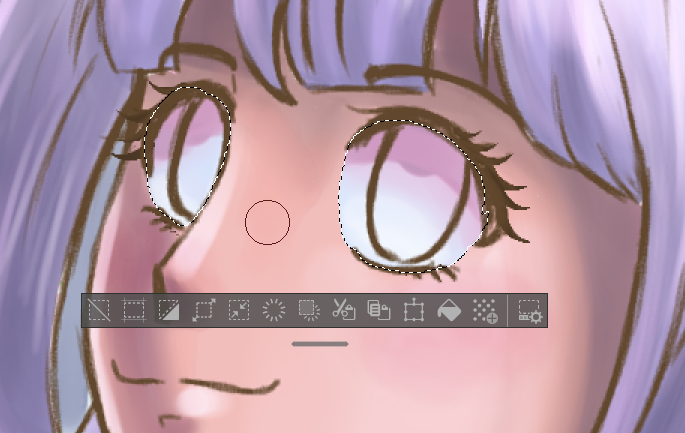
It was at this point that I realized I didn’t need the iris lines at the moment but would need them later for reference. So I selected my lineart layer and used the Soft eraser tool to lighten the pupil lines so they weren’t obstructing the painting any more.
Now back to the eye whites shading layer! I used a darker purple shade at the top of the eye and a bright white toward the bottom, then blended them some more to get the look I wanted. You can blend by either using the watercolor brush tool very lightly over applied color, or use the Blend tool.

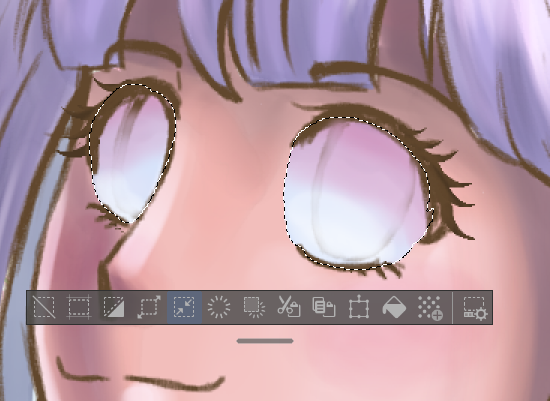
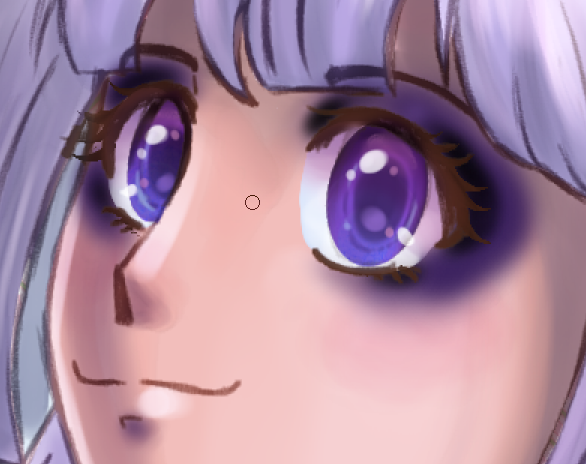
Now create a new layer for the irises. I used the ellipse selection tool to draw out an oval, then filled it with the eye color I want. Click the Scale/Rotate tool in the top toolbar, then rotate and scale the pupil to fit in the eye. You may need to uncheck the “Keep aspect ratio” checkbox in the Tool Property window to scale the pupil to the shape you want. Position the iris in the eye and click on OK to confirm the changes.

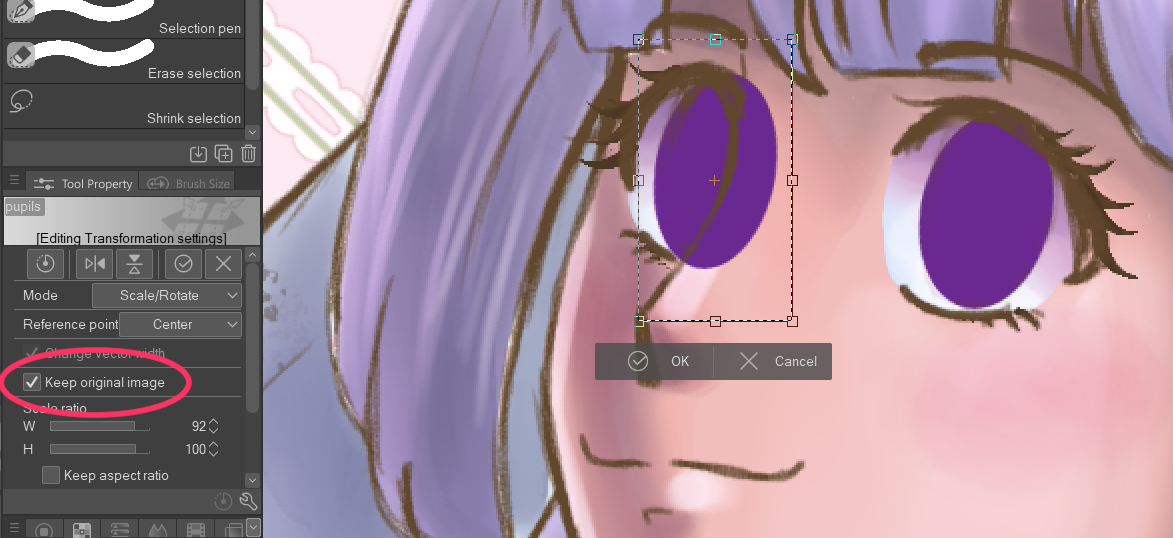
Now click on the Scale/Rotate tool again to select your iris. In the Tool Property window, click on the “Keep original image” checkbox. Then click and drag on the iris to drag out a copy. Scale and rotate the iris to the second eye. Click OK and then erase any areas that aren’t needed (i.e. covered by the bridge of the nose, as in my illustration).
Right click the iris layer and click Selection from Layer - Create Selection to draw a selection on both irises. Then take a lighter color and add highlighting to the bottom of the eyes.
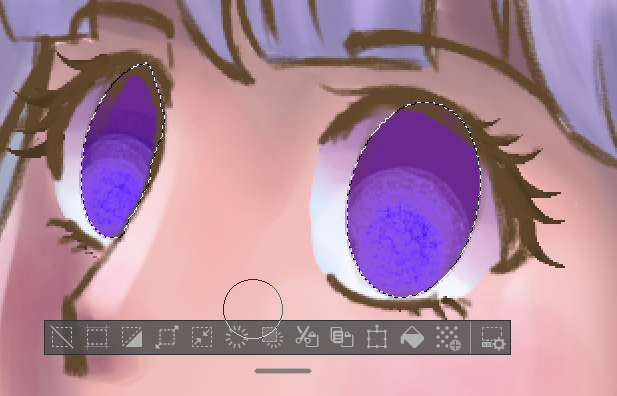
Use the Blend tool to blend out the colors to make a smooth gradient.

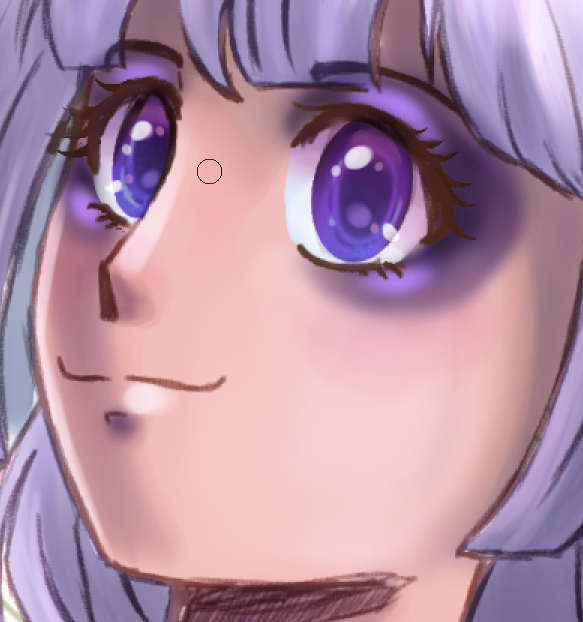
Now I’m going to make another new layer and name it pupils. On this layer I’m taking a very dark version of my iris color. I used this to paint in the shape of the pupils and also to add some dark areas to the upper part and down the sides of the iris.
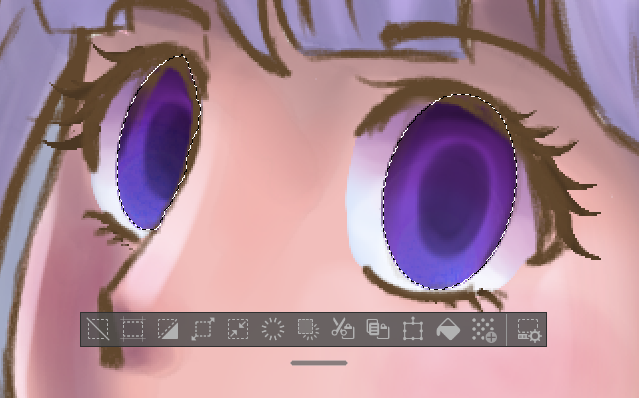
I created another new layer so that color from the pupil wouldn’t interfere with the small details. Using both a dark purple and a light blue, I added some thin lines and specks to the iris. I also took a pink color and added it to the bottom of the pupil.
Now for the final layer - it’s time to add some shine to these eyes and really bring them to life! Use white to add some light reflections on a new layer. I used the watercolor brush but if you want them to be very defined you can use a pen tool. I also added just a few little specks of pink on this layer to add a little more interest as well but these are optional.

Creating Eye Makeup
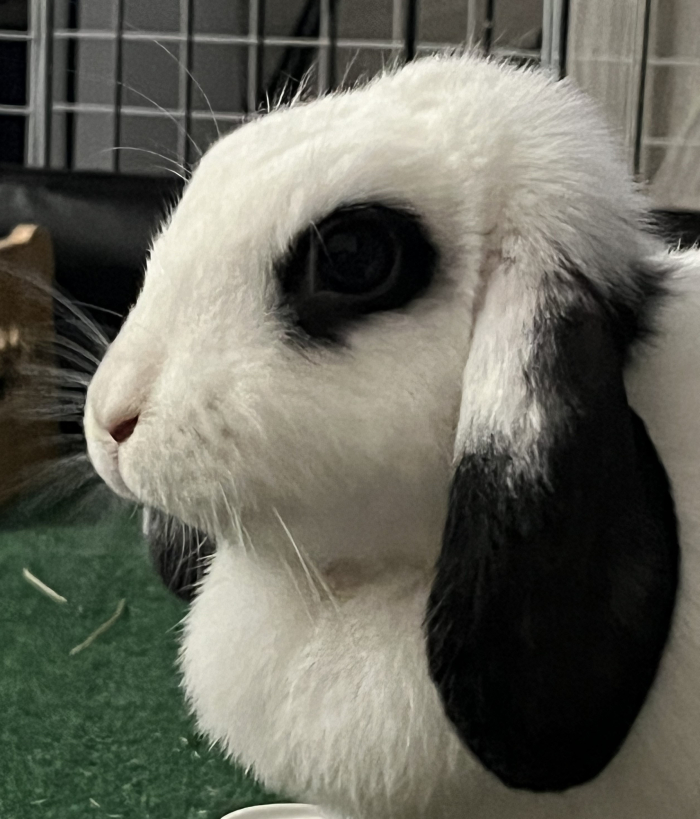
So what I haven’t told you yet is that this bunny girl anime character is supposed to be based on my real life pet bunny, who has some absolutely fabulous “smoky eyes” eyeshadow. I definitely want to include this on my character, so let’s make some smoky eye makeup as a final touch.
I also did a Google image search for smoky eye makeup so I am looking at some reference as well - which is very important because I am not good at makeup even when it’s not digital!
This is the only time that I used a tool other than the watercolor brushes and Blend tool for this image. Using the Soft airbrush on a new layer I brushed a dark purple color around the eyes.
With black, I added some darker areas in the inner upper lip, at the outside of the upper lid, and below the lower lashes.
Time for some highlights! I chose a light purple. Highlight along the middle of the upper lid where the light would hit and along the lower lash line.
Use the Blend tool to soften the edges and make the color transitions a little smoother.
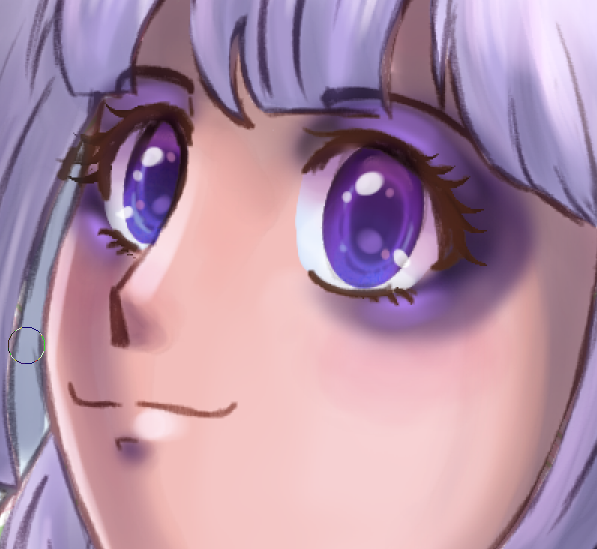
Finally, use the Soft eraser to clean up the edges and adjust the shape of the outside of the smoky eye.
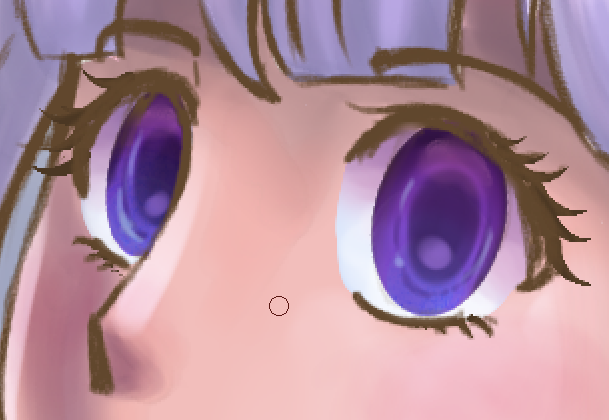
I added a few final touches to the background, adjusted the line colors, signed it, and this illustration is finally done!
Conclusion
I hope you have enjoyed the process of creating this illustration from thumbnail to finish, and that you picked up some helpful tips along the way!
For more information on CLIP Studio Paint, please visit https://www.clipstudio.net/en or https://graphixly.com