My Favourite Clip Studio Tools by Charles Kenway
Contact Graphixly @
By Charles Kenway
Based in Australia, with over 20 years making digital and non digital art, I’ve worked in TV, feature Films, advertising, games, music videos, digital content and even public art.
I’m sure there’s a bunch of other stuff in there too.
Oh yes storyboarding! I’ve done a galactic ‘ton’ of storyboards for all of the above, ranging from Audi cars to pot noodles, from a little pig called Babe to Lego Friends from children’s programming to indie horror.
Clip Studio became my first choice for digital painting, illustration, comics and frame by frame animation, several years ago, when I was given the opportunity to try it as it was still fairly unknown in the Anglophonic world.
I was very surprised by how powerful and versatile Clip Studio is and quickly forgot about those other more familiar apps that had become unworthy staples.
I also mix my work in Clip Studio with another innovative program called Moho which has some great rigging and camera animation tools, plus some great ways of turning my Clip Studio illustrations and frame by frame animations into even larger more complex scenes.
They work really well together.
Here are a small selection of some of the reasons that I love Clip Studio so much.
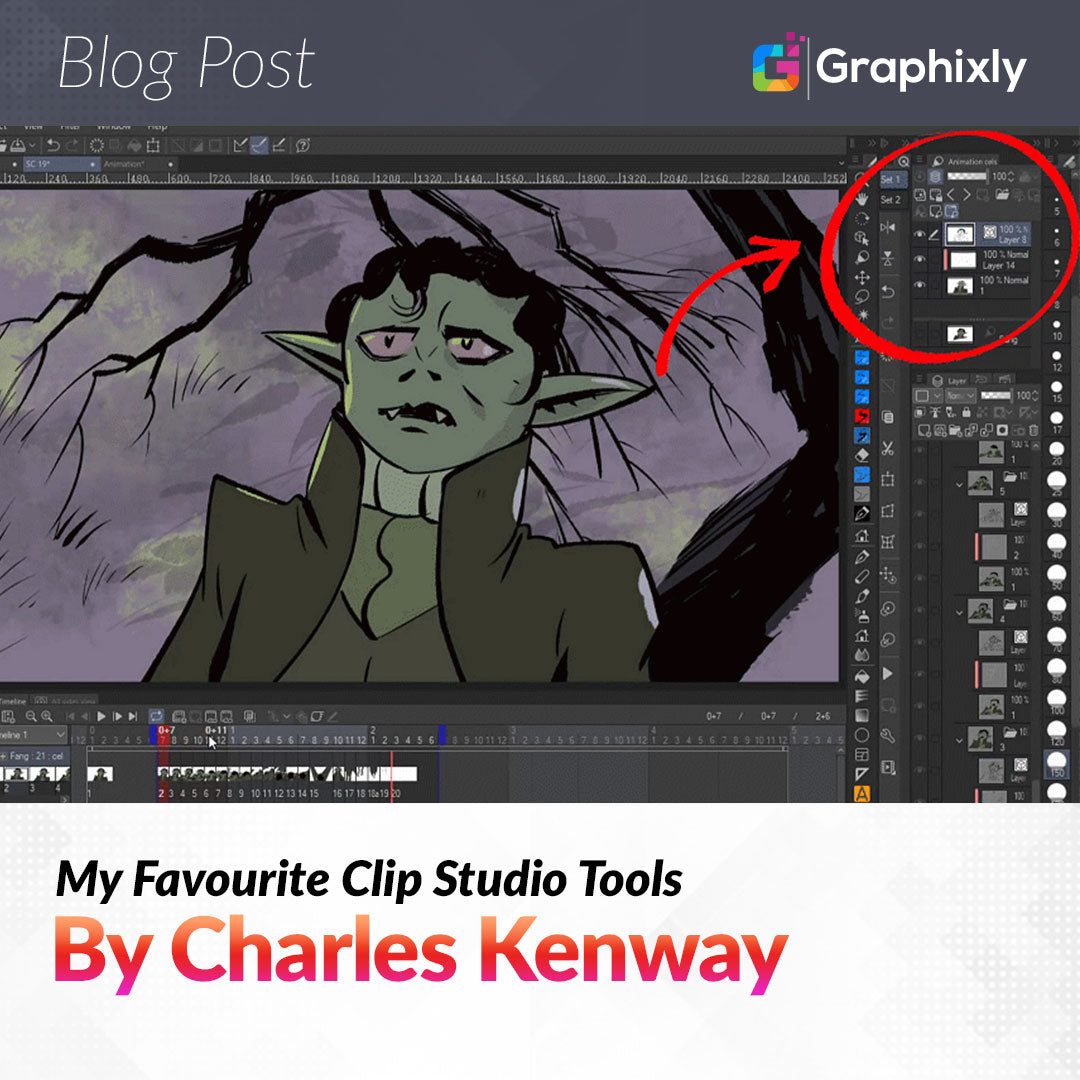
Animation Cels
Easy edit exactly the layer you need even in a long animation with lots of layers.
For example if you have made a group with a line layer, a fill, shadow and highlight, when you create a new cel , that cel is automatically added as a group, containing all the child layers of the last cel. Those layers are conveniently empty layers with the correct corresponding names, like line, clean, shadow and highlight
As you navigate from frame to frame the animation cels window opens that group only which makes it super quick and easy to draw the correct layer on the correct cel.
This feature is one of those that really grows on you, so I encourage any animator to try it, if they haven't so far.

Vector Eraser
Wherever the Vector strokes cross each other, the eraser can actually trim the lines at the intersection for really great clean ups with no overlaps just as you see in the image above.
Bam!
This makes a traditionally tedious task (in many other apps) quick, easy and fun- especially if you have configured one of your side buttons on your stylus as an eraser.
Quick access tool sets.
Conveniently configurable tool sets allow instant access to any of your favourite tools.
Multiple custom sets can be tabbed and placed in exactly the right place to speed up workflow by reducing hand stretching, combination keyboard shortcuts and/or awkward reaches to the top of the screen. Now you can place these function right near you hands resting spot... nice
Favourites for me include selection tools like deselect, onion skin settings and various transform tools.

Object tool
This tool is a strange chameleon like beasty, with so many context sensitive functions that I have not even discovered all it's tricks. So keep it at the ready.
Here are a couple very useful tricks availed by the 'Object' tool.
· Use it to select layers... Any part of the canvass you click on with the object tool becomes the active layer, no need to hunt through the layer stack... Just use the object tool.
· Text and bubbles, you can modify text and bubbles using the Object tool, pretty cool!
· Vector layers...Use the object tool to modify vector stroke: edit points, change the line width, even change the brush!
Do not underestimate this amazing tool.

Brush Engine
Clip Studio's brush engine is amazing, it has so many highly configurable variables that the possibilities are almost endless with graphs and sliders galore.
Not only that, but the brushes work both on raster and vector layers.
They also have plenty of blending modes and a configurable UI for each brush's options that can be seen in the detailed panel or added to the standard brush properties panel by simply selecting the icon.
Also it is highly accurate, as I discovered through a great variety of different projects, one in particular piece that needed to be scaled to over 3 metres tall, where every stipple had to fit with a small range of diameters that were laser cut through stainless steel.
Clip's brushes handled this with ease.
Tips and texture's scale independently as do particles of the spaying effect.
All brushes have access to exactly the same features, so there's no dead ends when it comes to creating exactly the brush you need.
Of course there's one more thing, if you are thinking of switching to Clip Studio from photoshop, you can easily import those brushes for a painless transition to the best drawing application on the planet.

Clip Layers
A super simple masking solution.
Clip layers restrict their transparency to the next layer below that is not also a clip layer.
This makes lighting and shading passes painless and cuts out more tedious making processes.

Timelapse
Timelapse records your brush strokes as you work and can render your progress as an mp4 as shown in the above demonstration of the clip layer feature.
There are a lot more things to celebrate in Clip Studio’s armory, but this article has to end somewhere.
I urge anyone just scratching the surface to dig deeper, the rabbit hole goes a long way.
To see some more of Charles’ work a good place to start is his YouTube channel Charles Kenway - YouTube
There you can find more information and links to his work and contact details.