Making an eBook in CSP
Contact Graphixly @
Hello! My name is Liz Staley and I’m a long-time user of Clip Studio Paint (I started using the program back when it was known as Manga Studio 4!). I was a beta-tester on the Manga Studio 5 program and for Clip Studio Paint, and I have written three books and several video courses about the program. Many of you probably know my name from those books, in fact. I write weekly posts on Graphixly.com and on CSP Tips, so be sure to come back every week to learn more Clip Studio Tips and Tricks from me!
Distributing or selling your work in PDF format is an often overlooked way to connect with your audience or make a little extra money. You can create digital art books, comic books and graphic novels, or any other eBook that you can dream up - and for most creators the features already available in Clip Studio Paint are more than enough to create these files!
In this article we will cover the following topics:
File Set Up
Adding Images and Text
Exporting a PDF
Let’s get started.
File Set Up
To create eBooks in CSP you will need to have the Clip Studio Paint EX version (not PRO), as this version will allow you to create multi-page files. If you do not have the EX version, you can create your individual pages and then use an Image to PDF creator to make your PDF book.
In this first section we will be setting up a multi-page file in CSP EX. Start by clicking on File - New.

At the top of this window, be sure to enter a File Name and also choose a folder to save your project in. If you don’t choose a folder then your file will not be created.
The images that I want to put into this book are 8x10 inches, so that will be the width and height in the “Canvas” section. If you will be sending this PDF to a printer to get physical books made, be sure to set your Resolution to at least 300.
If you are creating a book that will be only in digital format, the “Comic Settings” section is less important than if you will be creating this PDF for printing. However, I still like to turn these on so that I will have margins on each page to make sure that the pages look nice and neat and the text and images aren’t too close to the edge of the pages in the file.
Since I won’t be printing this book I’m setting my trim size to the same size as the width and height set in Canvas. The Inner Border settings is where I’ll set the inner margins of the pages. These will only be visible in Clip Studio Paint and will not export to the final file.
If you want a more detailed run-down of the canvas, trim, and inner border settings, please check out this previous article I wrote on the subject!
https://tips.clip-studio.com/en-us/articles/3458#2949e246
I do want a cover page for this eBook so check the “Cover Page” section to turn it on. Since we’re just making an eBook this isn’t really necessary, but I like having the cover pages marked out for me, especially since without the Inner cover pages being included I tend to forget to put in things like copyright information and social media handles, so it’s basically a little reminder for me!
Down at the bottom left of the New File window, click the check box next to the “Multiple Pages” section. Now is the time to figure out how many pages we want. You can always add and delete pages later. Note that if you have the cover page option turned on, four of these pages will be delegated to the front and back cover.
I set the binding point to left because, if I did print this out, I would want it to be laid out with the binding on the Left. If you want your book bound manga-style, choose the Right binding option instead.
I also knew I wanted to do two-page spreads, so check the “Combine into two-page spreads” checkbox as well to have this done automatically by Clip Studio.

Click OK to create the file. Depending on your hardware and the number of pages, this may take several minutes to complete.

Adding Images and Text
For this example I am creating an art book of a collection of my drawings. If you are creating, say, a graphic novel, then you may want to start the comic drawing process at this point. However, I will be adding some images and text to each layout. So let’s go over how to add these elements to your pages.
Double-click on one of your pages to open it for editing. To add an image file to the currently open page, click File - Import - Image.

Choose the image file you wish to import and click Open. Your image will be imported with a bounding box around it that allows you to scale, rotate, and move the image to where you want to place it. I have chosen to create a simple cover design by putting three of my favorite images from this set together.

Choose the text tool and click on the canvas to add your title. While you’re using the text tool there are tons of editing options for text available in the Tool Property window! Below the screenshot is a brief rundown of these options and what they do.

Font - Set the Font from fonts installed on your device.
Size - Set the size of the font
Horizontal Ratio - Controls the horizontal squash or stretch of the letters
Vertical Ratio - Controls the vertical squash or stretch of the letters
Kernig - Control space between individual letters, used for correcting letters spaced too close together or too far apart.
Style - Bold, Italics, Underline, or Strikethrough the text.
Alignment - Set text to left justified, Centered, Right Justified, or to fill all lines equally.
Text Direction - Set text horizontal or text Vertical
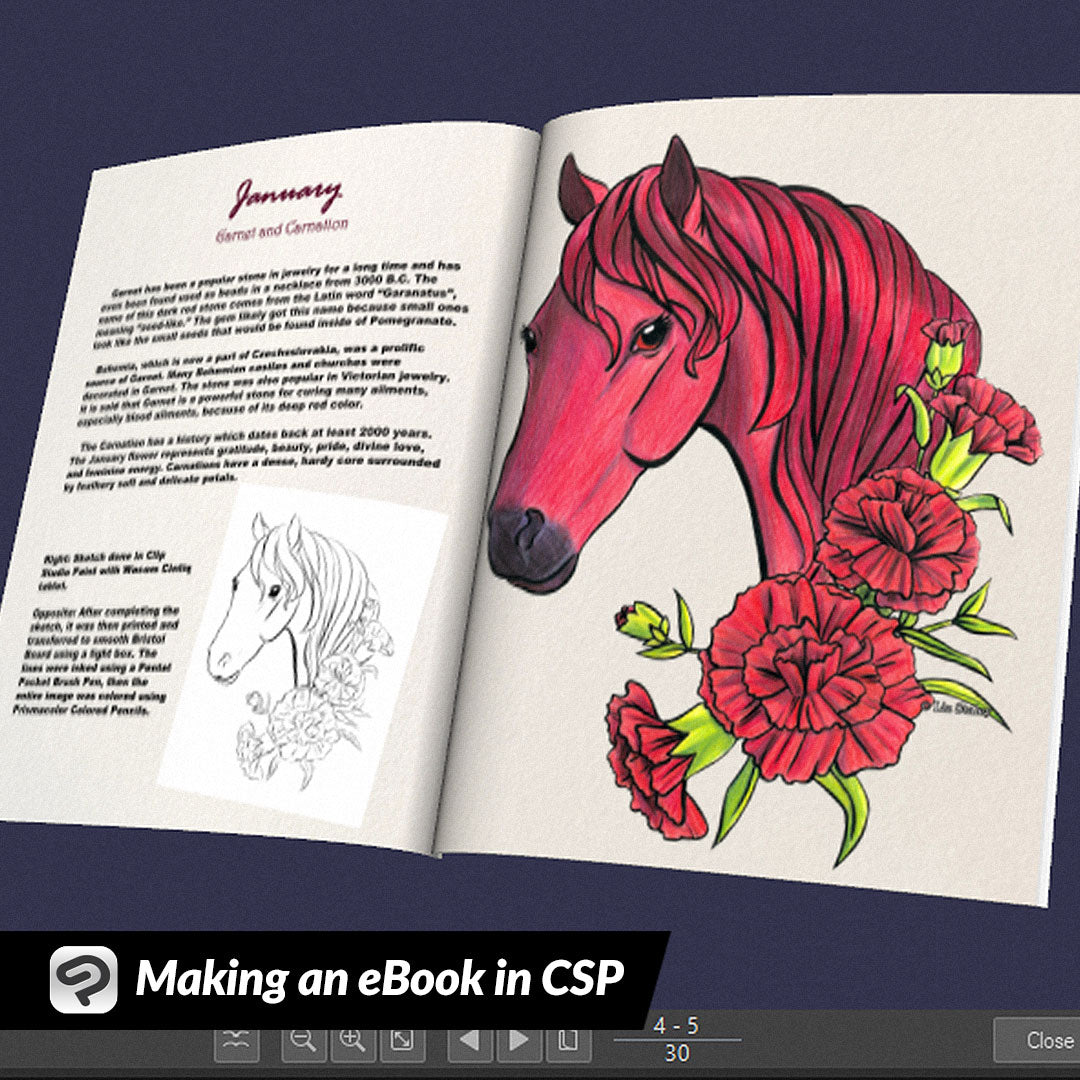
Lay out all your pages with whatever text and images you want to put into your eBook. I wanted mine to include some information about the gems and flowers that inspired the artwork, as well as info about how each piece was made. Remember that most people love to hear about an artist’s process and thoughts, so be sure to include some interesting info where applicable! It can make your eBook more interesting to look through for your audience.

Exporting a PDF
Now that we have our book all laid out, it’s time to export it to a PDF that can then be distributed as an eBook! But first, let’s take a look at a preview of our book. I find this step to be invaluable to see any mistakes in my layouts.
Click on file - Export Multiple Pages - 3D Preview for Binding.

Clip Studio will show the following message while it compiles the 3D preview. Depending on the size of your file and your hardware, this may take some time.

Once compiling is done, the 3D Preview for Binding window will show. Here we can view our file how it would look if we got it printed and sent to be bound into a real book! Even though we’re just making an eBook here, I do like doing this because it makes my brain easier to pick up on mistakes. Something about seeing it how it would look if it was a physical object just makes my brain look at it differently, I guess?

You can use the direction arrows at the bottom of the preview window to flip through the digital book and look at the pages. Zoom in or out with the magnifying glass buttons.

If you need to make adjustments, click on Close and then open your page and make changes. Once you are satisfied with the look of your ebook, we’ll export! Click File - Export multiple pages - PDF Format.

Choose where you want to save your PDF. Type in the File Name you want to save under as well. In the Page Range section, you can choose to export all the pages, only the cover pages, or only the inside pages. You can even choose to only export certain of the interior pages.
If you have made your file with two-page spreads but want to export them as individual pages, check the “Split spread pages” box at the bottom. Click OK to start the export process.

And you’re done! Now you can use your PDF however you wish!
Conclusion
If all you want is to put together simple PDF books to showcase your art and you already have Clip Studio Paint EX, then you have the tools needed already! Though fancy layout programs are awesome, they aren’t necessarily needed in situations where you just need to put together something simple.
For more information on CLIP Studio Paint, please visit https://www.clipstudio.net/en or https://graphixly.com