
Layer Organization for Effective Workflow
Contact Graphixly @
Hello! My name is Liz Staley and I’m a long-time user of Clip Studio Paint (I started using the program back when it was known as Manga Studio 4!). I was a beta-tester on the Manga Studio 5 program and for Clip Studio Paint, and I have written three books and several video courses about the program. Many of you probably know my name from those books, in fact. I write weekly posts on Graphixly.com and on CSP Tips, so be sure to come back every week to learn more Clip Studio Tips and Tricks from me!
Sometimes the amount of layers that can build up when doing a digital illustration is completely overwhelming. Depending on how you work, you can quickly get upwards of 20-50 layers even for a simple colored drawing! That’s where the features that we will cover this week come to the rescue though by letting us organize and color code layers in the layer palette window to find them easily.
In this article we will cover the following topics:
Using Layer Folders
Assigning Layer Palette Colors
Splitting Layer Palette into Two Panes
Let’s do some organizing!
Using Layer Folders
One of the easiest ways to start organizing layers is to use Layer Folders to group similar layers together. I like using these for storing sketch layers I’m no longer using, or for putting color layers for different characters or different parts of the image (i.e. foreground, background, etc) in. This also makes it easy to hide or unhide many layers at once by just toggling the visibility of the folder.
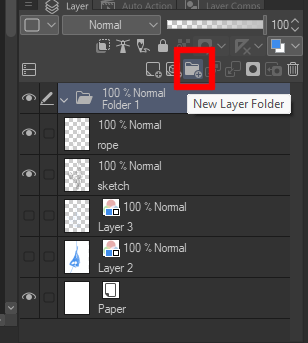
To add a Folder to the Layer palette, simply click the “New layer folder” icon above the list of layers, shown in the red box below.
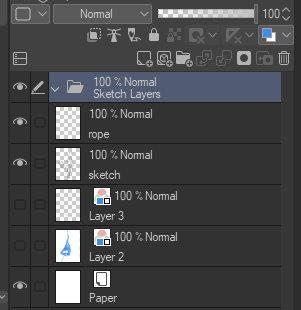
The folder will be created as “Folder 1” which isn’t very descriptive! Double-click the folder and type in a better name. I’ll be using this one to put my sketching layers in, so I’ve decided to name it “Sketch Layers”. Hit ENTER when done to finish renaming the folder.
Now we need to put some layers in this folder! If you are creating new layers to go in the folder, simply make sure that the folder is selected (is highlighted), then click the “New Layer” icon to create the layer directly in the selected folder.
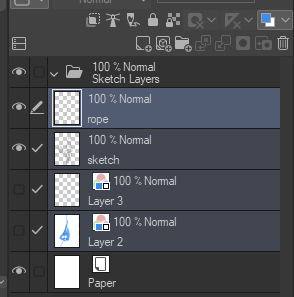
To move existing layers into a folder, select them by holding down SHIFT or CTRL on the keyboard to select multiple layers. All selected layers will be highlighted.
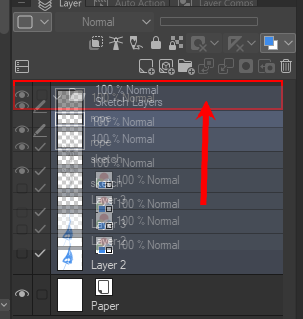
Click and drag the highlighted layers to the Layer Folder. When the layers are going to be placed in the folder, the folder layer will be surrounded by a red rectangle. Release when this shows up to place the folders in the layer.
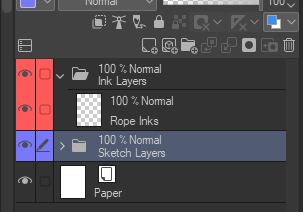
You can tell these layers are in the layer folder because their thumbnails and information are indented underneath the layer folder.

Now you can change the visibility of individual layers in the folder by clicking the eye icon to the left of the layer name, or change the visibility of all layers in the folder by clicking the eye next to the folder.
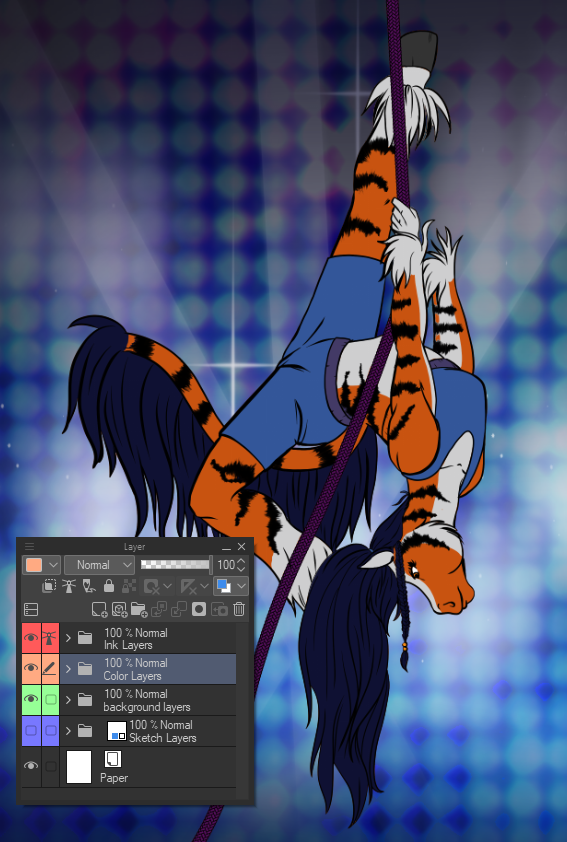
Assigning Layer Palette Colors
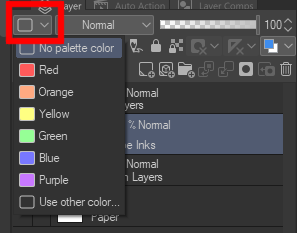
Another way of organizing layers is to assign them colors in the Layer palette. This makes it very easy to tell which layers are of similar things (i.e. a certain color for a specific character, or certain colors for sketch layers, ink layers, etc). To set a layer color click on the “Change palette color” dropdown menu to the left of the blending mode menu. You can then select a pre-set color or choose “Use other color…” to set your own.
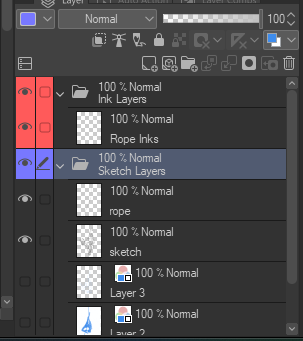
Layer palette colors can be set to both layers and layer folders.
However, note that assigning a color to a folder will NOT assign that color to all the layers inside of that folder! If you want the folder and the contents to have matching colors you will have to select the layers and folder by holding down SHIFT or CTRL and clicking them. Then you can assign a layer color to all the selected layers using the dropdown menu.
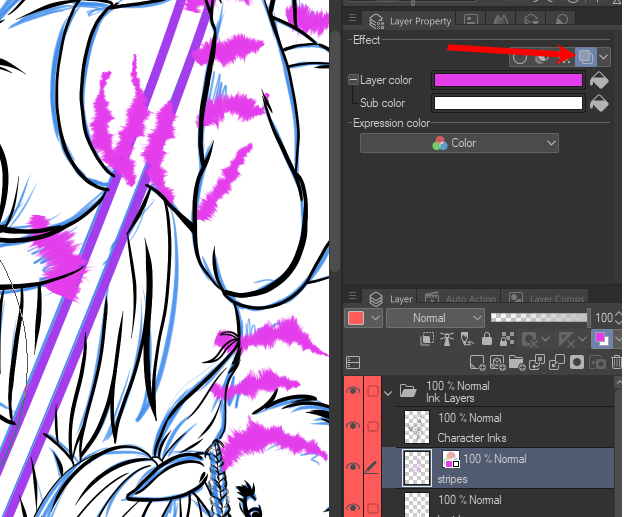
Note that this layer color is different from the Layer Color option found in the layer property palette! The Layer Color option in the Layer Property palette will change the color of all the contents of the selected layer to the chosen color while the option is on. When turned off, it will change the color of the layer contents back to their original color. The Palette Color option only changes the color of the icons next to the layer name in the Layer palette!
In the screenshot below the Layer Color option in Layer Property is set to pink, so the drawings on the “Stripes” layer have become pink. However, the layer palette color of this layer is set to red.
Splitting Layer Palette into Two Panes
If you have a very long list of layers that you’re constantly having to scroll up and down, you may want to use this last feature. In the Layer palette, click on the “Show layer in 2 panes” icon, outlined in red below. This splits the layer palette into two panes. Now you can scroll each pane individually and have each one at different points in the layer list.

With these features as well as being diligent with naming your layers, even the heftiest of layer lists can be well organized and easy to navigate!
Conclusion
Though it can be tempting to just create new layers and not name them or put them in folders, as your list of layers gets longer it can become almost impossible to find the one you’re looking for! A little bit of organization off the bat can save a lot of time in the long run when working on larger projects.
For more information on CLIP Studio Paint, please visit https://www.clipstudio.net/en or https://graphixly.com