Layer Mask Basics
Contact Graphixly @
Hello! My name is Liz Staley and I’m a long-time user of Clip Studio Paint (I started using the program back when it was known as Manga Studio 4!). I was a beta-tester on the Manga Studio 5 program and for Clip Studio Paint, and I have written three books and several video courses about the program. Many of you probably know my name from those books, in fact. I write weekly posts on Graphixly.com and on CSP Tips, so be sure to come back every week to learn more Clip Studio Tips and Tricks from me!
Layer masks are an extremely powerful tool for so many reasons, but so many CSP users don’t seem to know how to use them or what they do! They are powerful but also very easy to use once you have a little experience with them. So this week let’s take a look at the basics of Layer Masks!
In this article we will cover the following topics:
Layer Mask Basics
Creating Layer Mask From Selection
Let’s learn about the versatility of Layer Masks!
Layer Mask Basics
A layer mask allows us to hide parts of a layer without deleting any of the data from that layer. Since it is non-destructive, it’s a great way to “erase” parts of an image but leaving that image still intact for use elsewhere. For instance, if you have a character with a logo on their shirt and you create the full logo, but only need to use half of the logo when the character is turned to the side, you could use a layer mask to adjust the logo without having to delete any of it.
I also like to use layer masks when doing very tricky operations, such as removing the background from a piece that I’ve scanned so that it has transparency around it. Using a layer mask for this type of task means that if I zoom out and realize I ‘erased’ something incorrectly, the pixels can be brought back with the stroke of a pen and there’s no harm done!
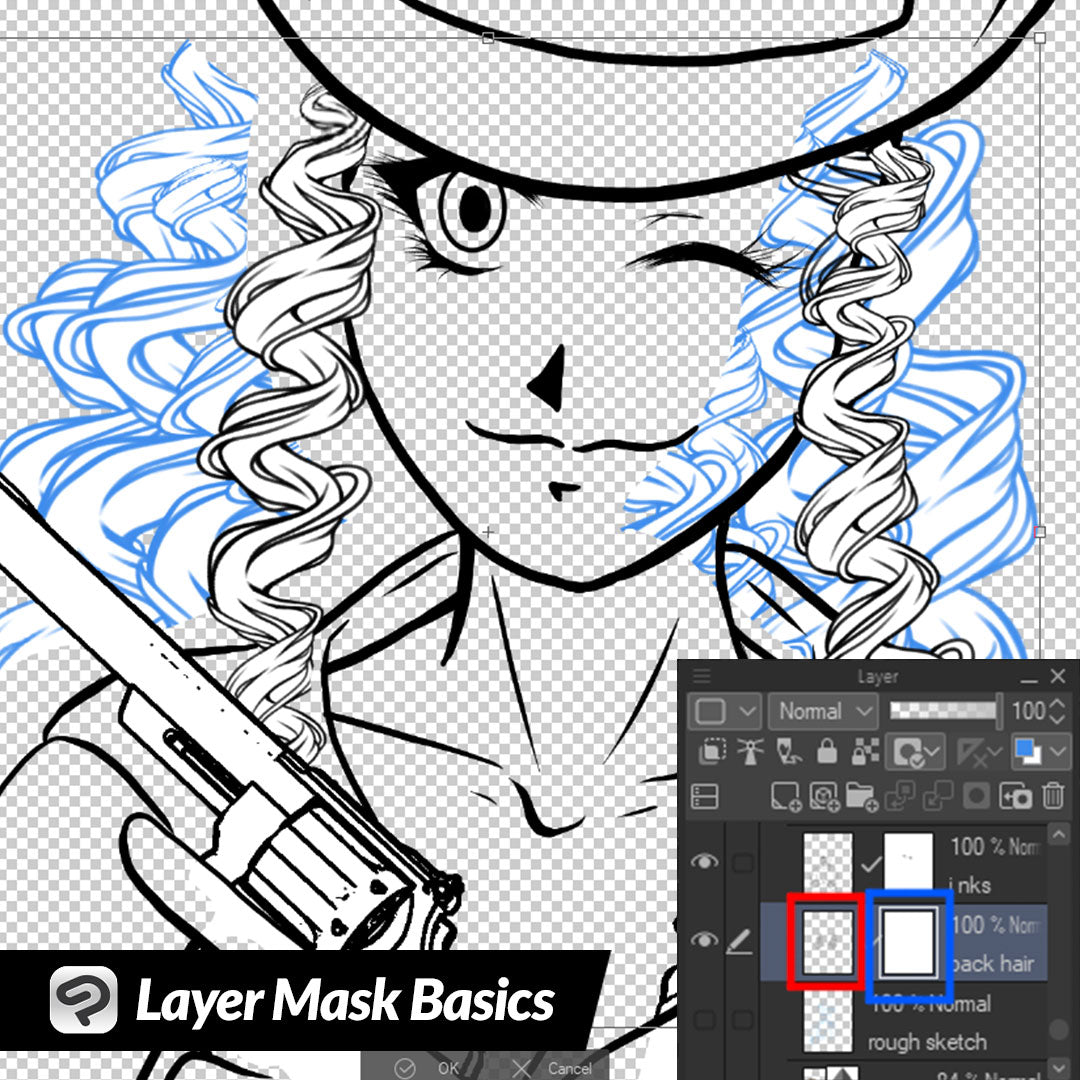
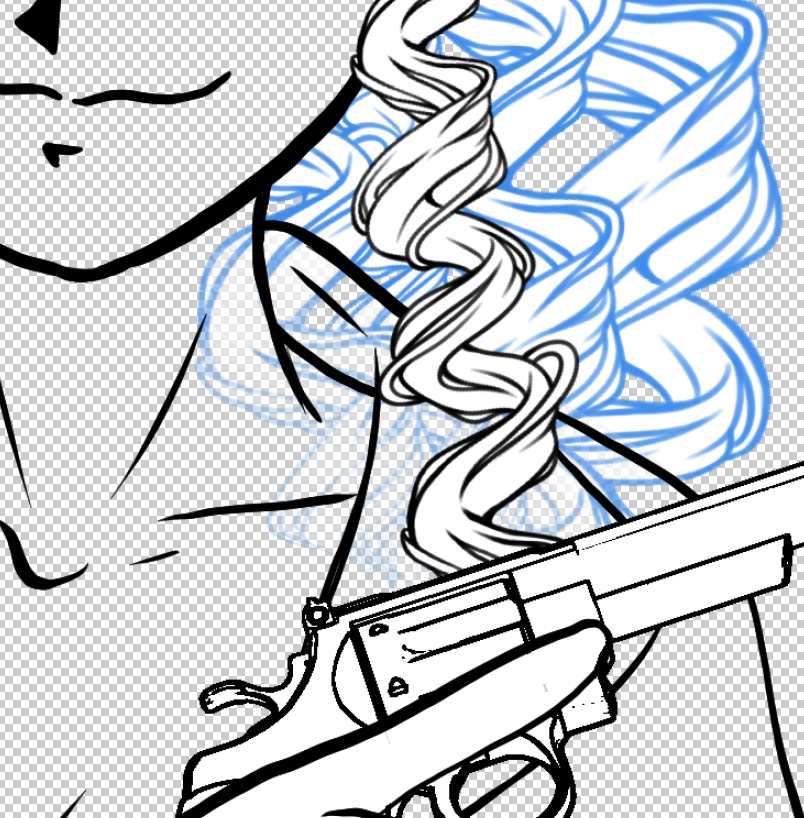
I created the drawing below with several different elements, including 3D models for the weapons, and a curl brush for the hair. The hair is on two layers - one for the foreground and then one for the hair that is behind the face and body. Because of this, there is quite a bit of masking that needs to be done to clean up the lines and make it look like all one layer of lineart.

For this example I’m going to be working with the back layer of hair. I found and selected this layer. Then, in the layer palette window, click on the Add Layer Mask icon, shown in the red square below.

This will add the layer mask to this layer. The layer mask shows as another icon to the right of the layer’s icon in the layer list. In the screenshot below, the layer itself is in the red rectangle and the mask is in the blue one. If you look at the layer mask below you will see that there is a small white outline around it, showing that the mask is currently active. This means that any changes we make will be applied to the mask and not the layer itself unless we click the layer’s icon.

Now we can use various tools to make changes to the layer mask to hide and show the contents of the connected layer. Using an eraser tool allows us to “erase” the contents of the layer I want to hide behind the character’s body in the example below.

To create special effects, you can also use soft erasers to fade edges. We can also use brush tools set to transparent and with the opacity reduced to create an opacity fade. I created the fade below using a brush tool set to 25% opacity and transparent ‘color’, then overlapped the tool on the mask several times to create the fading effect.

To bring back areas that are hidden by the layer mask, select a drawing tool and set the drawing color to black. Then go over the area you want to restore.

If you need to move, scale, rotate, or otherwise transform a layer with a layer mask attached, you can do so without having to change the layer mask at all. The mask will move and change with changes made to the main layer!

Creating Layer Mask from Selection
If you don’t want to painstakingly mask out areas with the eraser tool, you can also quickly mask large areas using selection tools! I used the Lasso tool to select the areas of the hair that I want to mask out below.

Now click on Layer - Layer Mask. You will see two options for creating a mask. Let’s click on “Mask Outside Selection” first.

Anything outside of our selection area on the layer we’re currently working with will have the mask applied to it.

This wasn’t what I wanted to do in my example image, so I hit Undo and now let’s look at the Layer - Layer Mask - Mask Selection option.

The layer mask is created and the mask is applied to the area inside of the selection, which is the area I wanted to mask out!

Conclusion
Even with just the basics of using Layer Masks, you can unlock powerful tools to create your art! Next week we will be looking at using layer masks to shade your colored artwork more easily, so stay tuned!
For more information on CLIP Studio Paint, please visit https://www.clipstudio.net/en or https://graphixly.com