Idea to Finished Product with Doug Hills
Fahim Niaz @
Hello, everyone! I’m very thankful for the opportunity to guest blog here on Graphixly!
While most people that use Clip Studio Paint probably know me from the various tutorials and books I’ve created covering the program, I also dabble a bit in the art world.
Over the last 18 years, I’ve had the opportunity to work on a variety of projects, including commercial storyboards, concept art, and comic books. More recently, I’ve been creating commissions that combine two of my favorite genres: comic books, and professional wrestling.
Mike Kingston (creator/writer of the comic book series Headlocked), recently approached me to work on a series of prints that would be sold at independent wrestling shows and comic conventions. These prints would re-imagine classic comic book covers or movie posters with wrestlers replacing the main characters.
For this guest post, I wanted to break down the process I go through from idea to finished product.
Planning The Commission
All of my projects begin with a discussion with my client, breaking down exactly what they are envisioning. In Mike’s case, he sends me a comic cover or movie poster that he thinks could work as an homage for a particular wrestler or event.
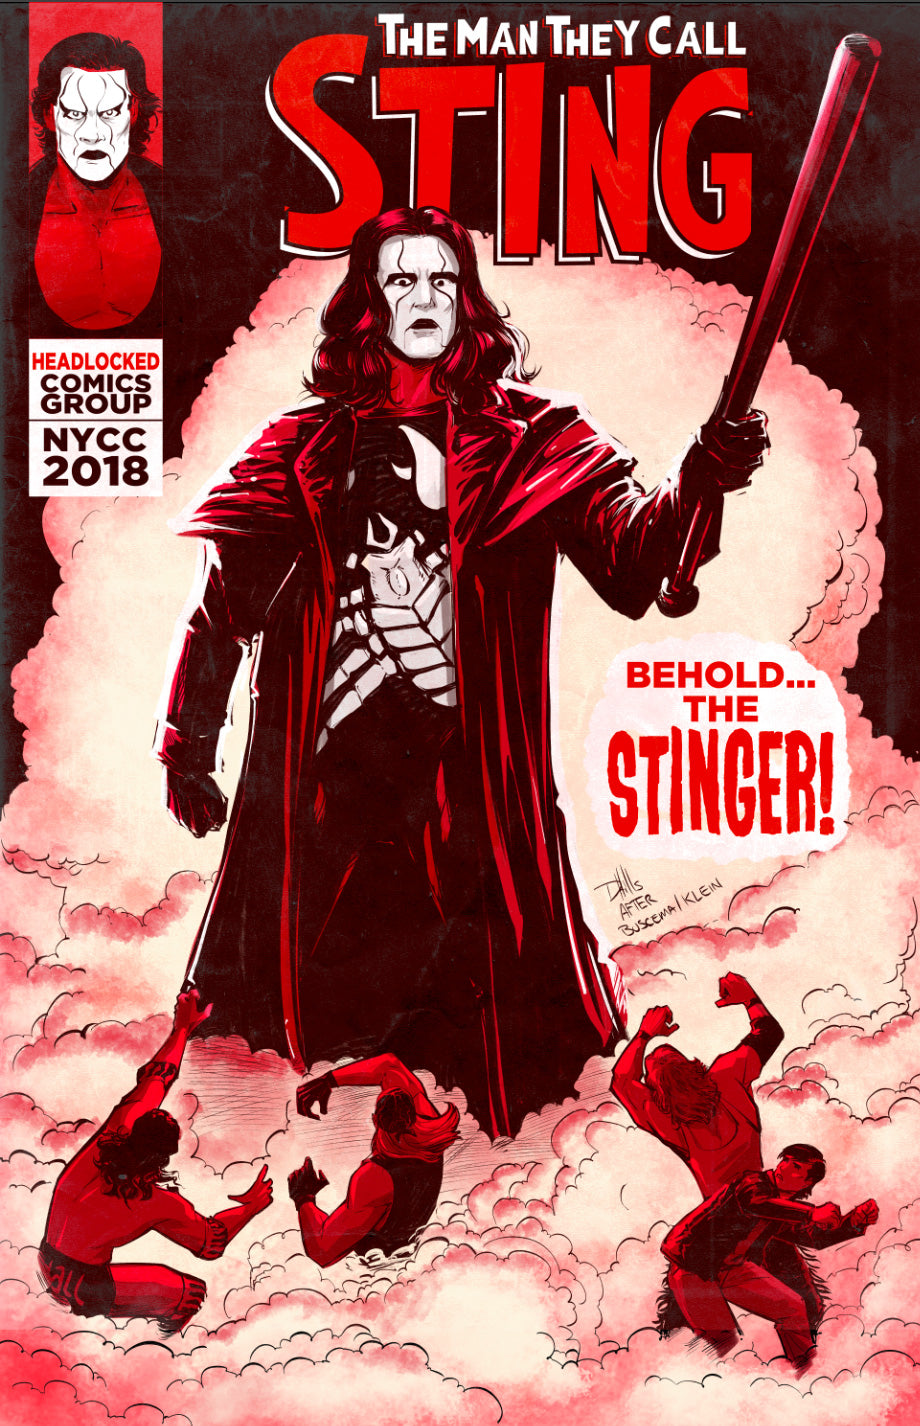
In this example, he chose this classic Avengers cover to showcase professional wrestling legend Sting. This print was available for fans to purchase at the 2018 New York Comic Con.

Creating the Canvas
The first thing that I need to do is prepare my canvas.
I create a new page at 11 inches by 17 inches. The image resolution is set at 350 dpi, which is slightly higher than the normal print quality of 300 dpi. This results in a slight sharpening of the image as it is eventually reduced to normal print quality.
Because the print will not be trimmed (ie: there will be a white border around the artwork), I don’t worry about adding the manga draft settings to note the bleed area.

Importing The Original Art
When creating an homage, I like to import the original artwork. That way, I can draw above it (on a new layer), to match the general dimensions & character positions.
I first select File ➔ Import ➔ Image from the Main Menu. I then navigate to the location that I saved the original cover, select the image, and press Open.

Right now, the image is smaller than the canvas. The good news is that the image has been imported as an Image Adjustment Layer (note the resize nodes around it). So, it’s very easy to resize to fit the canvas.
Making sure the Object Select tool is selected, I head over to the Tool Property Palette….

I find the Adjust Position drop down list, and switch from Free Position to Canvas. Once I do that….

The cover now fits the canvas! You can see that there are still some white areas above and below the image. That’s not a problem; I’ll just fill those areas in as I work.
Pencils
The next step is to start pencilling where the characters will be in the scene, matching where they are in the original piece.
So, I switch to the Layers Palette, and reduce the opacity of the Avengers layer to about 30 percent. Then I add a new raster layer above it.
From there, I select a pencil tool, and create a loose drawing of the characters.

When it’s time to refine the look, I hide the Avengers layer, reduce the opacity of my loose pencil layer, add a new raster layer, and start tightening my pencils.

Note that, while more refined than the first pass, I’m still keeping my pencils pretty loose. This is because I want to save the final pass for the line art when I begin inking.
Inks and Colors
Here is where the real heavy lifting begins!
I first reduce the opacity of the pencils layer. Then, switching to the Layer Property Palette, I click on the Layer Color button. This changes the color of all of the linear to a specific color. In this case, I use the default blue color.
From there, I add a new raster layer, switch to the Pen Tool (Selecting the Real G Pen Sub Tool), and I begin to ink over the pencils.
And, after a couple of hours…

…The inks are done.
Because the original piece was monochrome (using primarily red), coloring the piece was relatively simple. After hiding my pencil layer, I created a raster layer below my inks. Then, using the Fill Lasso tool, I selected and filled in the characters.

I then add a new layer, changing its blending mode to Overlay. This allows me to add some highlights and shadows to the characters, giving them a bit more depth.

I add two more layers: First, to add some shadow to the white areas on Sting…

Then, to add white highlights.

To make the white pop more, I add a layer below the inks and colors, and fill it in with a light cream color.

To give some depth to the clouds, I switch to a custom Cloud brush (created by Brian Allen), and paint in some red shadowing.

Now, I need to add the sidebar to the upper left corner of the piece.
Using the rectangle Marquee Tool, I select and fill in the sidebar’s primary colors.

Then, using the same method I used to create the main portion of the piece, I create a small drawing of Sting.

Text & Logos
The primary portion of the artwork is done! Now it’s time to add the lettering. This is where I take advantage of a couple of other art programs that I own.
The first thing I do is check the text styling of the original piece, and see if I have a similar font either on my computer, or on the Internet (preferably a free-for-commercial-use font, as the print is intended to be resold).
Once I find the fonts (and install them into my computer), I start adding in text.

For the logo, a font that matches the Avengers title font didn’t exist. So, I needed to create it by hand.
For this process, I used Affinity Designer. This is a vector based program for Macs, similar to Adobe Illustrator (but one that I find much easier to use).
Using a copy of the Avengers logo as a reference, I created lettering that closely resembled the original font.

I provided two options for text placement for Mike to choose from (he preferred Option 2).
From there, I selected the preferred title, and exported it as a transparent PNG.
(By the way, If you don’t own Affinity Designer or other vector programs, don’t worry! It’s possible to do this in Clip Studio Paint. This is just my preferred method of creating logos.)
Returning to Clip Studio Paint, I import the logo into the piece (erasing parts that overlap over Sting’s head).

And to give the piece the weathered comic look, I import a vintage paper texture that I found on the Internet, changed the blending mode from normal to Hard Light, and reduced the opacity down to 25%

Final Edits and Export
Once I believe the piece is done, I send it off to Mike for his approval. If there are any changes requested, I go back, revise, and re-send the image for his approval.
Once he’s happy with everything, I export two copies of the image: one at web quality, and another at print quality. I upload them to a shared cloud drive, where he then shares the image on social media, and sends off to be printed.
And then, we go through the process again for the next commission!
(For the record, Sting was quite pleased with how this piece came out. :) )
All told, I believe this took about 20 hours to create. It can be daunting, and sometimes a bit frustrating (no one ever said creating art was easy!). But, the end result is always satisfying, especially when my clients are pleased.
I hope you found this step-by-step breakdown useful! If you have any questions, or just want to say hello, find me on social media:
- Twitter: @dnhills
- Facebook: /dnhills
- Instagram: @dnhills
- Website: dnhills.com
1 comments
Mr. Doug Hill,
I’ve followed your tutorials on YouTube for some time now and just wanted to write to you. I am very grateful for the information that you share with us hungry artists. Awesome work as ever!
Thank you,
Max