How to Use Puppet Warp
Contact Graphixly @
Hello! My name is Liz Staley and I’m a long-time user of Clip Studio Paint (I started using the program back when it was known as Manga Studio 4!). I was a beta-tester on the Manga Studio 5 program and for Clip Studio Paint, and I have written three books and several video courses about the program. Many of you probably know my name from those books, in fact. I write weekly posts on Graphixly.com and on CSP Tips, so be sure to come back every week to learn more Clip Studio Tips and Tricks from me!
This week, let’s continue our exploration of new features in Clip Studio Paint 4.0 by learning how to use the new Puppet Warp feature! This feature allows you to quickly and easily re-pose your characters - even after you’ve finished coloring!
In this article we will cover the following topics:
Using Puppet Warp
Warping Using Selections
Let’s get down to it!
Using Puppet Warp
So first of all we’re going to need something to use the Puppet Warp feature on. This could be anything really, but I’m going to go with the drawing I created below.

If your drawing is made up of multiple layers that you want to warp together, such as ink lines and colors, you don’t need to merge them! Simply select all the layers you want to warp in the Layers palette by holding down either SHIFT and CTRL and clicking. You can also put your layers into a layer folder and select the folder as well.

Next, click on Edit - Transform - Puppet Warp.

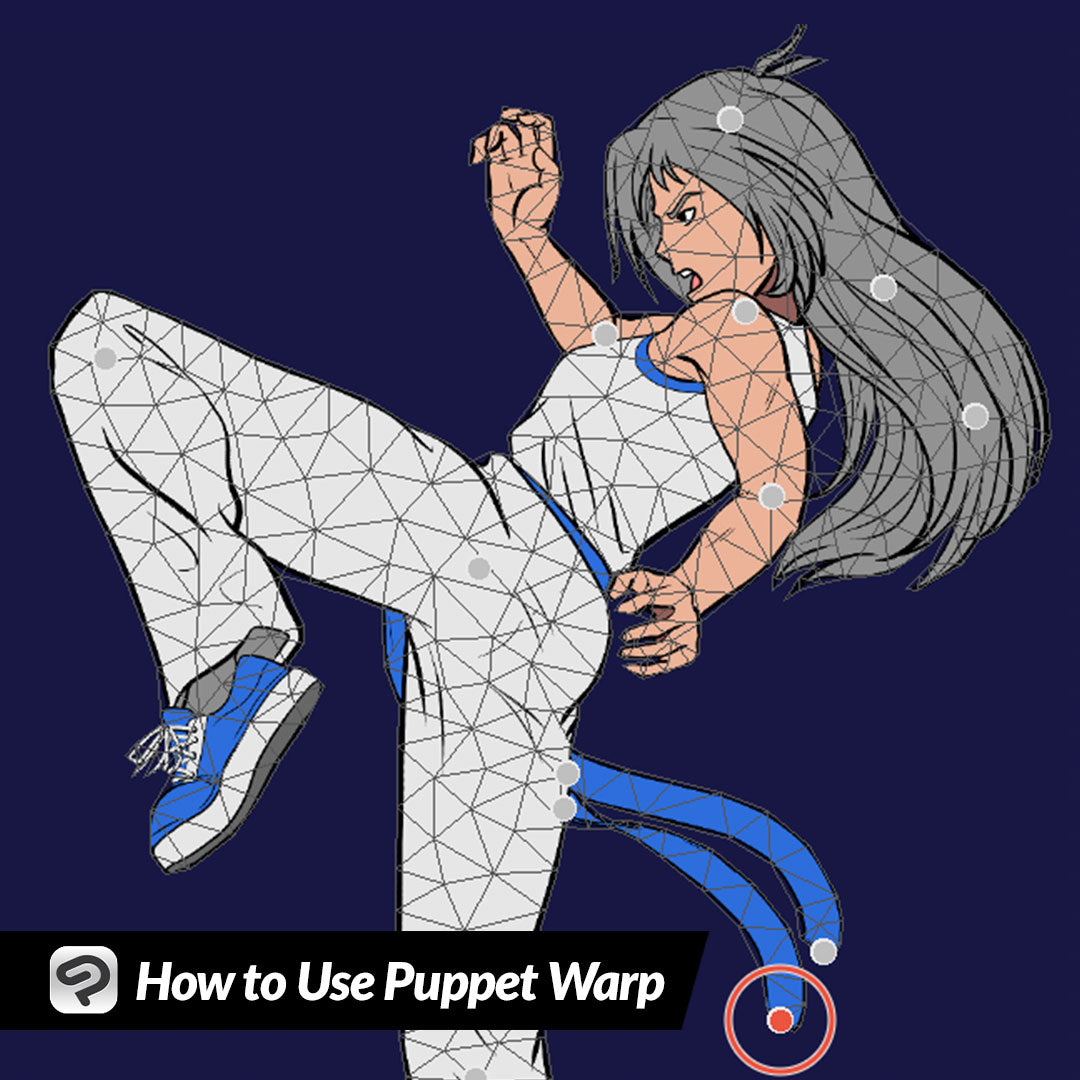
A mesh of triangles will appear over your drawing.

Before we can start warping, we need to put down “pins” by clicking on the mesh. These pins are areas that we don’t want to move and it’s usually good to put them on the joints if you are working on a character. These pins will also provide us with points to rotate or move around the mesh.

For this leg I chose first to put a pin at the hip, knee, and ankle.

Now I can use the pin at the ankle to either rotate the mesh by putting the cursor over the outside circle, or use it to move the mesh by dragging around the center dot. You can see how I’ve adjusted the position of the foot and the leg below.

If something isn’t moving the way you want it to, I recommend switching to the “Delete Pin” mode in the Tool Property window and clicking to delete a few pins, then switch back to “Select Pin” and try moving the pin again. For instance, to move the character’s entire leg, I would need to delete the ankle and knee pins and just use the pin at the hip.

To adjust the position of the ends of the belt, first I put pins at the side by the character’s leg so that those areas won’t move. Then I put a pin at each end of the belt. These are the pins I’ll be using to adjust the curve of the belt ends.

Then we can either use the rotate control on the pins to adjust the curve or move the middle circle of the pin to reposition the belts.

If you want to compare the original image with your adjusted one, click on the “Keep Original Image” checkbox in the Tool Property window. (You can also use this if you want to create a copy of the original and keep it while using Puppet Warp, if you need to!) Then uncheck this box when you’re done comparing.

Below, the left image is my original drawing and the right one is the one that I used Puppet Warp on.

Warping Using Selections
So what happens if you want to puppet warp only a part of an image? That’s where selection tools come in! For this example I still have both the line art and color layer selected in the Layer palette, and I’ve used the Lasso tool to draw a selection around the right leg.

Now click on Edit - Transform - Puppet Warp. The Puppet Warp mesh will show only in the area of the selection. Make sure to add pins along any areas that you don’t want to move, especially those that are up against unselected parts of the character.

Use the pin controls to rotate the mesh around or move the drawing.

When making your selection or placing your pins, be very careful! For this example I should have either selected the ends of the belt while selecting the leg or placed more pins along the edge to prevent the “tear” that occurred in the screenshot below. If something like this happens, you can use Undo and either add to your selection area or redo the Puppet Warp with more pins to prevent the movement.

Conclusion
Puppet Warp has been a heavily requested feature for a long time, and I’m glad it’s finally here! It is going to be a great addition to my workflow to fine-tune poses and make sure they’re as close to perfect as they can be.
For more information on CLIP Studio Paint, please visit https://www.clipstudio.net/en or https://graphixly.com