
Grouping 3D Models
Contact Graphixly @
Hello! My name is Liz Staley and I’m a long-time user of Clip Studio Paint (I started using the program back when it was known as Manga Studio 4!). I was a beta-tester on the Manga Studio 5 program and for Clip Studio Paint, and I have written three books and several video courses about the program. Many of you probably know my name from those books, in fact. I write weekly posts on Graphixly.com and on CSP Tips, so be sure to come back every week to learn more Clip Studio Tips and Tricks from me!
The newest version of Clip Studio Paint, Ver 2.2.1, has added some interesting new features. This update is only available to those who are paying monthly or have the Update Pass. One of these new features is the ability to group 3D models and attach them together to move them as one unit, which is something I have wanted for forever! In this article we will explore how to use this feature to attach some items to a 3D drawing model.
In this article we will cover the following topics:
Attaching and Positioning 3D Items to Drawing Model
Let’s get down to business!
Attaching and Positioning 3D items to Drawing Model
With this new feature, we can not only group items like a book and a desk, but we can also add items to character models such as weapons, cell phones, and even hair or clothing models. To test out this new process I wanted to try putting this hair model and staff model on to a basic drawing model.
Staff from here: https://assets.clip-studio.com/en-us/detail?id=1905762
Hair model from here: https://assets.clip-studio.com/en-us/detail?id=1884693

Let’s start with the hair. I started out by moving the hair model to the head, though this turned out to be an unnecessary step because I ended up having to move it again anyway in the next few steps.
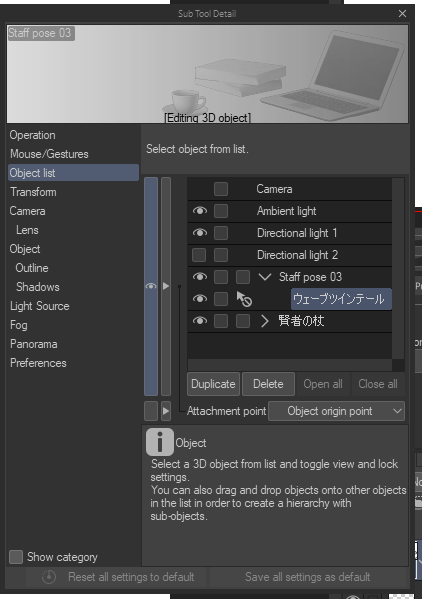
With one of your 3D models selected, open the Sub Tool Detail window by clicking on the wrench icon in the lower right hand corner of the Tool Property palette. On the left side of the Sub Tool Detail window, click on the Object List option.

Because we are going to be putting these objects on the character model, we want the character to be the “main” model and the other two models to be attached to it. So in the Object List I made sure the model for the hairstyle was selected. Then click and drag the hair model to the character model, which is called “Staff pose 03”. You will see a red box as you drag the model name up the list. Release when the red box is over the model you want to attach to.

Now the hairstyle model is an object underneath of “Staff Pose 02”.
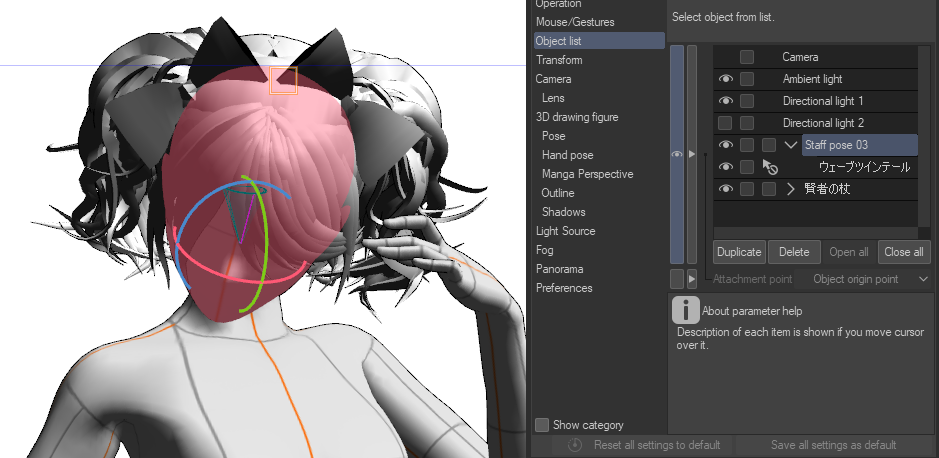
Once we complete this step the “Attachment point” dropdown menu will be accessible. This allows us to choose where to attach the second model to the first one. I selected “Head” from the menu.
After selecting the attachment point, I then had to move and scale the hairstyle model so that it fit on to the head of the character model and was the correct size.
Once you have the model where you want it in relation to the head, you can make changes to the model’s position and the hair will follow it!
So much easier than having to move both items separately! Plus this makes it much easier to change a pose if you decide you don’t like it once you get your accessories positioned.

Now let’s attach the staff model to the character’s right hand. To start, open the Sub Tool Detail window and make sure you’re in the Object List. Then drag and drop the staff item onto the model so that it’s nested underneath it.
Now I’m going to select “right hand” from the Attachment Point drop-down menu.

Using the Operation - Object sub tool we can now use the 3D control tools to move, scale, and rotate the staff object so that it’s in the correct position in the character’s hand.

With the staff object attached to the model, now whenever we change the position of the right hand the staff will move with it.

Conclusion
For those who use multiple 3D models in one image, this feature is a game changer that will make your workflow so much faster. If you have the update pass or monthly subscription, this is definitely a great feature to have!
For more information on CLIP Studio Paint, please visit https://www.clipstudio.net/en or https://graphixly.com