
Exporting An Image With A Watermark
Contact Graphixly @
Hello! My name is Liz Staley and I’m a long-time user of Clip Studio Paint (I started using the program back when it was known as Manga Studio 4!). I was a beta-tester on the Manga Studio 5 program and for Clip Studio Paint, and I have written three books and several video courses about the program. Many of you probably know my name from those books, in fact. I write weekly posts on Graphixly.com and on CSP Tips, so be sure to come back every week to learn more Clip Studio Tips and Tricks from me!
In the latest update, 2.2.1 (available to those with monthly subscriptions and also who have purchased an update pass) we finally have the ability to add a watermark when exporting an image! In this post let’s take a look at how to do this and the options available for our watermark.
In this article we will cover the following topics:
Exporting an Image with a Watermark
Let’s get to it.
Exporting Image with a Watermark
To get started, click on File - Export (Single Layer) - and then choose the file format you’d like to export your image at. I’m choosing .jpg for the example in this article.

At the bottom of the export settings window is a new “Watermark” section, outlined in red below.

Click on the “Add a watermark” checkbox. This will make the Watermark settings box clickable, so click there to start setting up a watermark.

In the Watermark settings window we will see a preview of the image we’re exporting. Below the preview are standard controls to zoom in, zoom out, and pan around the image to get a closer look at what’s going on.

Beneath the preview area is a button that says “Files”. Click here and choose the file that you’d like to use for your watermark.

We can use the blue bounding box around the watermark image to resize, move, and rotate the watermark.
Beneath the file loading option, we have an option to change the Blending Mode. When we click on the dropdown menu you can see that we have all the same options that are available in the blending modes in the Layer palette in CSP.

To the right of the Blending mode dropdown menu is an opacity slider. I usually like to have my watermark at about 50% opacity.

Beneath the blending mode and opacity controls are tiling controls that allow us to automatically repeat the watermark across the image. Repeating a watermark across the image can make it more difficult for an art thief to crop out or erase it, so it can be a good way to protect your images.
Click the checkbox next to the Tiling option to enable it. The starting default options are “Repeat” and “Horizontal and Vertical.” This means that CSP repeats the image horizontally and vertically with no changes.

Another option for tiling is the “Reverse” option. This means that CSP will mirror the watermark across your exported image. Because “Horizontal and Vertical” are still enabled in the example below, it is mirroring both of those directions.

Another option is to Flip the watermark image, which mirrors the image and then repeats it so that it is flipped.

Now let’s talk about the Tiling Direction options! We’ve already seen the “Vertical and Horizontal” option in the previous examples. But we also have a “Only horizontal” option, shown below, that repeats only in the horizontal direction (great for long panoramic images).

There is also a “Only vertical” option that repeats the watermark in the vertical direction, which is perfect for long images.

I decided to rotate my watermark and have it on the Repeat tiling in both Horizontal and Vertical directions. Then I set the Blending Mode to “Overlay” and the opacity to 50%.
Once you have your watermark settings the way you’d like them, click on “OK” to continue the export process.

Because I decided to export my image as a jpg, the JPEG export settings window came up next for me. I chose the dpi and quality that I wanted to save my image at. I like to leave the “Preview rendering result on output” checkbox checked so that I can see how my exported image will look before I commit to it.

After clicking OK I get one more time to look over the image and make sure it’s the size and look that I want thanks to the Export preview that I mentioned above.
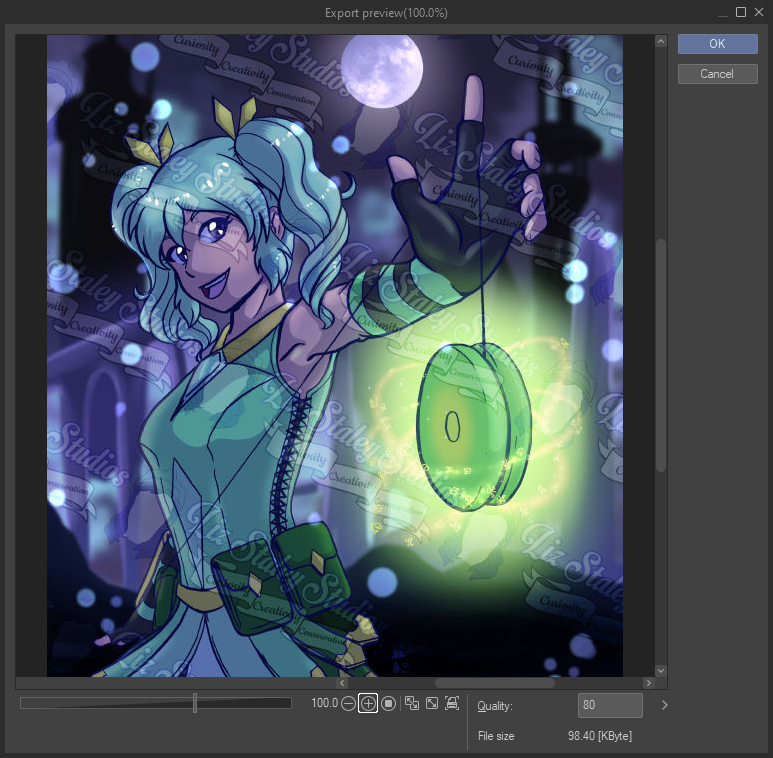
Click on OK to complete the export process and we’re done!
Conclusion
Watermarking your art can be an annoyance, but it is also one of the best ways to protect your work from art thieves. With this new feature available in 2.2.1 watermarking your art has never been easier.
For more information on CLIP Studio Paint, please visit https://www.clipstudio.net/en or https://graphixly.com