Creating GIFs for Social Media
Contact Graphixly @
Hello! My name is Liz Staley and I’m a long-time user of Clip Studio Paint (I started using the program back when it was known as Manga Studio 4!). I was a beta-tester on the Manga Studio 5 program and for Clip Studio Paint, and I have written three books and several video courses about the program. Many of you probably know my name from those books, in fact. I write weekly posts on Graphixly.com and on CSP Tips, so be sure to come back every week to learn more Clip Studio Tips and Tricks from me!
Creating gifs for use on social media and in mailings can be a great way to promote yourself. Especially if you brand these gifs and put them on Giphy, the library that most Facebook and Twitter users get their gifs from! Around 13 billion gifs are sent through Facebook each year. But what if you’re not an animator? That’s okay, you too can make gifs and add them to Giphy so they have the potential to be spread across the net! In this tutorial we’ll look at making a simple gif from existing artwork, even if you’re not an animator.
In this article we will cover the following topics:
Some Key GIF guidelines
Creating a simple GIF
Putting your Work on Giphy
Let’s dive right in!
Some Key GIF guidelines
One of the most important things to remember when you’re making a GIF specifically for social media is to know your audience. Search a few terms on Giphy, Facebook Messenger, or Twitter that are related to what you want to promote and see what’s being shared. Reaction GIFs and funny GIFs are very popular, especially among the younger crowds.
Here are a few other things to remember when creating GIFs.
Don’t crowd your GIF with too much text. These should be quick and shareable, so don’t put a novel on it. It will be hard to read and may go by too fast for the viewer to read it. If you’re adding text make sure that your font is legible, especially at the small sizes of mobile screens.
Gradients can sometimes compress badly in GIFs, so use them at your own discretion.
Try to keep your GIF to 30 seconds or less to keep your file size down.
These are, of course, suggestions as opposed to rules (though if you have text in a design you should ALWAYS make sure it’s readable), but they’re good things to keep in mind if you’re designing a GIF for shareability.
Now that we have a few guidelines to think about, let’s create a simple animated GIF.
Creating a Simple GIF
Before we get into this process, let me first say that this is probably not the “best” way to make a simple GIF in Clip Studio Paint, but this is the process I went through for this article. All the times I’ve animated in CSP before I have done hand-drawn “straight ahead” animation, so creating the work for this writing was a bit different than normal for me and took some experimenting, especially since I was working with pre-existing artwork.
Also, yes, I will be creating a Krampus GIF in this article, despite that it is just going into summer at the time of this writing. It’s not seasonally appropriate, but I feel that Krampus is for year-round anyway! :)
Okay, with that out of the way, let’s get into making this GIF! I will be making a canvas to design my GIF on, then adding the art from separate files into the GIF file. I’m starting with a relatively small canvas, 640x540 pixels and 72dpi. We’re designing for social media so it doesn’t need to be print quality.
As you can see in the image below, I am also leaving the “Create moving illustration” checkbox BLANK. This is because I want to get the elements of my design on the canvas first and then add the animation later. I found this to just be easier than starting off with a Timeline. This will make sense later.

Click on OK to create the new canvas. Your width and height may vary, but for mine I want a “landscape orientation” relatively small canvas size.
Next I’m going to start putting my artwork into the new canvas. I have my Krampus design open in Clip Studio Paint alongside the new canvas. I simply selected the entire drawing and copied it, then pasted it into the GIF canvas. Then I used the Transform tools to resize and reposition the art in the middle of the canvas.

Next I added a background color on the layer beneath my artwork. I ended up changing this later, but for now it makes the artwork a little easier to see.

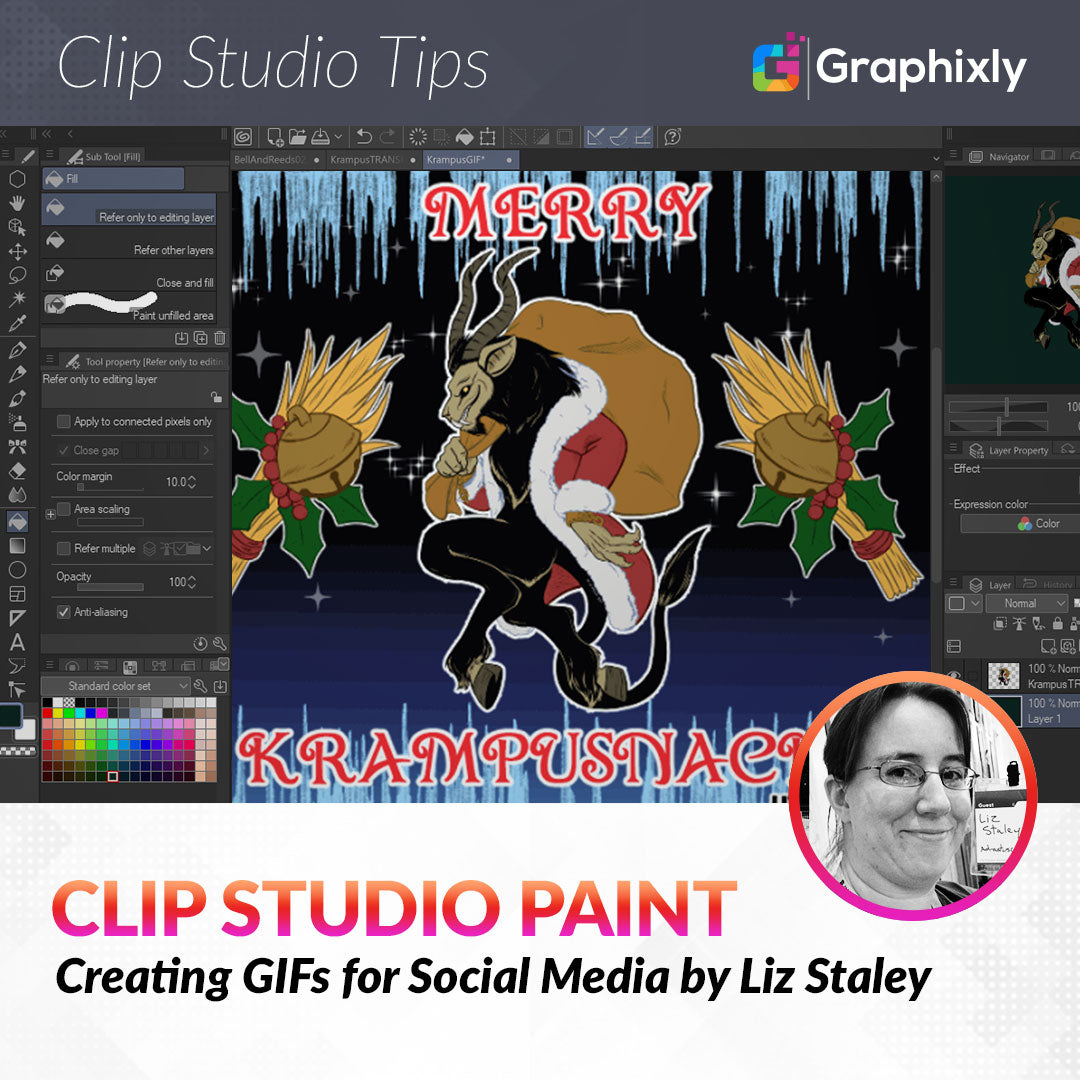
My intention for this GIF is for it to be shared on Krampusnacht, so I decided to add some text above and below the character that says “Merry Krampusnacht”. This should make it more shareable on December 5 (the date of Krampusnacht) and make it more clear who the character is supposed to be.

Don’t forget to also put some branding on your GIF if you are using it for promotional purposes. For this image I decided to put my website address at the bottom right in a simple, easy-to-read font.
With these elements in place, I used the same process that I used for the Krampus art to add my art of bells, holly, and bunches of reeds on each side of the GIF. These are the elements that I’m actually going to be animating when it comes time to do those steps.
This is also when I decided that I didn’t like the green background. So I added some icicles to the top and bottom edges (these came from a Clip Studio Asset by the user Thimsy. You can download them here: https://assets.clip-studio.com/en-us/detail?id=1835902 ). Then I changed the background to a black-to-blue gradient and added some stars. Since Krampusnacht translates to “Krampus Night” I thought a night sky with stars would fit better with the theme.
You can see my ready-to-animate design below.

Now that we have our GIF elements laid out, we can create a simple animation. To start we need to tell CSP that we want to create animation, so we need a Timeline. Click on Animation - Timeline - New Timeline, as shown below.

The New Timeline options will come up. The most important options for our purposes are the Frame Rate and Playback Time. TV and Movie animations normally have a frame rate of 24 or 30. Since this is a simple animation we’re creating just for social media, we don’t need that high of a frame rate, so I’m going to pick 8. This means that every 8 frames of animation equals one second of time. If we were doing a more complex animation then we’d want to have a higher Frame rate to create smoother motion.
Next we need to set the Playback time. This is how many frames we want to create for the Timeline. I’m going to create a simple back and forth animation that will repeat every 8 frames (or every second), so I’m going to choose a Playback time that is evenly divisible by 8. In this case, I chose 32, so my GIF will be 4 seconds long. (8 frames for each second, 32 total frames. 32/8=4)

Click on OK to create the Timeline. This should open the Timeline window of the interface, which is at the bottom of the screen by default. If you don’t see the Timeline window, click on Window in the top menu bar and then click on Timeline to open it.
Now that we have a Timeline, we need to create an Animation folder to put our animated frames in. Click on Animation - New animation layer - Animation folder.

A new folder will be created in the Layer window for your Animation. This is where you will create your animation frames - or, in the case of this tutorial, where you will put the layers that contain the elements of the design you want to animate.
Because of the way that Clip Studio does animation, I also found at this point (after some trial and error) that it is easier to either have both elements to be animated on the same layer or to create two animation folders. I decided to create two animation folders, one for the left bell and one for the right. Once I had these animation folders created, I then dragged one of the Bell layers into one folder and the other into the second folder.
As you put these layers into the animation folders, they may suddenly vanish from your design. Don’t panic! They’re not gone, we just need to link the layers to frames of the animation to tell CSP when it should display these layers.
To do this, make sure that the red vertical line in the Timeline is on the first frame of your animation, and that you have your layer selected in the Layer palette as well. Then click on the “Specify Cels” icon in the timeline, which is indicated in the screenshot below.

Choose the layer to be displayed in the first frame from the list of layers. This list will only contain layers that are in the current animation folder, which is why we made sure we selected the layer in our Layer window first. This ensured that our list of layers was correct.
Next I’m going to make a copy of my right-hand Bell’s layer and then flip it horizontally so that the reeds are facing to the outside of the GIF instead of toward the inside. If you can’t transform your copied layer, you may need to delete the layer copy, then Rasterize the original layer (right click the layer and select Rasterize from the menu). Then copy the layer again and see if you can complete your transformation. If that doesn’t work, drag the layer out of the Animation folder, complete the transformation, then drop it back into the Animation folder. I had to play around with this a bit to figure out why CSP didn’t want to let me do a transformation, but eventually I got it.
In the screenshot below you can see that I have two layers in the currently selected Animation folder. One contains a Bell that faces toward the right and the other contains a bell that faces to the left. These are my two frames of animation, and I need to have the same two frames for the bell on the other side of the GIF.

Once I get all the layers created, it’s time to tell CSP how to display them in the Timeline. I want the position of the Bells and Reeds to change every second. Remember when we set our frame rate? We set it to 8, so we need to have the change happen after every 8 frames. Move the red vertical line (which shows where in the Timeline playback we currently are) to Frame 9. Make sure your desired Animation folder is selected, then click on the Specify Cels icon again.
Select the second animation frame from the list of layers and click OK, as shown below.

I’m going to continue this process for both animation folders and for the entirety of my timeline. You can see in the screenshot below that I’ve set a layer switch every 8 frames (on frames 9, 17, and 25) for both animation folders.You can see in the screenshot below how my layers are laid out on the Timeline.

You can check your animation at any time by clicking the Play button at the top of the Timeline window. If you have the Loop play icon clicked the playback will loop until you hit stop. This is a great way to check motion and get a preview of your GIF.
My simple GIF is just the way I want it now! You can see it below. In the next section we will export our GIF and then upload it to Giphy so it can be shared.

Putting your Work on Giphy
In order to share our little animation on the internet, we first need to export it to a file format that an internet browser will understand.
Because we’re concentrating on creating a GIF, that’s what we want to export as. To do this, File - Export Animation - Animated GIF, as shown in the image below.

This will bring up the Animated GIF export settings. In this window we can change the width and height of the exported GIF, export all or part of our frames, change the frame rate, and set how many times the GIF will loop.
In the screenshot below I have made my GIF slightly smaller than the original canvas size. I want to export all of my frames, so I’m leaving the Export range at 1-32. I’m keeping the frame rate the same and also keeping the Loop count on Unlimited. This way, the GIF will continue to play on repeat an unlimited number of times instead of stopping after a certain number of plays in a browser or Facebook message.

Click on OK and choose a location and file name for your exported GIF. After completing this step I went to my folder location and opened the file just to make sure the export didn’t have any issues.
Now let’s submit our GIF to Giphy, the library that lots of social media sites pull their GIFs from. This includes Facebook, Facebook Messenger, and Twitter. Putting your image on Giphy and adding tags can help spread it across the internet and promote your work, provided that you’ve made a “shareable” image, of course!
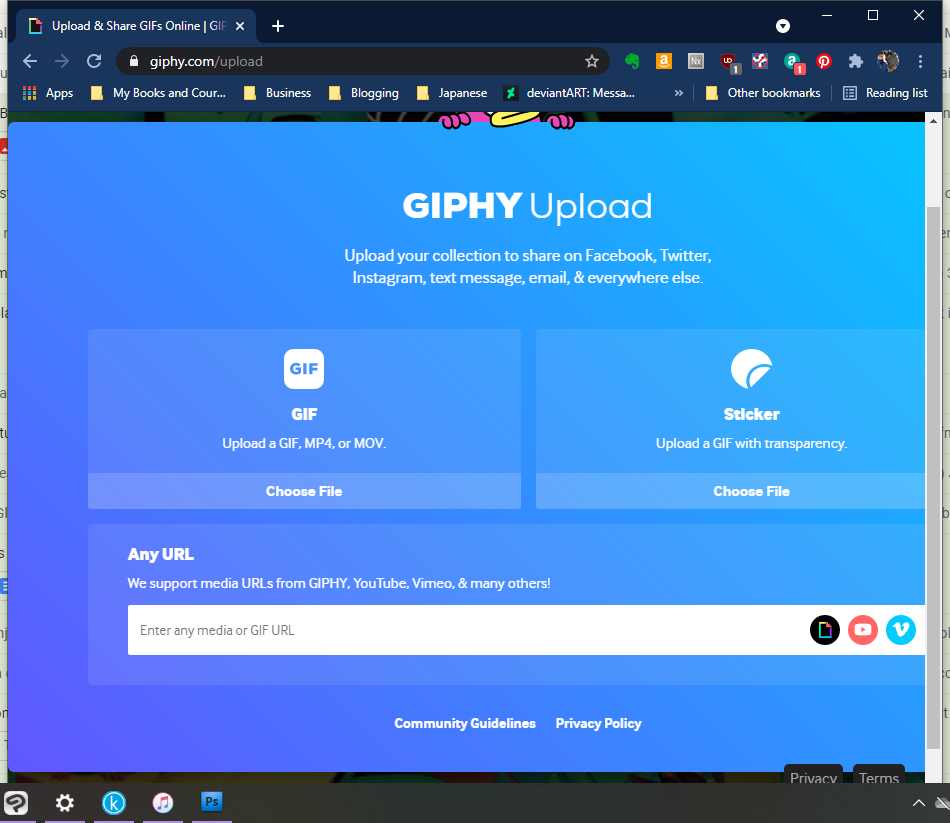
First you’ll need to go to Giphy and sign up for an account. Once you’ve signed up for an account and logged in, you will see the screen in the following image.

As you can see, I haven’t uploaded anything yet. So let’s fix that! Click on Upload either at the top right of the screen or in the middle of the screen under the “You haven’t uploaded anything!” text.
Next we need to pick what we’re uploading. Our options are GIF or Sticker (which is a GIF with transparency). The GIF upload option is also used for MP4 or MOV files. Since we’re uploading an animated GIF without transparency, I’ll click the GIF option.
Choose the file you want to upload.
On the next screen, shown below, we can set the visibility. Making the image Public will allow anyone to see it. Setting it to Private will keep the image so that only you can see it.
Add some tags so that the GIF can be found. I’ve added a bunch of Krampus and Christmas related tags to make my GIF easy to find by someone who might be searching for something like this. Put a comma between each tag when adding multiple tags.
I’m putting my website as the Source URL since the artwork in this image is mine.
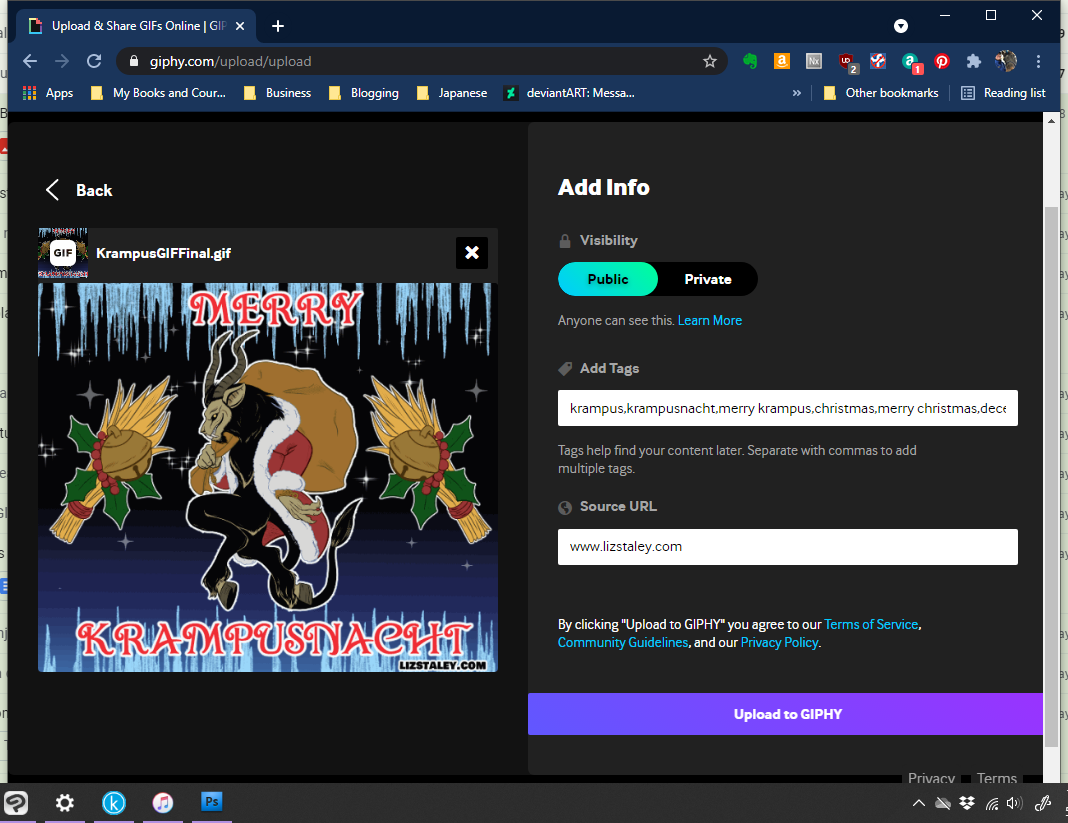
Click on Upload to GIPHY to complete the upload process. Now your GIF will be searchable and has a chance of spreading to a large audience!
Conclusion
GIFs are highly shareable and can really help you promote your art, business, comic, or other project. With a little research and some work, you can potentially make a GIF that spreads to a wide audience and gets your work in front of lots of eyes! By using existing artwork elements and simple transformations, even those who have no animation experience can create a GIF.
For more information on CLIP Studio Paint, please visit https://www.clipstudio.net/en or https://graphixly.com