Creating Colored Line Art
Contact Graphixly @
Hello! My name is Liz Staley and I’m a long-time user of Clip Studio Paint (I started using the program back when it was known as Manga Studio 4!). I was a beta-tester on the Manga Studio 5 program and for Clip Studio Paint, and I have written three books and several video courses about the program. Many of you probably know my name from those books, in fact. I write weekly posts on Graphixly.com and on CSP Tips, so be sure to come back every week to learn more Clip Studio Tips and Tricks from me!
Colored line art is a great way to achieve a softer look than black lines, but how can you go from black lines to colored lines without having to ink an entire drawing again? In this article we’ll look at one way to create colored lines that can be quickly changed and don’t make any changes to the original lines.
In this article we will cover the following topics:
Preparing your Image
Creating the Colored Lines
Let’s get to it!
Preparing Your Image
If you have inked your drawing digitally and your lines are on a layer all by themselves with just transparent space, then you can continue to the next section! However, what if you have scanned in an inked drawing, like I did in the example below? 
If you are working from scanned lines there are a few things we need to do to isolate the lines on to a layer with just them and transparent space. Thankfully this is not a difficult process!
First, adjust the brightness and contrast and Levels of your image to make your lines as dark as possible without making them jagged.
Now time for a bit of magic! Go to Edit - Convert brightness to opacity. This changes the lighter parts of the layer to transparent while keeping the darkest parts opaque. Shades between the brightest and darkest will be made semi-transparent. This is why we darkened up the scan beforehand.

Now we are ready to proceed to the next steps.
Creating the Colored Lines
I decided to add some flat colors to my illustration to act as a guide later on. You don’t have to do this, but if you will be making the lines a darker version of the area’s color, it can be helpful to do the coloring first to act as a guide.
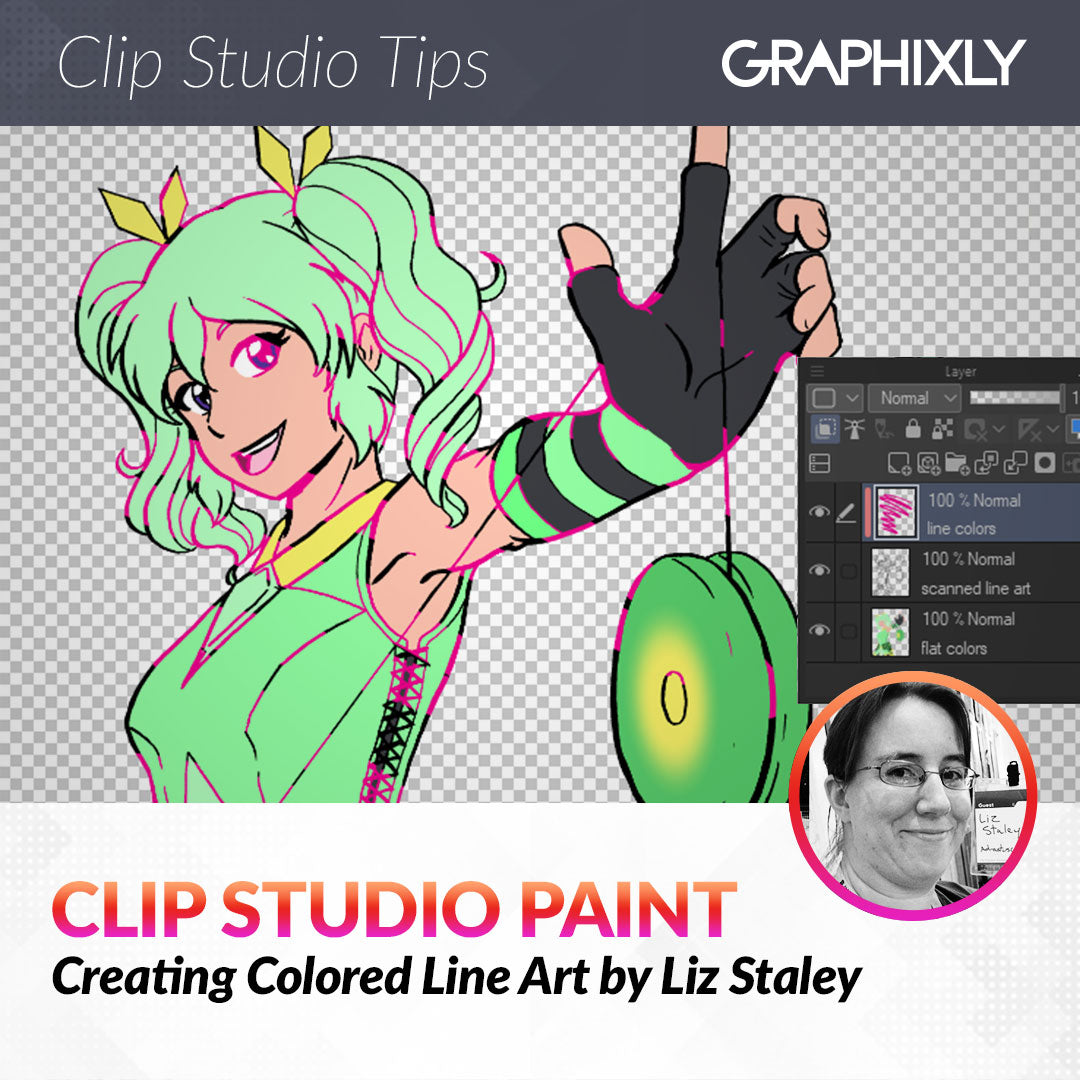
You can see in the layer palette below that my lines are on one layer by themself (that is just the black lines/transparent pixels) and the flat colors are on another layer below the line art. 
To start creating colored line art, make a new raster layer above the line art layer. I’m going to name this layer “line colors”. Then click on the “Clip to Layer Below” icon near the top left of the Layer palette (to the left of the lighthouse icon). The “line colors” layer now has a pink line to the left of the layer icon to show that it is clipping to the layer below.
When a layer is clipped to a layer below, it means that anything done on that layer will only show in areas where it crosses with pixels on the layer below. Let’s see this is practice by putting a rainbow gradient on the entire “line colors” layer and looking at the results in the image below. 
As you can see from the layer thumbnail, the entire layer is filled with a rainbow gradient. But the gradient is only visible where there are filled in pixels on the layer below - in this case, our ink lines.
Let’s go back to a blank layer and then take a large brush tool and bright pink and make a random scribble across our image. Again, the new color will only show over the lines in our line art layer. 
This is how we can color our lines without having to change them in a permanent way. Simply take a brush or pen tool, select the color you want to make your line, and then draw over that line on the clipped layer. You can also erase on this layer to change the lines back to black, or paint over them again with a different color if you don’t like the one you chose.
I chose a darker, less saturated version of each area’s colors and went over the lines with a large pen tool. The only lines I left black were around the character’s eyes so that the viewer will be drawn toward them since they are the darkest area on the character. 
What I really love about this method is that if you don’t like the results you can just delete the “line colors” layer, or select the entire layer and delete the contents to start over, without having done anything to your line art layer.
It is also easy to add special effects to your lines. For instance, I thought it might look nice if some of the yellow areas of my character were a shiny gold color. So I took orange and the soft airbrush tool and added a bit of a gradient to the lines of some of these areas. You could also just fill your lines with gradients on a solid black background to make something unique!
Once your line colors are done you can add any finishing touches you want. I decided to just put a gradient background on this example image to show how the colored lines look against a lighter and a darker background.

Conclusion
There are so many ways to create colored line art, but this is one of the best methods I’ve found so far since it’s so quick to make changes if you don’t like the results or want to try something different. I hope you give it a try!
For more information on CLIP Studio Paint, please visit https://www.clipstudio.net/en or https://graphixly.com
1 comments
Hello Liz! Great tip! Please let us know when you upload new videos and tutos. Tks!