Creating a Rain Effect
Contact Graphixly @
Hello! My name is Liz Staley and I’m a long-time user of Clip Studio Paint (I started using the program back when it was known as Manga Studio 4!). I was a beta-tester on the Manga Studio 5 program and for Clip Studio Paint, and I have written three books and several video courses about the program. Many of you probably know my name from those books, in fact. I write weekly posts on Graphixly.com and on CSP Tips, so be sure to come back every week to learn more Clip Studio Tips and Tricks from me!
It can’t be sunny all the time! In this article we’ll learn how to create a raindrop brush and use it on an image to create a stylized rainy day effect. This is by no means the only way to do this, but it’s the way I would do it. Feel free to take this information and add your own spin to it!
In this article we will cover the following topics:
Creating a Rain Brush
Let’s dive right in!
Creating a Rain Brush
If you don’t want to create your own brush, there are some great free or low-cost options for user created brushes on the Clip Studio Assets section. If you want ultimate control over how your brush looks, creating your own is pretty easy!
First we’ll need to create an empty file to make our brush tip shape in. I made a 300dpi square file for this. I decided on 300dpi so that if I decide later to print an image where this brush is used, the lines will look nice. The screenshot below has my canvas dimensions at 1000pixels square, but next time I would make it much smaller, like 500 or 300 pixels. (I also have the paper color set for a dark gray because initially I made my brush with a white color, but this didn’t work so next time I would just use black on a white paper color anyway!)

Now that we have a canvas, we need to create the image that we want to use for our brush tip. I want to create a single vertical line with a taper on both ends, so I’m going to use the Straight Line tool. Select the Straight Line, then click on the small wrench icon in the bottom right of the Tool Property window to open the Sub Tool Detail window.
In the Sub Tool Detail window, click on the Starting and Ending option in the left-hand menu. For the Starting and Ending drop down, I checked both the Brush Size and Brush Density options. This means that the size of the line will taper and the line will also go a little transparent at either end as well, making the effect a little more realistic. Because my canvas size was so large, I used a value of 200 for the Starting taper and a value of 100 for the ending taper. With a smaller canvas I wouldn’t use such a large value with these.

Once we have our line tool set up, we need to make sure we are on a completely empty layer in our canvas. We want to have nothing but our brush tip art on this layer, because whatever is on the layer will be used to make our brush (and we don’t want a big white square around each of our raindrops!)
On a completely empty raster layer, I made a straight line with the line tool by clicking and holding down the SHIFT key. Note how my lines taper off and also get a little more transparent on each end.

We’ll be able to adjust the angle of our rain in the brush settings, which is why we’re making our brush tip art straight up and down instead of at an angle. This way we can change the angle on the brush if we want to create rain that is more or less angled, instead of having to make a brand new brush each time.
With the layer our brush tip art active, click on Edit - Register Material - Image.

This will open the Material Property window, shown below. This window allows us to register our art into the Material Library and also set it as a file we can use as a brush tip.
Enter a name for your image in the Material Name box. For this I’ve chose “Rain Brush” so that later on I’ll know what this is supposed to be. The Material image box shows a preview of our material. Beneath the Material image, check the box that says “Use for brush tip shape”. For the Choose save location option, I’ve selected the Image Material > Brush folder. I like to enter tags in the Search tag box as well, so that I can find my items easily later. To add tags, click on the + in the lower right corner, type in the tag, and press ENTER.
You can see my Material property settings below. Click on OK to finish saving your brush shape.

Now that we have our brush tip shape registered to our Materials library, we can start making our brush.
I find the easiest way to do this is to find a brush that acts similar to the one I want to create and use that brush as a base. The final effect I want this brush to have is scattering the brush tip shape in a random pattern. So I’ve chosen the “Soft circle” effect brush from the Decoration category and will be making a copy of it by clicking on the Create copy of currently selected sub tool button.

After copying the sub tool, Clip Studio Paint will ask what to name the copy. I’ve chosen “Rain Brush” as an obvious name.
Now we can customize our new subtool. In the tool property window, click on the wrench icon to open the Sub Tool Detail window.

The brush I copied has a brush tip material added to it already that needs to be deleted, so we’ll take care of that first. In the Sub Tool Detail window, click on “Brush Tip” in the left-hand menu.

Click on the current brush tip shape (If a brush tip shape is already in use, it will be shown in the rectangle area under the “Circle” and “Material” buttons) and then click the little trash can icon. Clip Studio will ask if you’re sure you want to delete this brush shape. Note that this will just unlink the brush tip shape from this current subtool and will not delete the brush tip from your Materials Library.
Click on Delete in the dialog window to proceed.

Now we need to load our rain shape, so click in the rectangular area where the previous brush shape was showing before. This will bring up the Brush Tip category of our Materials library. You can see in the screenshot below that my tags came in handy! I had trouble finding my new material for whatever reason and had to do a search for “rain” to locate it.
Click on the brush tip shape you want to use to select it, then click OK.

We need to make a few more adjustments before our brush is complete. You will see a preview of your current brush at the top of the Sub Tool Detail window, but if you need a better look at your brush you can also check it on an open canvas as well! Just move the Sub Tool Detail window to the side and use your brush on an open canvas to check the look. I like to have a blank file open when I’m creating brushes for this purpose.
The rain lines in my preview were too thin, so I changed the Thickness in the Brush Tip settings to a much larger number. I also had to adjust the Brush Density because the brush we copied to make this brush was slightly transparent, and I don’t want that for this brush.

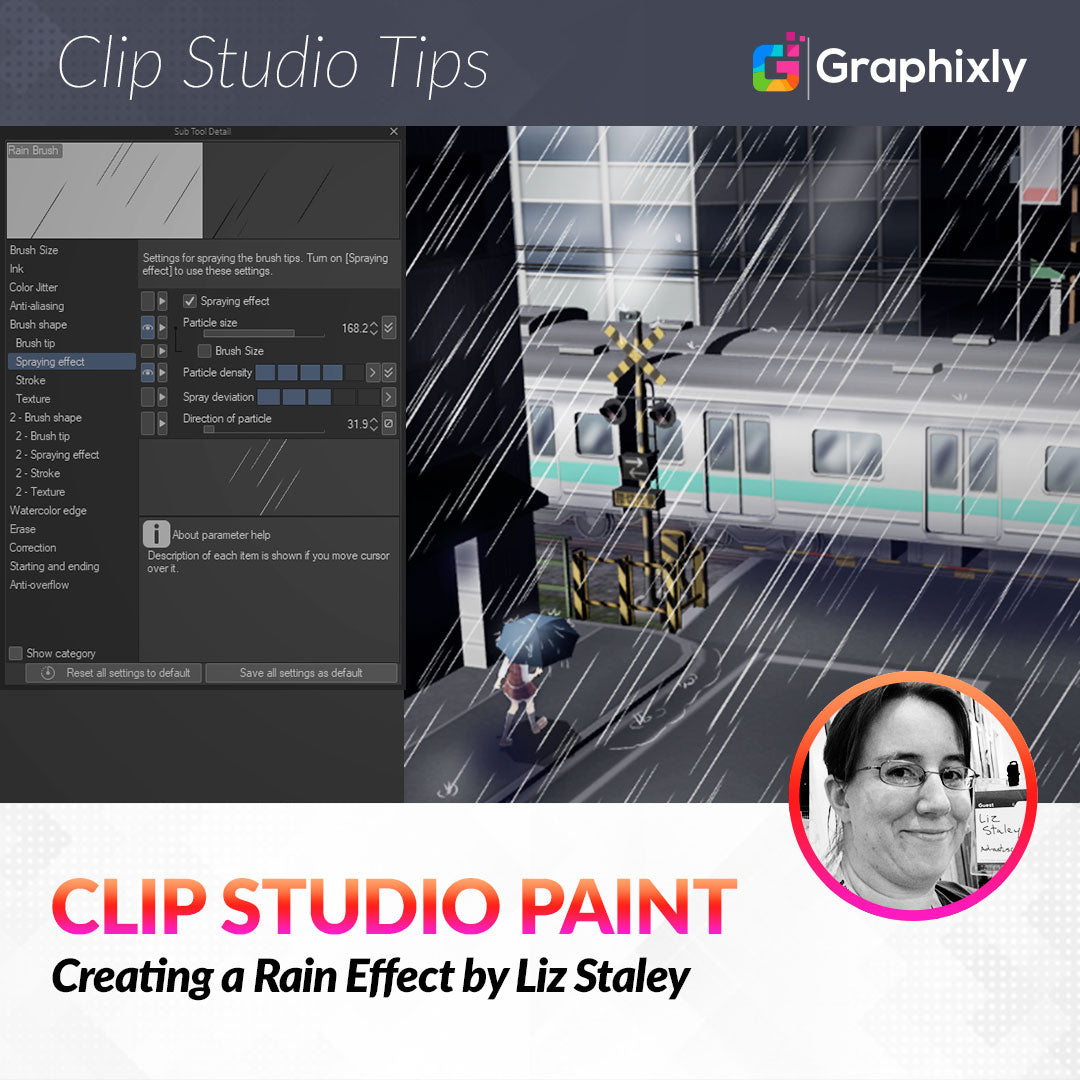
The final few changes we need to make are in the Spraying Effect category, which is shown below.

Changing the particle size will change the size of the individual rain lines. You can add some randomness by clicking on the small button to the right of the Particle Size slider and checking to make sure the “Random” checkbox is checked. This will make the size of the rain lines random as we use the brush.
Changing the Direction of Particle option now makes our rain line angled instead of straight up and down. This is how we can change the look of our rain, from a gentle shower to a terrible storm that’s blowing sideways! In this case I just want a slight angle, so a value of about 30 is perfect for me.
Below shows a preview of how the rain brush looks now! Not too bad at all!

To use the brush, I made a new layer over my image and then used the brush over it to make a random scattering of rain lines. Because the lines show up as black, I then used the Lock Transparent Pixels setting on the rain layer and filled the layer with white so the lines would be changed. I did the same thing with a second layer of rain that I used a slightly thinner rain brush setting on to add some depth.
With the falling rain brushed in, I then took a small brush and white and added some little details to my image below.

The added details are little spatters of rain along the sides of the street, on the character’s umbrella, and a few other places. I also added some lines to look like rain dripping down the umbrella. Remember that rainy days are usually gray and desaturated, so color your scene accordingly!
Conclusion
Creating brushes is really fun, once you get the hang of it. Using these same techniques, you can create all sorts of effects, including snow, falling leaves, flower petals, and more!
For more information on CLIP Studio Paint, please visit https://www.clipstudio.net/en or https://graphixly.com