Aligning Elements with Snapping
Contact Graphixly @
Hello! My name is Liz Staley and I’m a long-time user of Clip Studio Paint (I started using the program back when it was known as Manga Studio 4!). I was a beta-tester on the Manga Studio 5 program and for Clip Studio Paint, and I have written three books and several video courses about the program. Many of you probably know my name from those books, in fact. I write weekly posts on Graphixly.com and on CSP Tips, so be sure to come back every week to learn more Clip Studio Tips and Tricks from me!
Making sure that elements of a design are lined up and evenly spaced can be done in Clip Studio Paint using the grid, but it’s still a tedious process at times! Clip Studio Paint 4.0 has introduced a new snapping option though to make it a much faster and more intuitive process!
In this article we will cover the following topics:
Using the Snapping Option
Let’s make some layouts!
Using the Snapping Option
The snapping options can be found under the View menu at the bottom. In this article we’re going to look at snapping objects to one another, but objects can also be snapped to rulers, objects, and control points. If it is not already, click on the “Snap to Objects” option to enable snapping elements to one another.

Now I’m going to choose two illustration elements from the Materials Library and add them to my canvas. When moving one of the frame elements around, the object will snap to the position of the other object depending on where you are moving it to. For instance, below the center of the right frame has snapped and is now in line with the bottom of the left one.

Or we can center them as well. It is important to look for the red line to show that the objects have snapped to the alignment you want.

We can also snap other items, such as images that have been imported into your working canvas. Before they will snap like other elements, however, we need to convert that layer into a special type of layer. To do this, right-click on the layer in the Layer palette to open the menu. Then click on Convert Layer.

From the Type drop down menu, click on “Image material layer”, then click OK.

Now my imported image will snap just the same as the other elements in this image! While trying out this feature I found that if something didn’t snap, usually the answer was to convert the layer to an Image Material layer, so give that a try if you’ve already confirmed that Snap to Objects is checked and snapping still isn't working!

For another example of what can be done with this new snapping feature, let’s align an image and some text!

First I converted the layer with my drawing on it to an Image Material Layer using the instructions above.

Now we can drag either the image or the text to snap them to perfectly centered with one another.

Text can also be perfectly aligned with the edges of an image if you want the text larger.

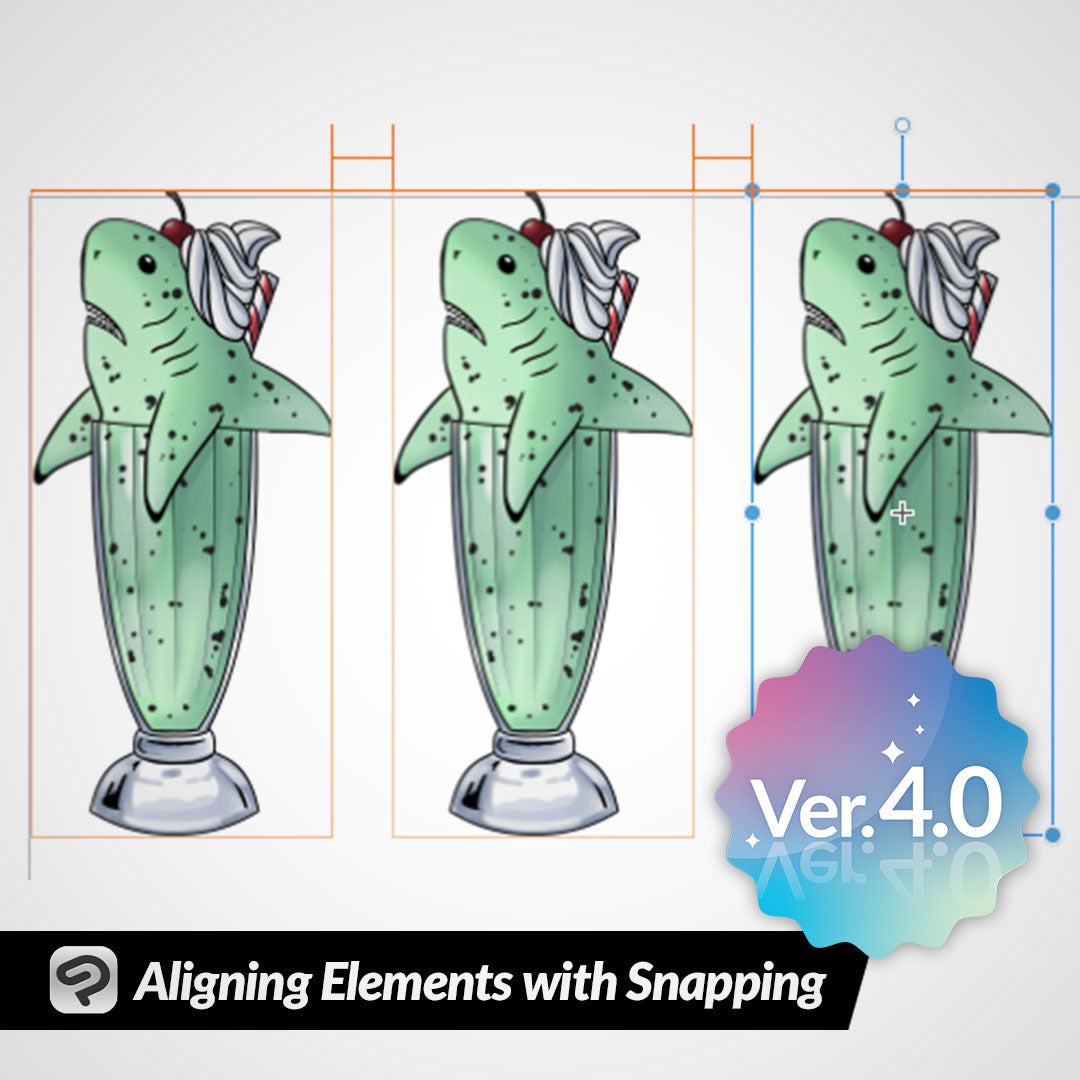
When creating layouts with more than two items, you can also be sure that they are evenly spaced from one another by looking for the “H” shaped lines between each of them, as shown below. This indicates that the objects are all the same distance from one another.
Conclusion
If you’re someone who designs comic covers or creates layouts that need precision, the snapping feature is invaluable to you! Next time we will look at some of the other snapping options!
For more information on CLIP Studio Paint, please visit https://www.clipstudio.net/en or https://graphixly.com