A Guide to Blending Modes Part Two
Contact Graphixly @
Hello! My name is Liz Staley and I’m a long-time user of Clip Studio Paint (I started using the program back when it was known as Manga Studio 4!). I was a beta-tester on the Manga Studio 5 program and for Clip Studio Paint, and I have written three books and several video courses about the program. Many of you probably know my name from those books, in fact. I write weekly posts on Graphixly.com and on CSP Tips, so be sure to come back every week to learn more Clip Studio Tips and Tricks from me!
When you’re first getting into digital art there are a lot of things you need to learn. Some of these things, like Blending Modes, are not intuitive and can be overwhelming for some digital artists. So in this two-part series, let’s take a look at each of the Layer blending modes in Clip Studio Paint and what they do so that you can incorporate them into your art!
This is Part Two of this guide. Last week we covered blending modes used for highlighting and shadowing, so be sure to go check that out if you missed it.
In this article we will cover the following topics:
Contrast Modes
Color Adjustment Modes
Other Effects
Example of How to Use Blending Modes
Let’s finish exploring blending modes!
Contrast Modes
These modes will change the contrast of the colors in some way. Let’s take a look at each one!
First we have the Overlay blending mode.

The Overlay mode behaves like the Multiply mode in dark areas and the Screen mode in bright areas. Bright areas look brighter and darker areas will look darker and be mixed with the blend color.
Now let’s move on to Soft Light.

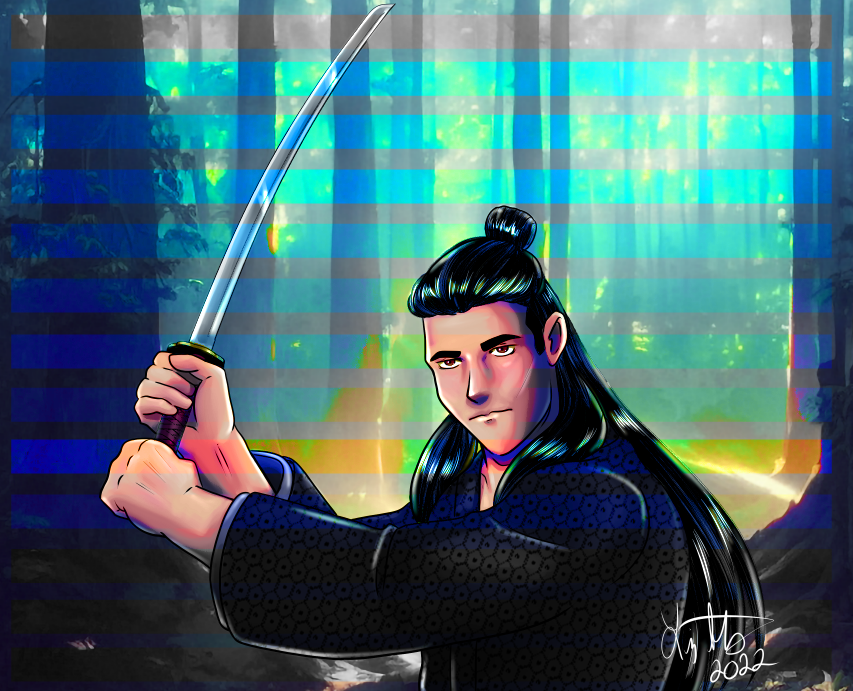
The results produced by Soft Light mode will depend on the blended color. If a bright color is used on the blending layer then a bright effect will be create (like the Dodge modes we discussed in Part One). Dark colors will act like the Burn modes and create darker colors. Color placed over a white area will appear only as white (as seen in the edge of the sword in the example above).
Now let’s move on to Hard Light.

Hard Light’s effect will depend on the density of the blending color. Bright colors will produce an effect like the Screen mode, but dark colors act like the Multiply mode.
Next up is the Vivid Light blending mode!

In the Vivid Light blending mode, contrast is enhanced for blending. Highlights are made brighter and shadows are darkened. Note that in the example above, dark blending colors are “broken” when they cross the lighter parts of the base image.
Now we can look at the Linear Light mode.

In this blending mode, the highlights of the base layer are adjusted according to the grayscale of the blending layer. Colors are less likely to mix, instead the hue is changed for the base layer according to the blending layer.
Pin Light is next on our list!

In the Pin Light mode, the grayscale of the overlapping color is used to replace the underlying layer. For example, if the blending layer’s color is brighter than 50% gray, the base layer’s color is only replaced in the areas where the color of that layer is darker. If the blending layer is darker than 50% gray, then the color of the base layer is replaced where it is brighter.
Now let’s look at an example of the Hard mix blending mode.

In Hard Mix there is a lot of math going on in Clip Studio Paint’s programming. The RGB values of the base layer and the blending layer are being added together and then displayed, making all colors more “extreme”. If the value is greater than 255, then a value of 255 (pure white) is displayed. If the total value is lower than 255, it is changed to 0.
Color Adjustment Modes
The blending modes in this category can be used to adjust the coloring of the entire image or just part of the image.
First let’s look at the Hue mode.

This mode applies the hue (color) of the blending mode while maintaining the brightness and saturation of the layer below. This mode is very useful for changing the overall color of the image (from daytime lighting to nighttime lighting, for example) or for changing the color of just one part of the image (a character’s hair) without changing the shadows and highlights.
Next we have the Saturation mode.

In this blending mode the saturation of the layer is applied while the brightness and hue of the layer below is maintained. In the example above most of the colors on the blending layer are very saturated, so the colors of the base layer are increasing in saturation, but they are still the same hue and brightness.
Color is the next blending mode we’ll look at.

For this blending mode, the hue and saturation of the blending layer are applied, and the brightness of the base layer is maintained.
Our final blending mode for this category is the Brightness mode.

In the Brightness blending mode, the hue and saturation of the base layer are maintained and the brightness of the blending layer is applied.
Other Blending Modes
These are the blending modes that I didn’t feel quite fit into the other categories.
First, let’s look at the Difference blending mode.

This mode subtracts the color of the blending layer from the color below, then blends the pure value of the difference with the blending color. Using this blending mode with black has no effect (as seen in the top of the example above, where the black bar has disappeared).
The example below is of the Exclusion mode.

Exclusion produces similar effects to Difference, but with less contrast. The closer the blending layer is to white, the more obvious the difference between the base color and the blended color will be. Black on the blending layer also produces no change in this mode.
And finally we have the Divide mode.

There is even more math going on behind the scenes in this mode. The RGB values of the base layer are multiplied by 255 and then divided by the RGB values of the blending layer. This math then determines what values will be shown.
Example of How to Use Blending Modes
Now that we know about all the blending modes, how can we use them in our art? Let’s look at an example of one way to use blending modes.
The image below is of the “Hallway 01 Morning” material from the Clip Studio Material Library.

What if we like this image but we want our scene to be set at night?
Let’s create a new layer above the background material and then use the “Night Sky” default gradient to create a black-to-blue gradient across the canvas. With the layer set to “Normal”, we only see the gradient.

Now let’s change the Blending Mode to Hard Light instead!

The “Multiply” mode also would work for this as well, but I liked the results of the Hard Light mode a little better. Now our hallway is appropriately colored for a nighttime scene!
Conclusion
Blending modes are a time-saving and useful part of Clip Studio Paint, but using them can be intimidating at first because there are so many. Hopefully this series has helped you understand the uses of these modes and given you an idea of how you can use them in your art.
For more information on CLIP Studio Paint, please visit https://www.clipstudio.net/en or https://graphixly.com