3D Camera Tilt Adjustment and Adding Fog
Contact Graphixly @
Hello! My name is Liz Staley and I’m a long-time user of Clip Studio Paint (I started using the program back when it was known as Manga Studio 4!). I was a beta-tester on the Manga Studio 5 program and for Clip Studio Paint, and I have written three books and several video courses about the program. Many of you probably know my name from those books, in fact. I write weekly posts on Graphixly.com and on CSP Tips, so be sure to come back every week to learn more Clip Studio Tips and Tricks from me!
In Clip Studio Paint 2.0, two features for working with 3D backgrounds have been added. These are a camera tilt adjustment, as well as being able to add fog to simulate depth. We’re going to look at both of these features today and how to use them.
In this article we will cover the following topics:
3D Camera Tilt Adjustment
Enabling Fog
Let’s get started!
3D Camera Tilt Adjustment
The camera tilt adjustment will straighten a 3D background in a way that turns it from 3-point to 2-point perspective. This will make the background easier to draw from.
Let’s start with one of the 3D backgrounds provided in Clip Studio Paint’s Material Library. I chose the “Clubroom (liberal arts) ver 2” background for this example. Then I rotated around to a slightly high angle. If we were to draw from this angle as a reference image we would need to use a 3-point perspective ruler because of the camera position.

While on the layer of your 3D background, click on the small wrench icon in the lower right corner of the Tool Property window to open the Sub Tool Detail window. Then click on the Lens category on the left side of the Sub Tool Detail window.

Click on the Straighten button under “Vertical Perspective”.

It’s probably a bit difficult to tell in the above screenshot, but CSP has taken the view and slightly changed it. This is most obvious, I think, in the legs of the table. Instead of them converging to a 3rd perspective point that would be at the bottom of the image, now the table legs are parallel. We’d be able to draw this scene using two perspective points now.

Let’s see how this looks with a low angle now. I changed the camera in the same scene so that we’re now looking up at the tables. In this case if we were to draw this scene in 3-point perspective the third point would be above the top of the image.
Let’s press the Straighten button in the Lens options again and look at the results below.

If you don’t like the results of the Straightening, click on the Reset Adjustment button below the Straighten button to return to the original perspective.
Enabling Fog
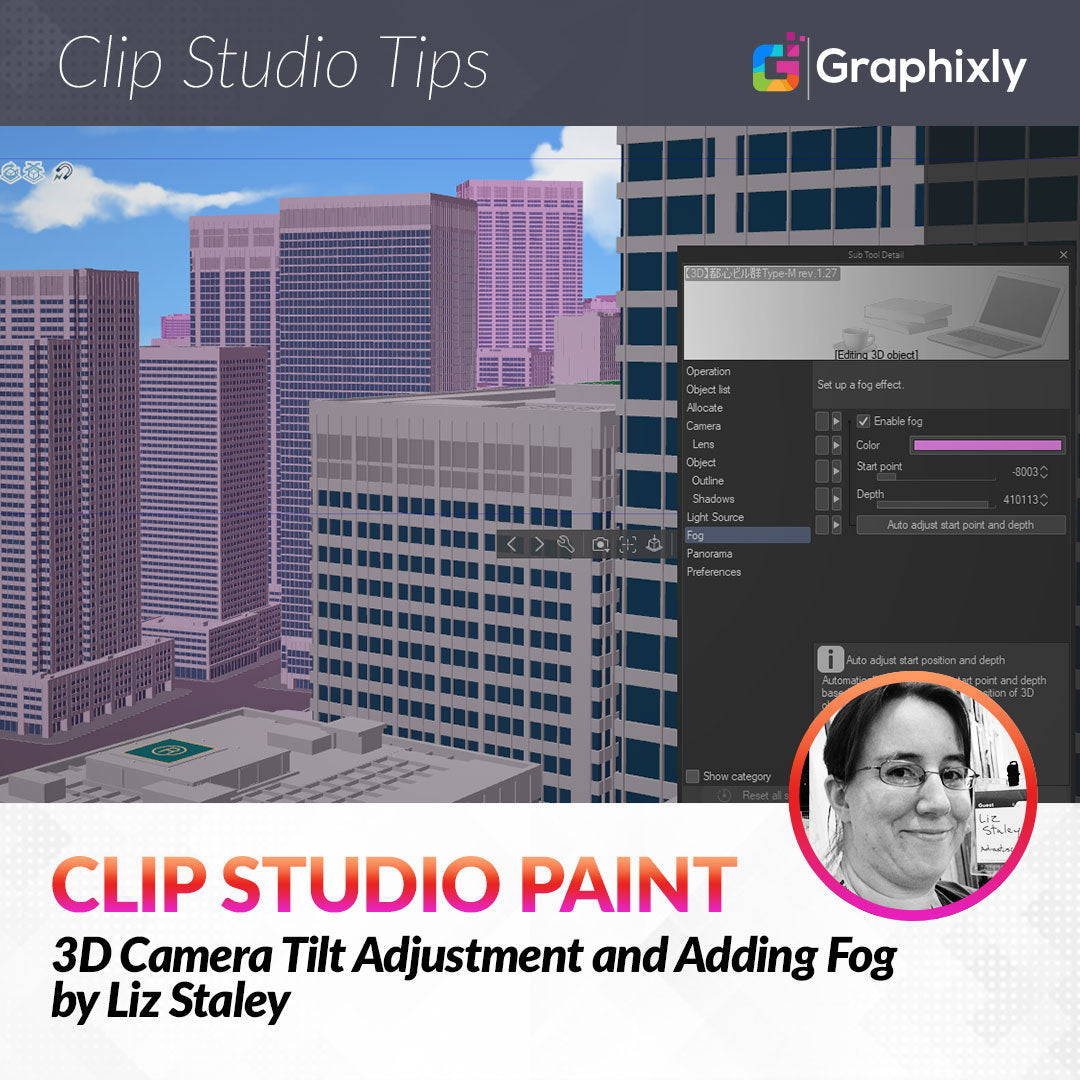
The new fog options help mimic atmospheric perspective, making large 3D backgrounds look more realistic. In the 3D city below, all the buildings are the same color and value, making the scene quite flat.

The city model I am using was made by CSP user crayonzen and available here: https://assets.clip-studio.com/en-us/detail?id=1939929
So let’s add some fog to make the buildings in the background look like there is air between the camera and them. Open the Sub Tool Detail window and click on the “Fog” category on the left side.

Click on the Enable Fog checkbox to turn on fog and access the settings. Depending on the size of your 3D background, you may get results that look like the following screenshot at first.

If you get this kind of result, don’t panic! I found the best thing to do was to click on the “Auto adjust start point and depth” button at the bottom of the fog window to quickly get a more desirable result.

After clicking the Auto adjust, CSP tries to choose the best settings for the scene. Now we can fine-tune the settings to get the desired effect. I moved the Start point to -8003 and the Depth to 410113 (this is a LARGE 3D city model!) to make the further buildings just a bit more washed out.
The Start point is the distance from the camera when the fog starts. Depth is the distance from the camera of the thickest point of the fog effect.

It’s pretty subtle but it does help with the perspective quite a bit.
If you are going for a more ethereal effect or a certain kind of lighting, you can also change the color of the fog. By default the fog is white. However, clicking on the rectangle next to Color in the fog settings brings up the color picker. Choose a new color for the fog and then click OK to complete the change.

Conclusion
These new settings aren’t as impressive as some of the other 2.0 additions, but they can still be very useful for the artist using 3D models for background reference or even just using them as backgrounds as is.
For more information on CLIP Studio Paint, please visit https://www.clipstudio.net/en or https://graphixly.com